

Everything I Do For Shooting Better LUMIX JPEGs
It probably won’t be a surprise to anyone reading this that one of my main passions is playing with settings to get great looking JPEGs straight out of my camera. My handle on YouTube and Instagram after all is @rossandhisjpegs…
If I’m honest it’s less of a passion and more of an obsession and recently the tool I’ve used most to feed this obsession is the LUMIX S9.
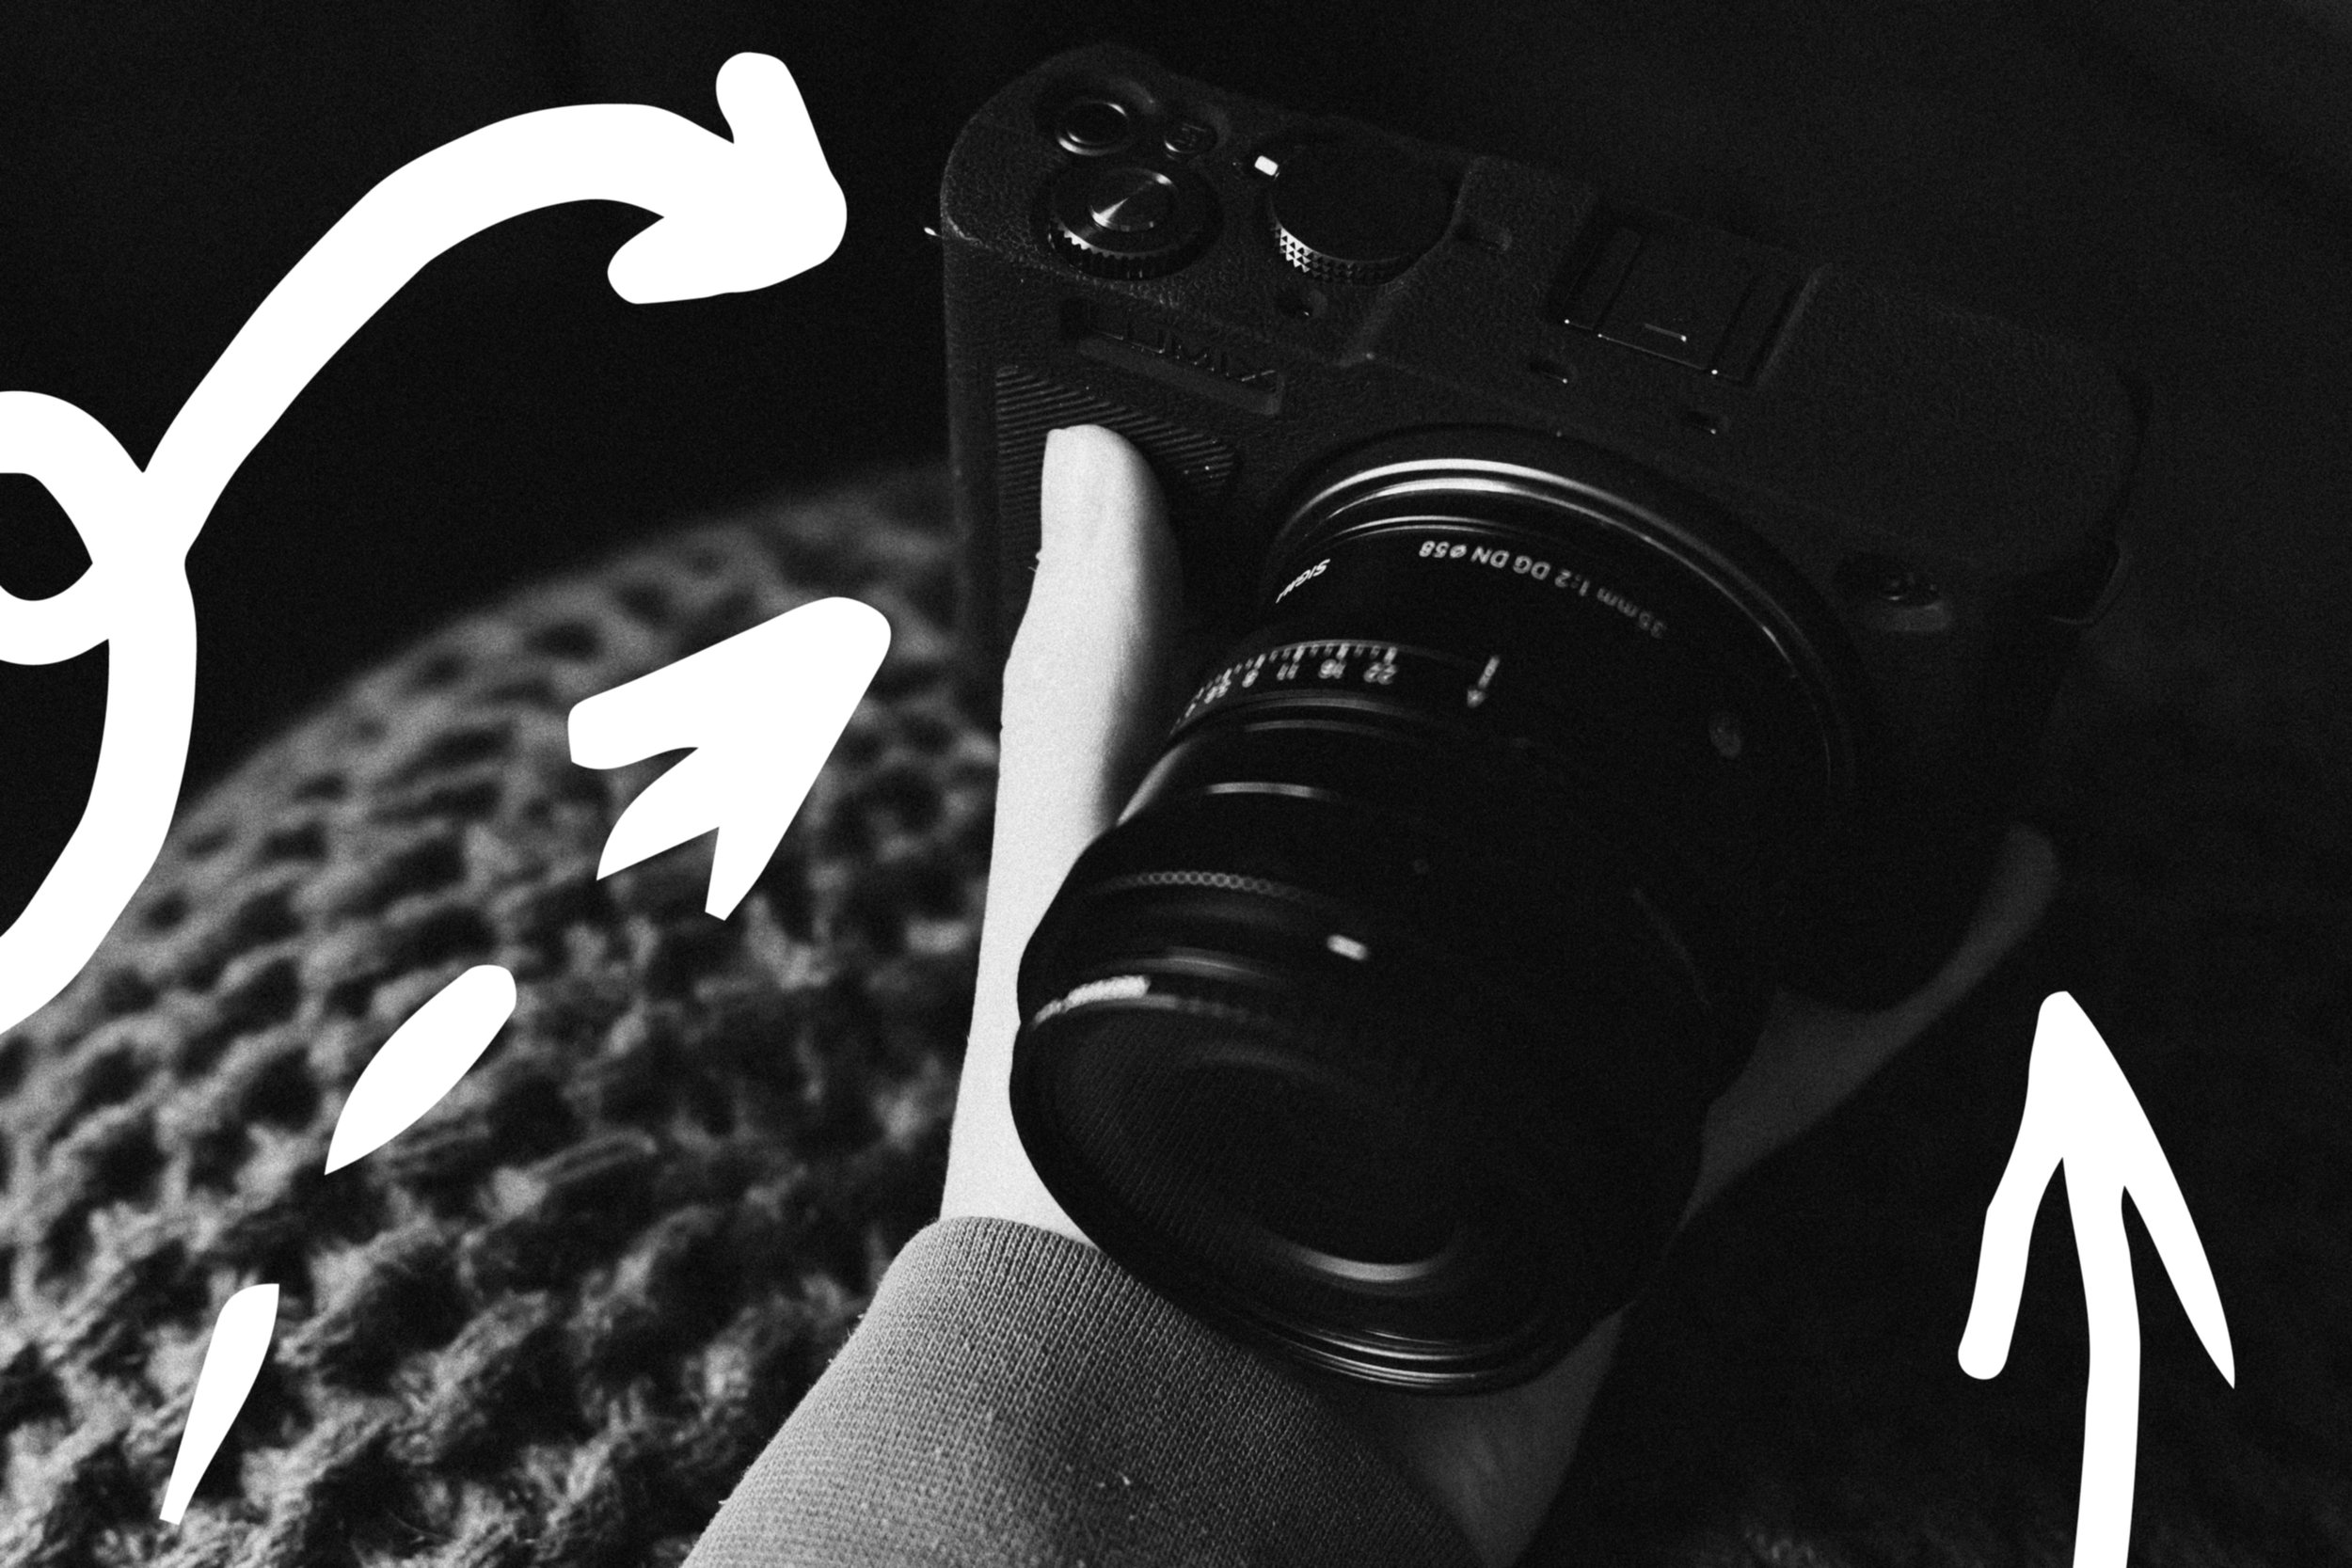
The S9 is 100% my favourite camera I’ve ever owned. I was sceptical at first like some others - but what this camera can do mixed with its small form factor, makes it one of the greats in my opinion!
Recently loads of people have been getting in touch looking for advice, tips and recommendations on how best to set up their LUMIX camera for shooting JPEGs. In this blog post I want to take the time to outline the steps needed to get your LUMIX camera ready for the best JPEG shooting experience.
First we’ll look at customising some settings and buttons, then I’ll cover where to download and how to transfer LUTs, after that I’ll go through the settings that can be changed inside one of the My Photo Style slots, then finally a few tips for combining LUTs, changing in-camera settings and advice for designing your own LUMIX ‘looks’.
So let’s get to it!
Settings & Buttons
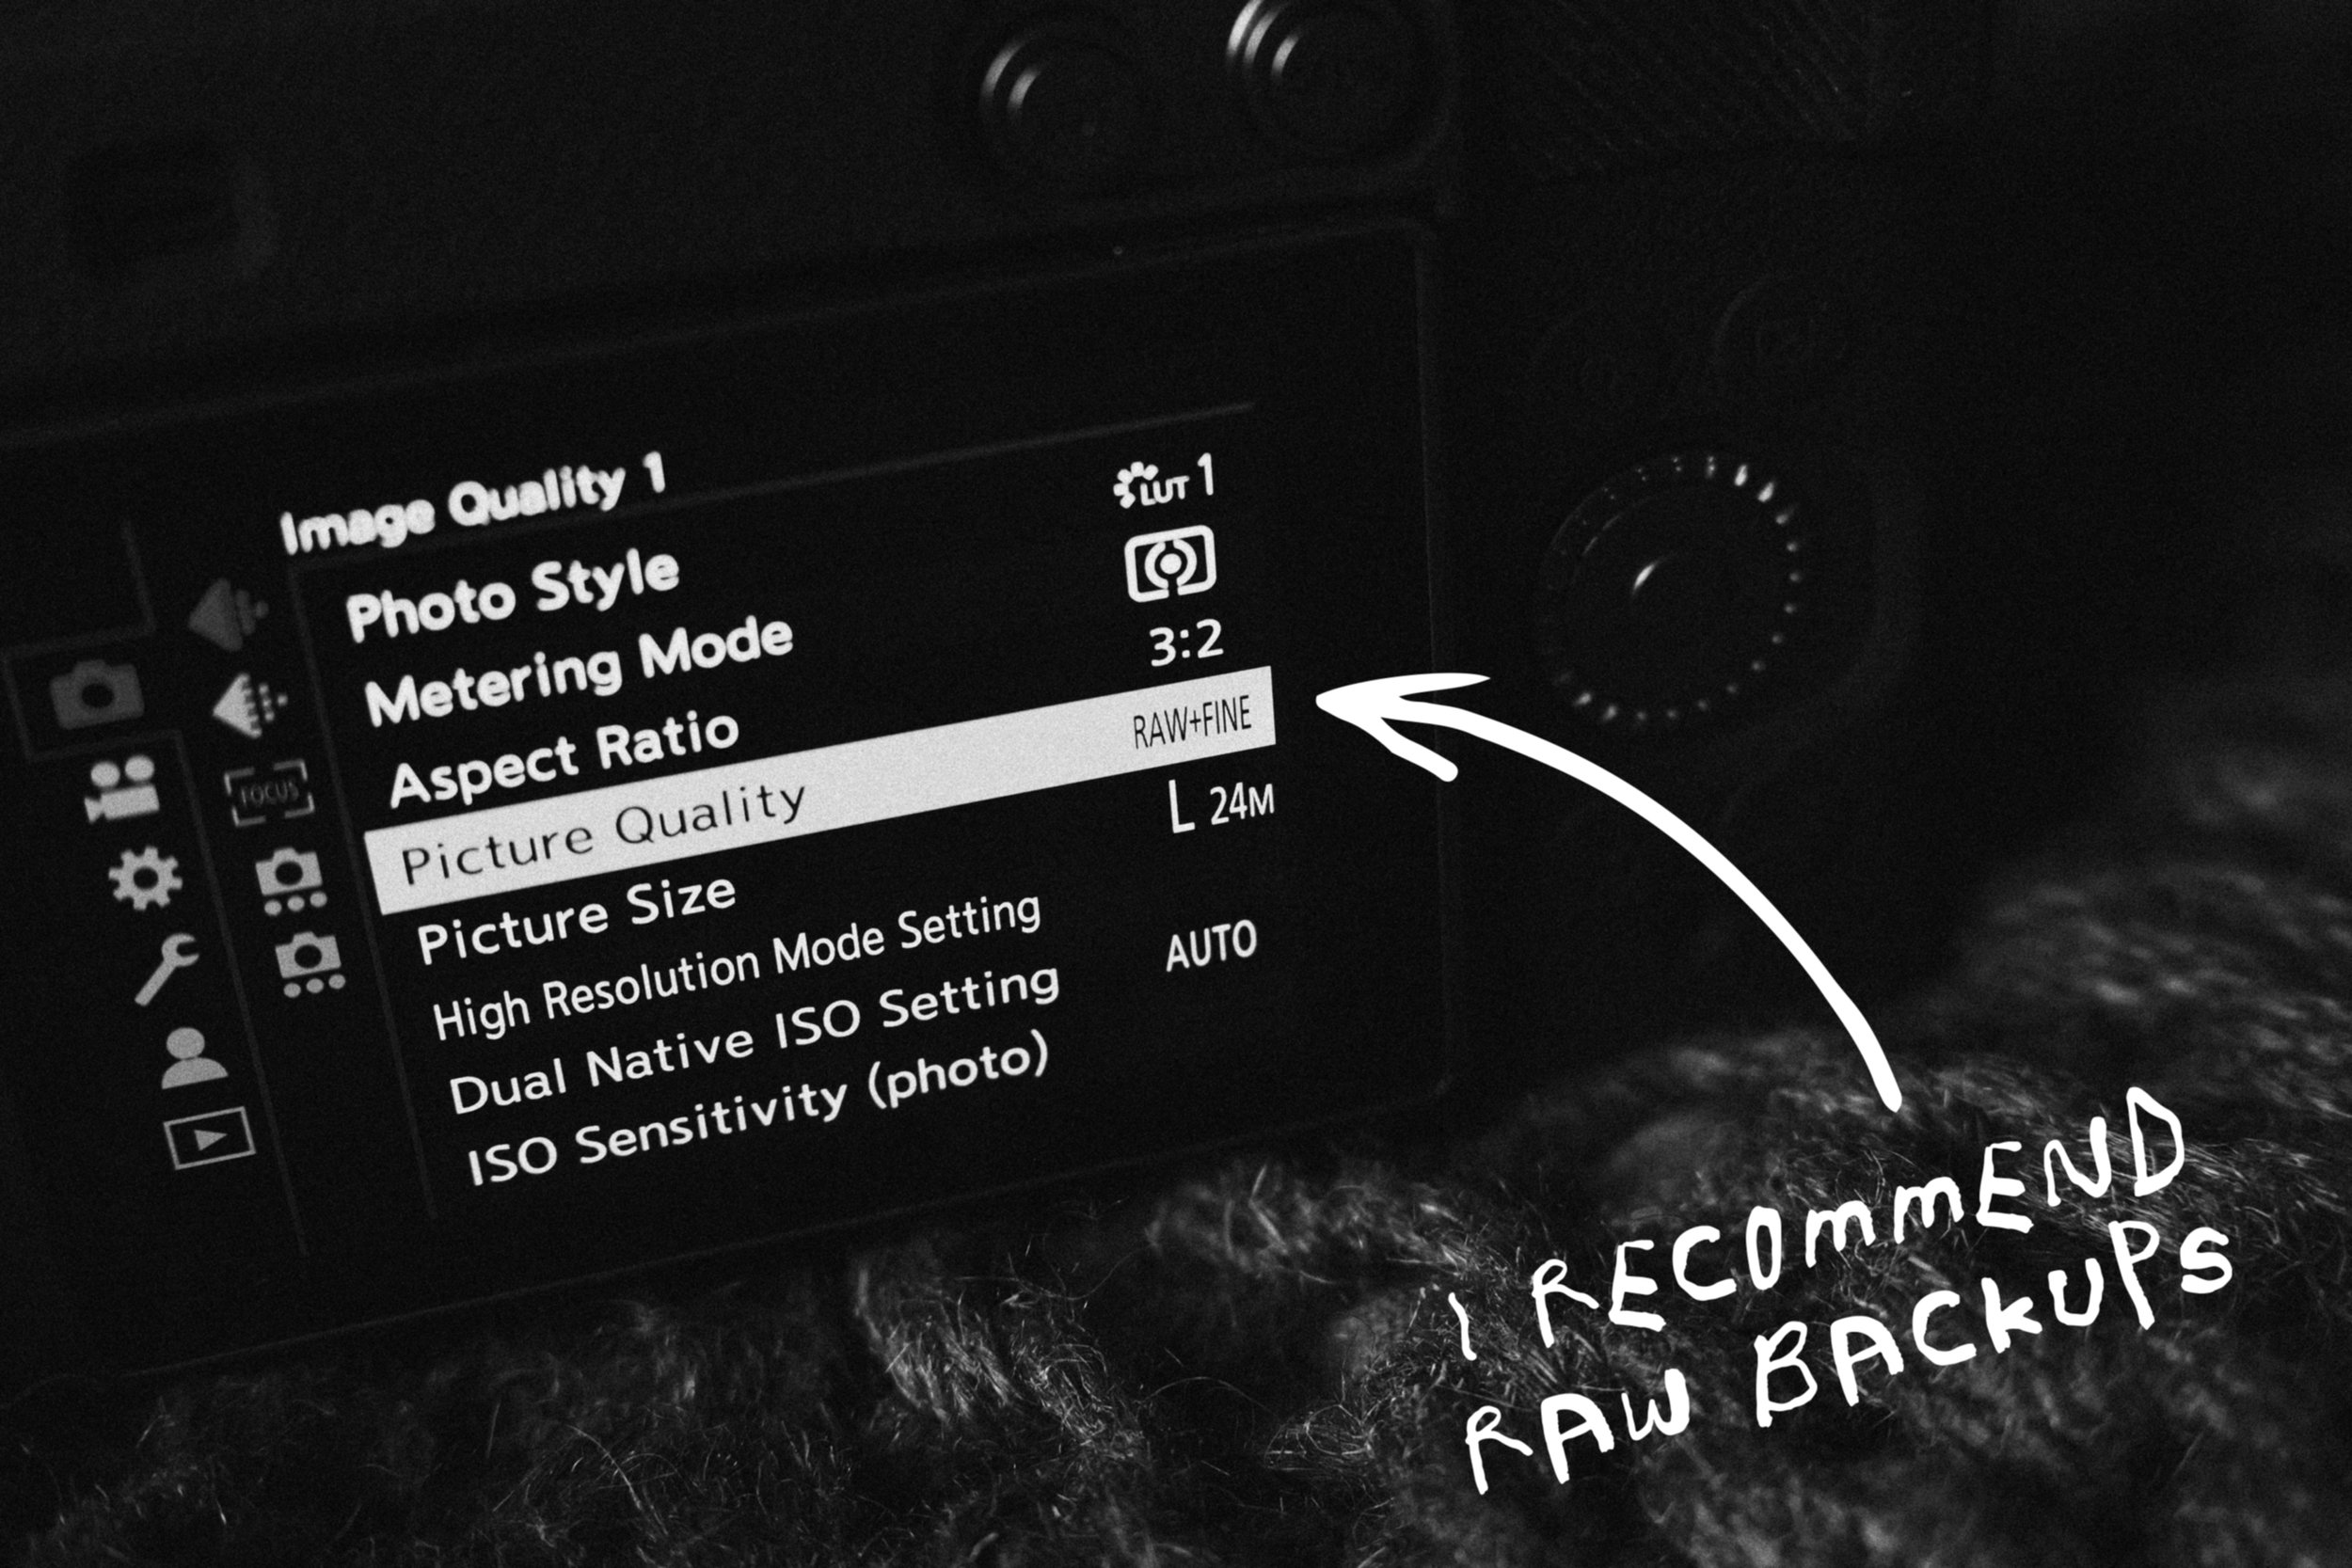
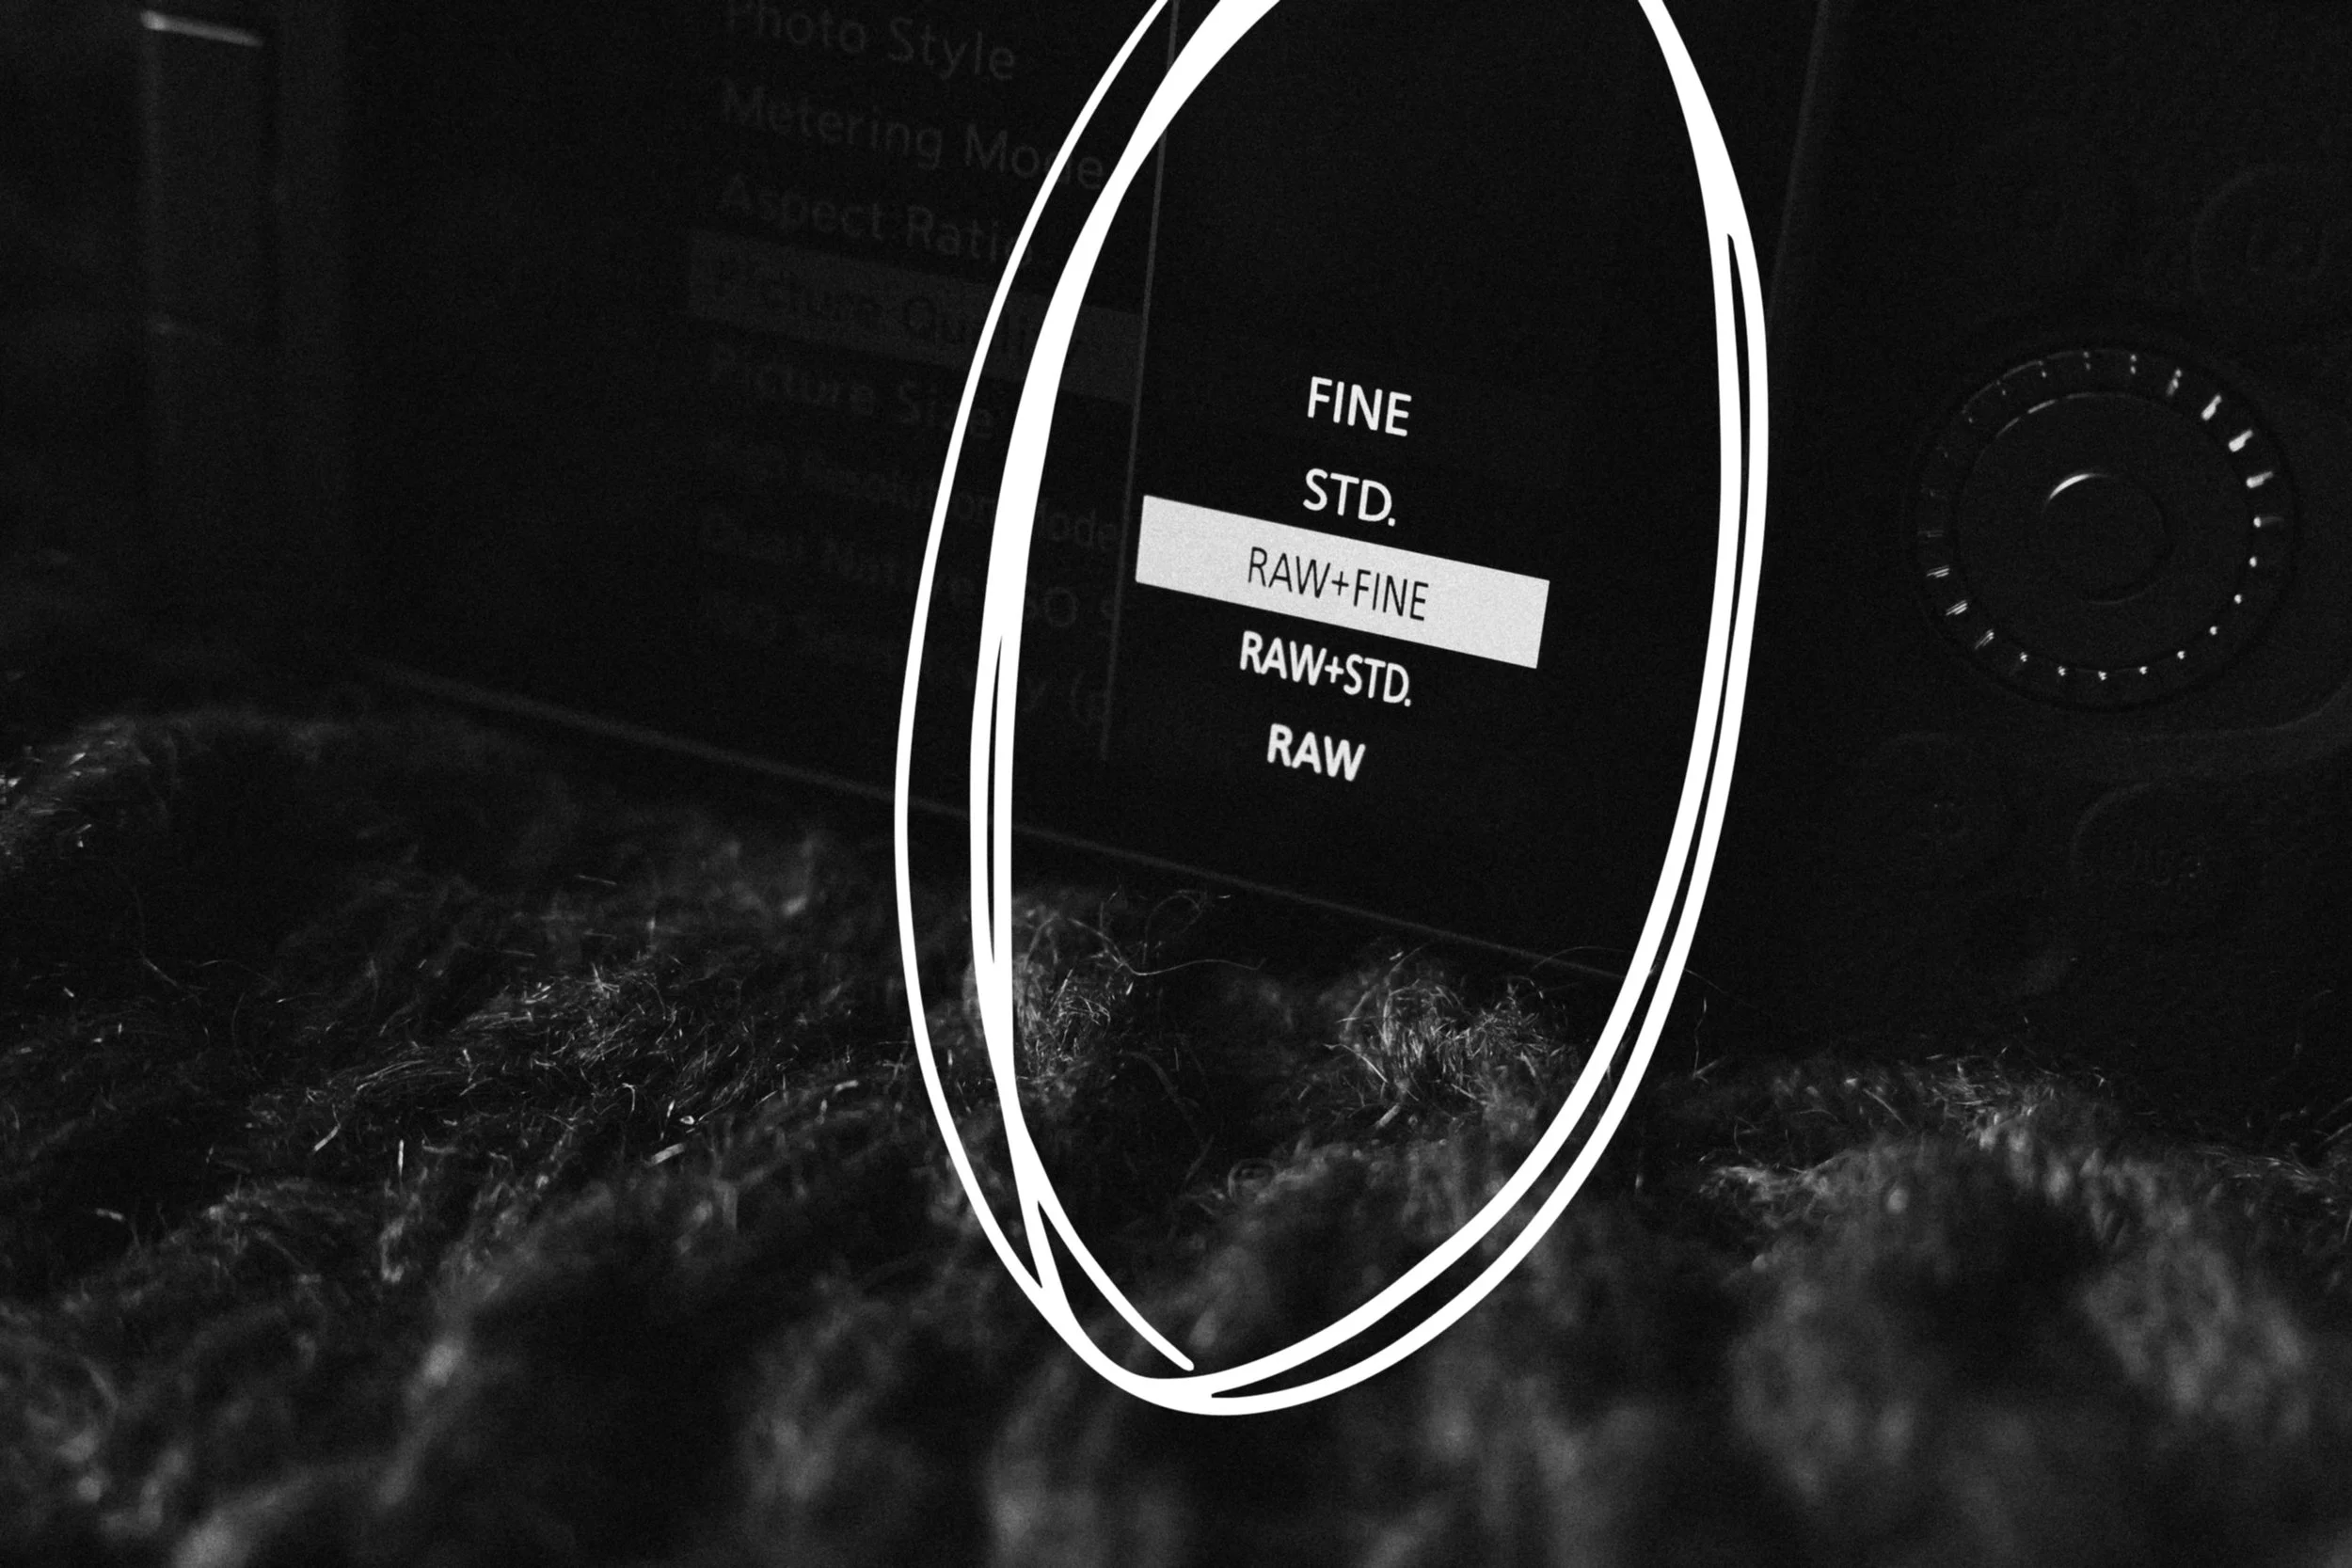
RAW & JPEG
For a guy obsessed with JPEGs I also like to have a RAW backup of everything I shoot, so my first recommendation is to set your LUMIX camera to shoot both RAW & JPEG. How you do that is simple, at the top of your camera’s menu find Picture Quality and select RAW + FINE.
It’s just good practice to keep the RAW files of everything you shoot, even if you don’t end up using them. You never know when you’re going to capture a banger and when you do, you might want the RAW file to process later.
LUMIX has a RAW Processing feature which I will cover a little bit later. It’s a great way to quickly edit or ‘process’ your RAW file in case your not 100% happy with the JPEG after you’ve shot it. This feature only works if you set your camera to shoot RAW as well as JPEG, so I massively recommend doing that.
My Photo Style Settings
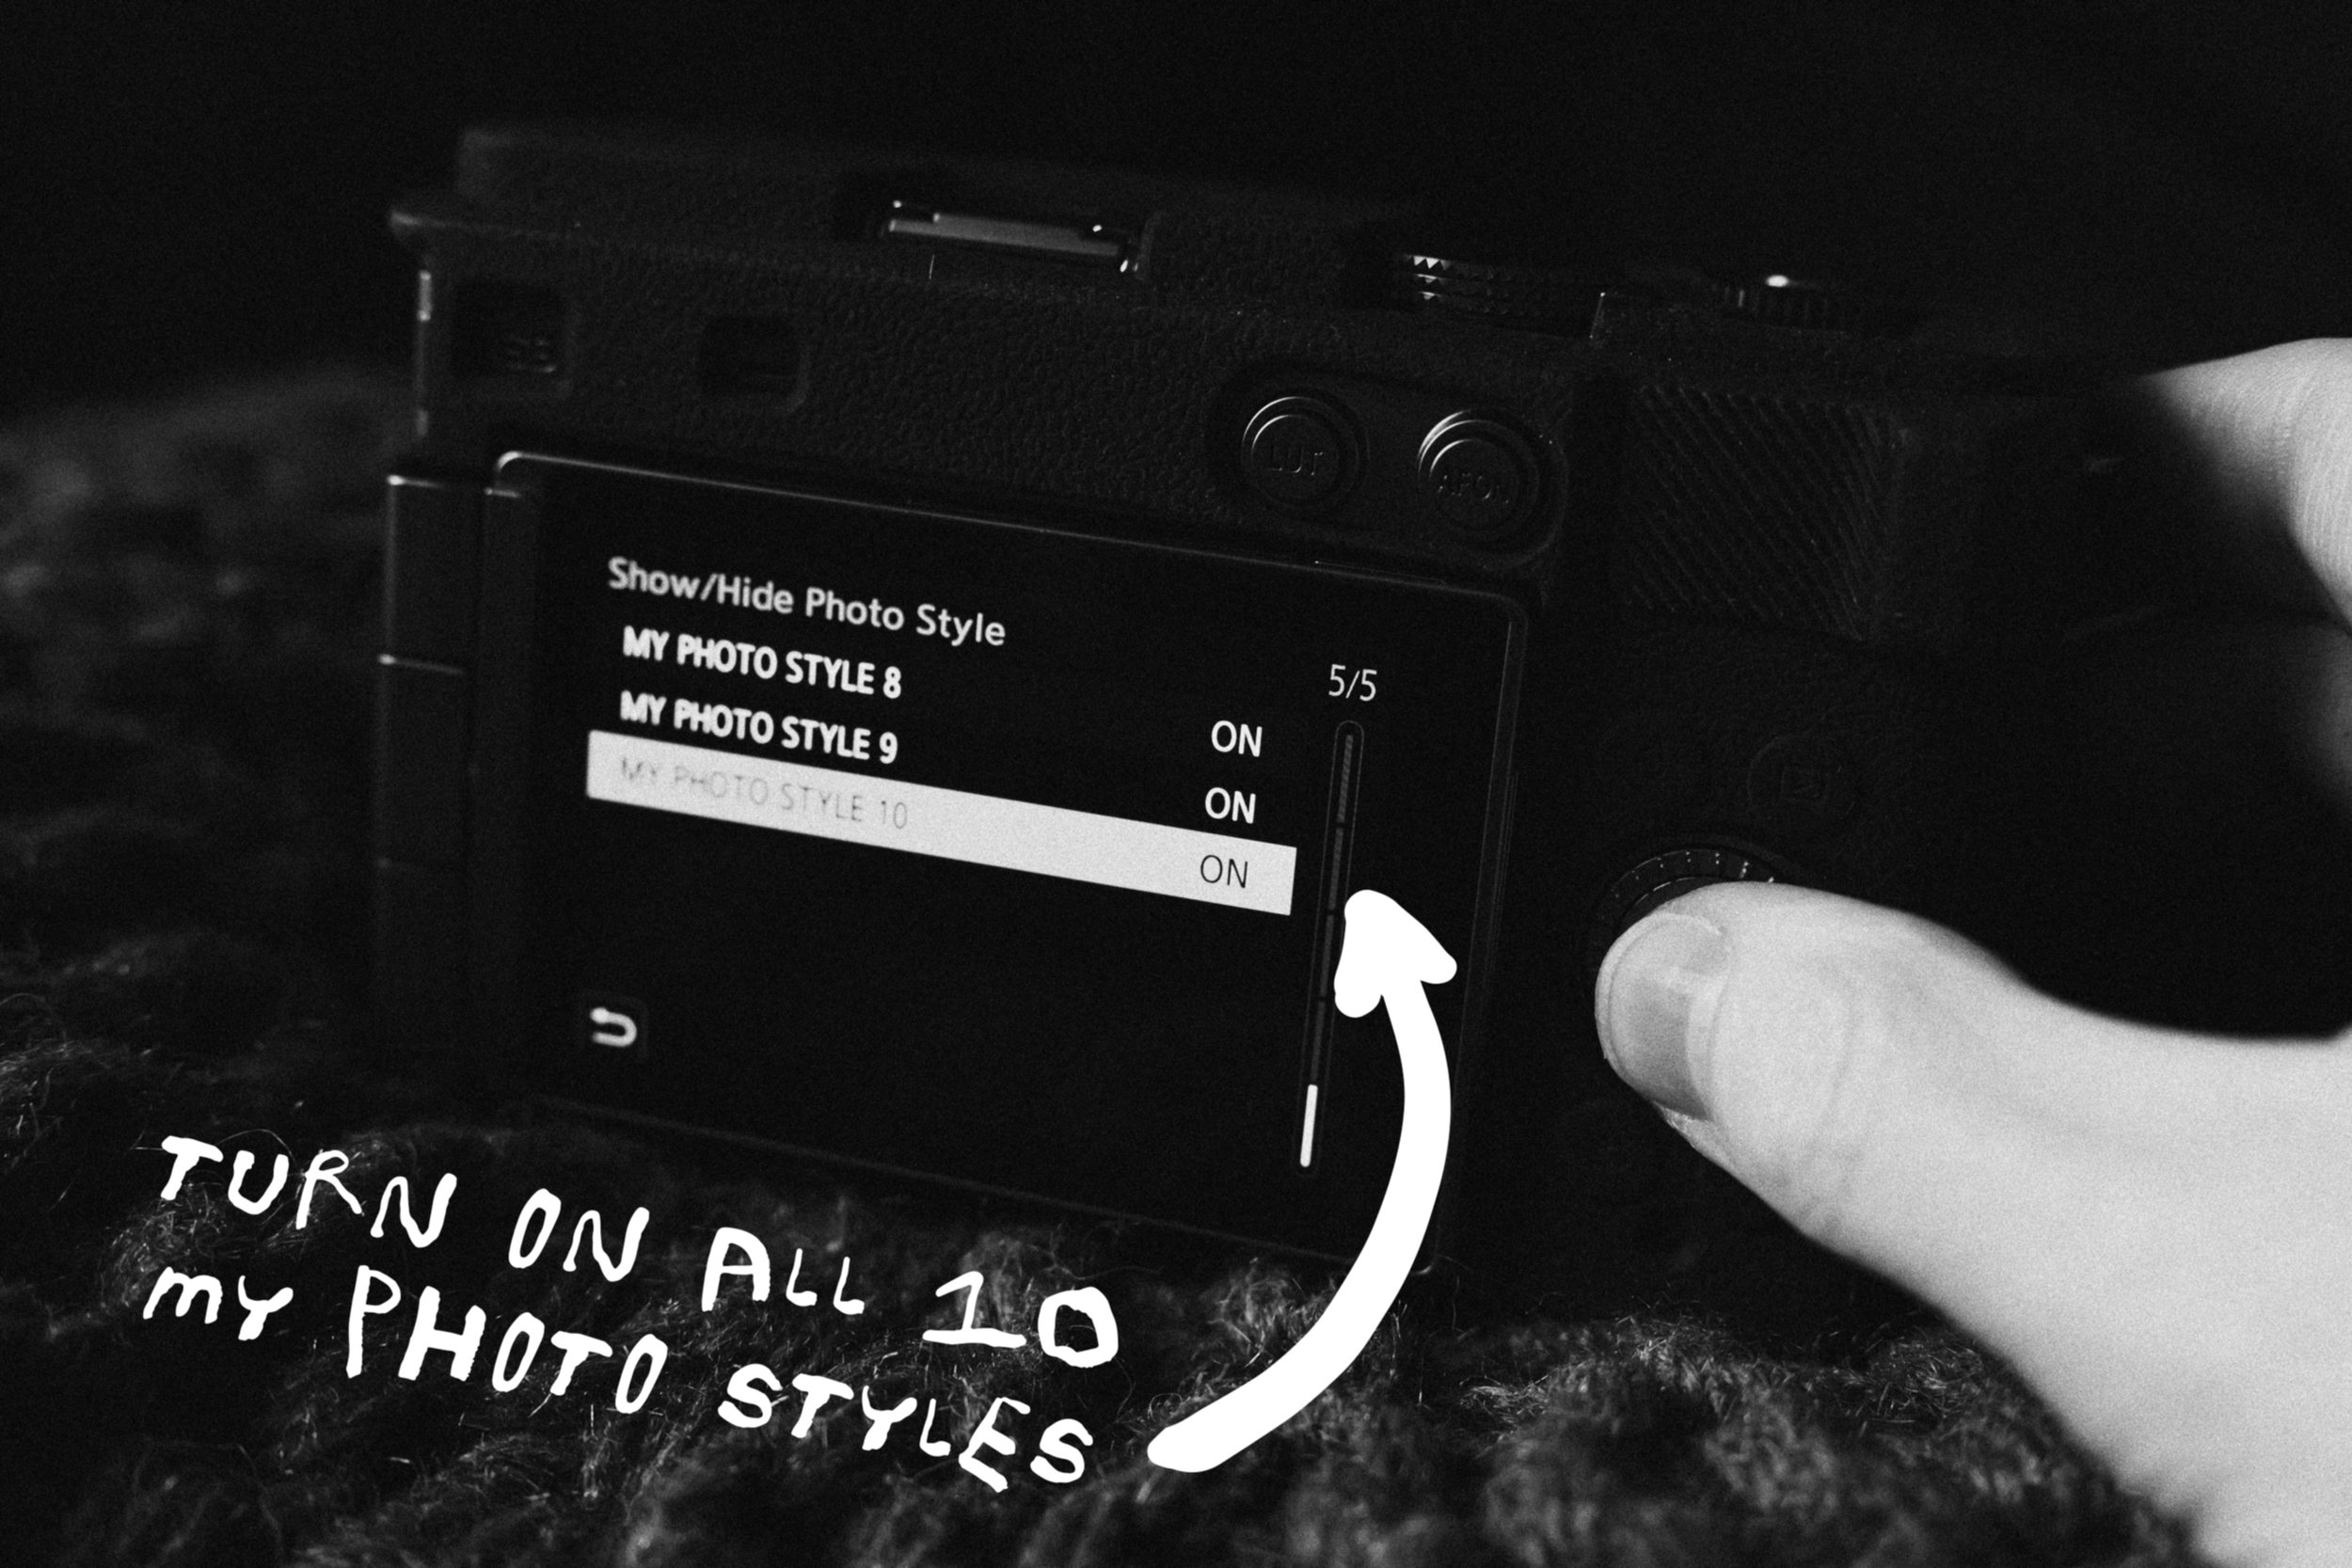
To get the most out of shooting LUTs with my LUMIX cameras, I always load them into a My Photo Style slot (I’ll discuss more about My Photo Styles below). Out of the box I think there’s only three My Photo Style slots activated but it’s really easy to activate all ten.
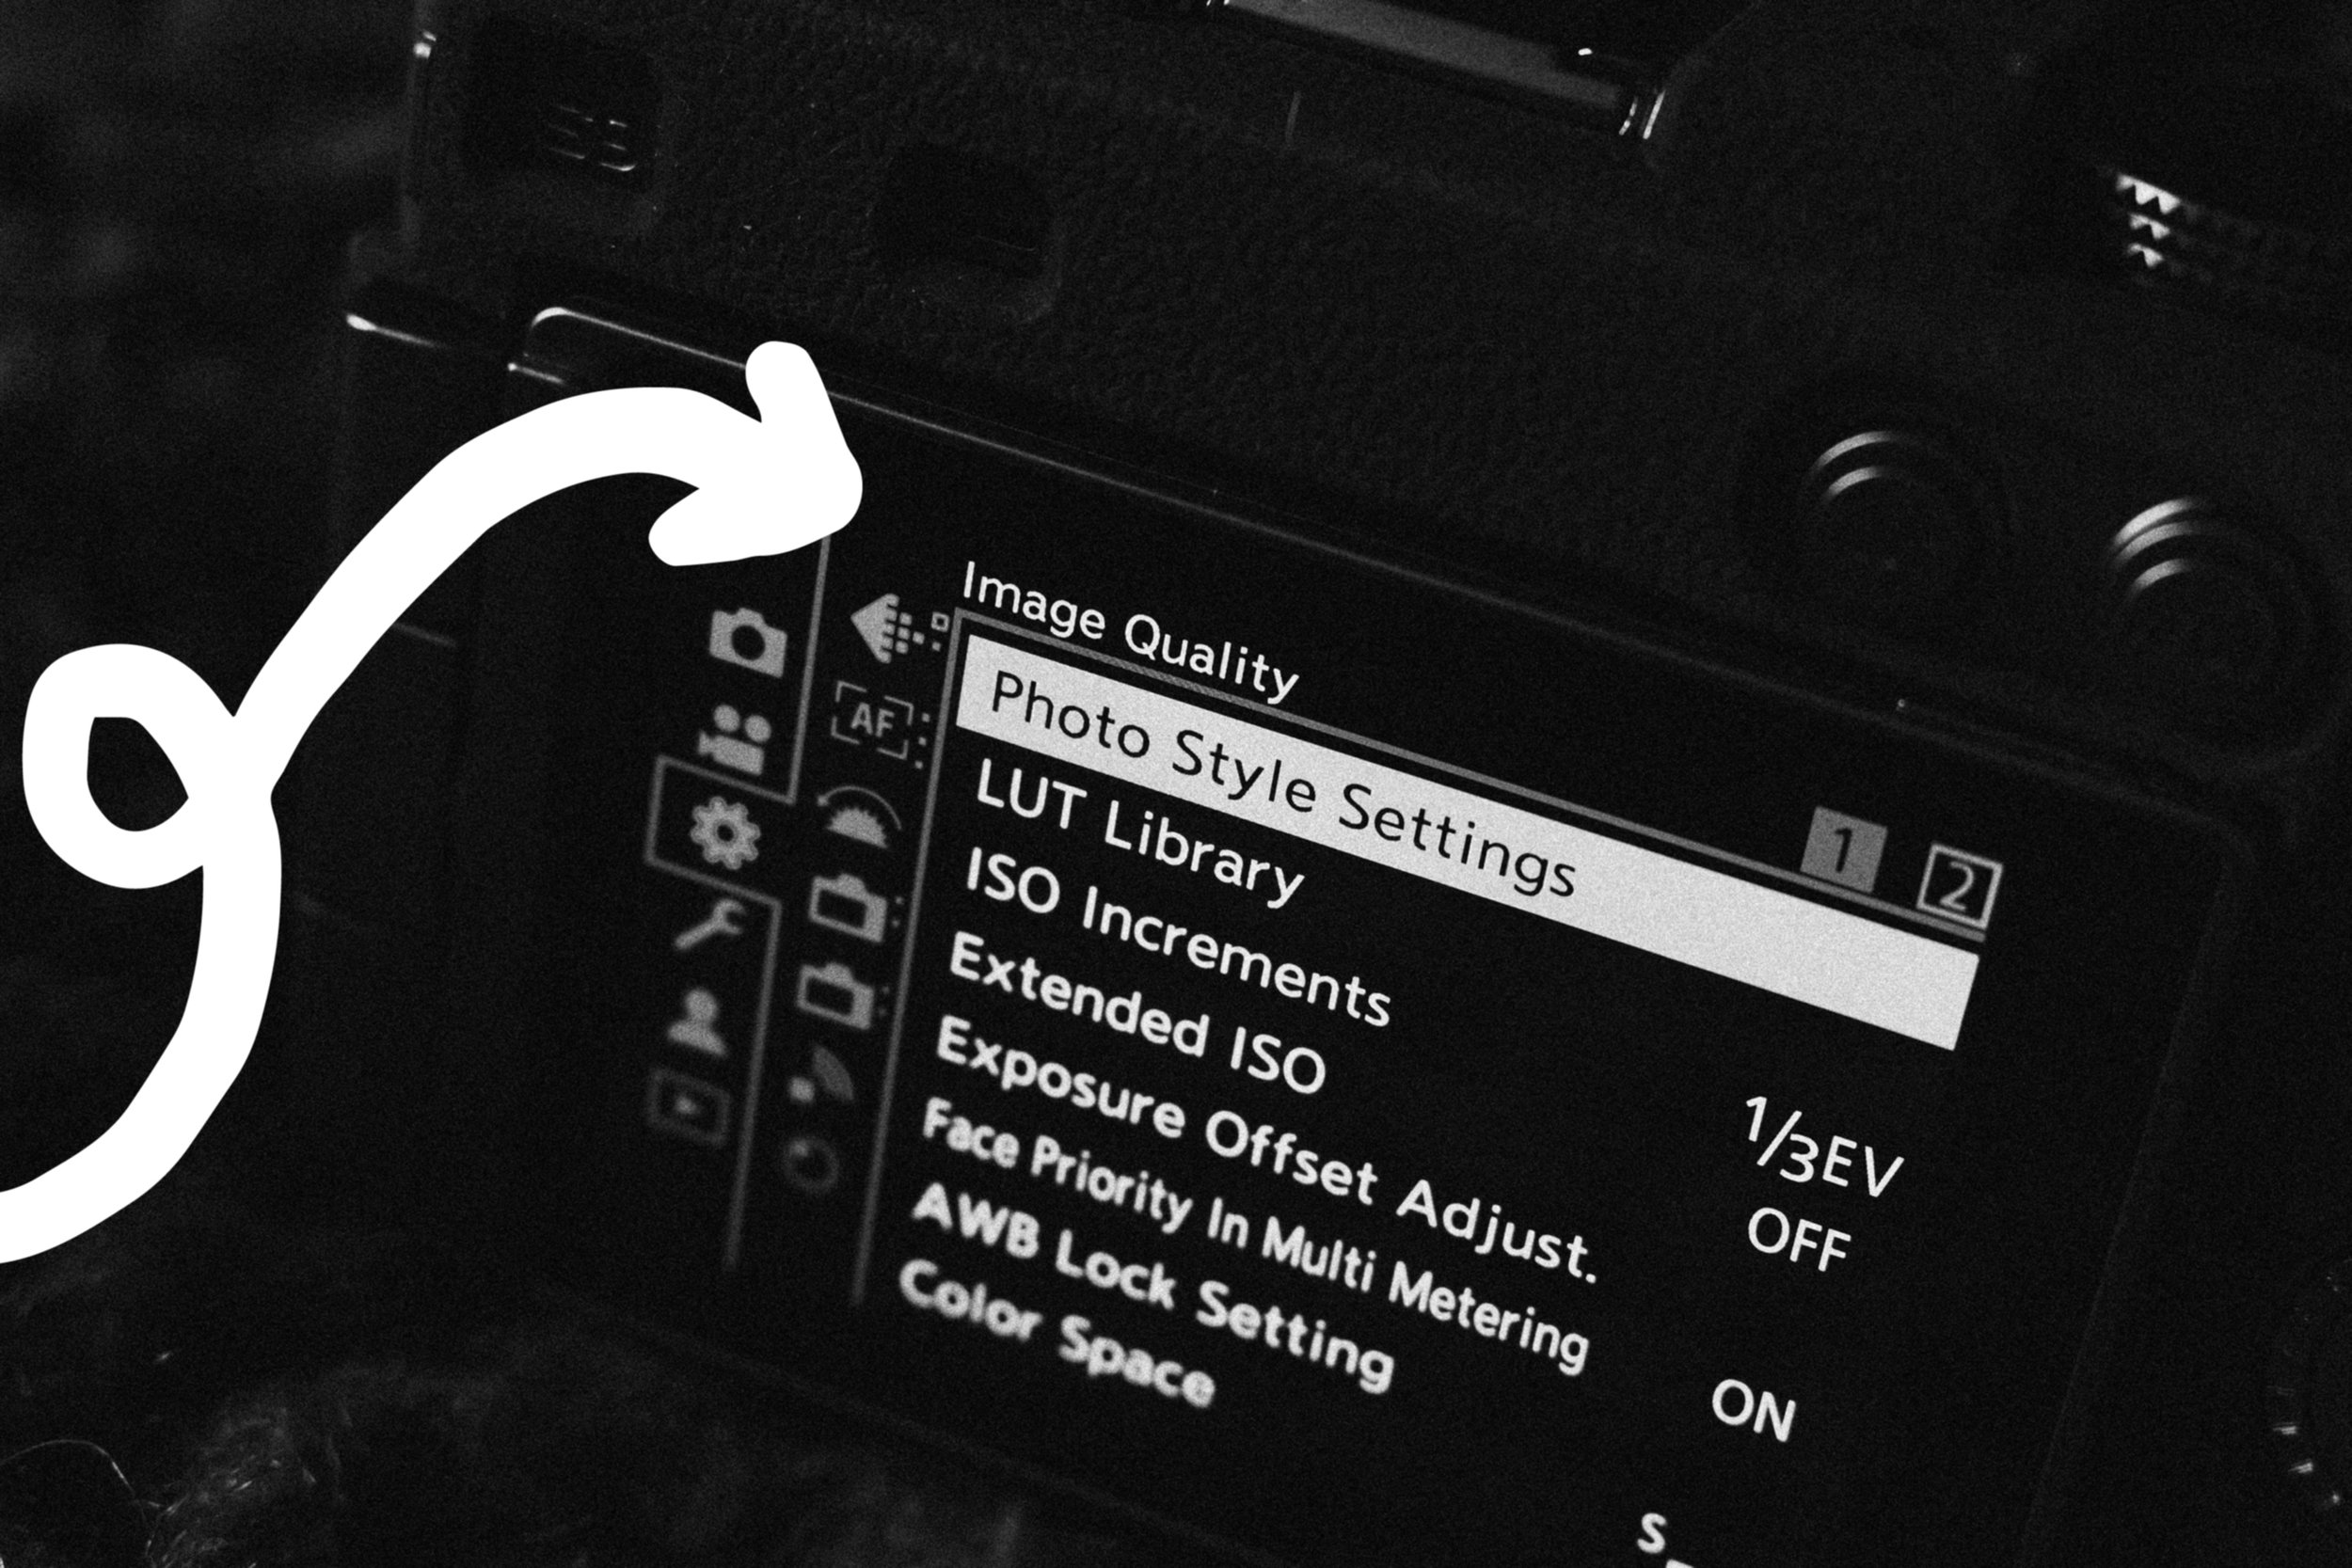
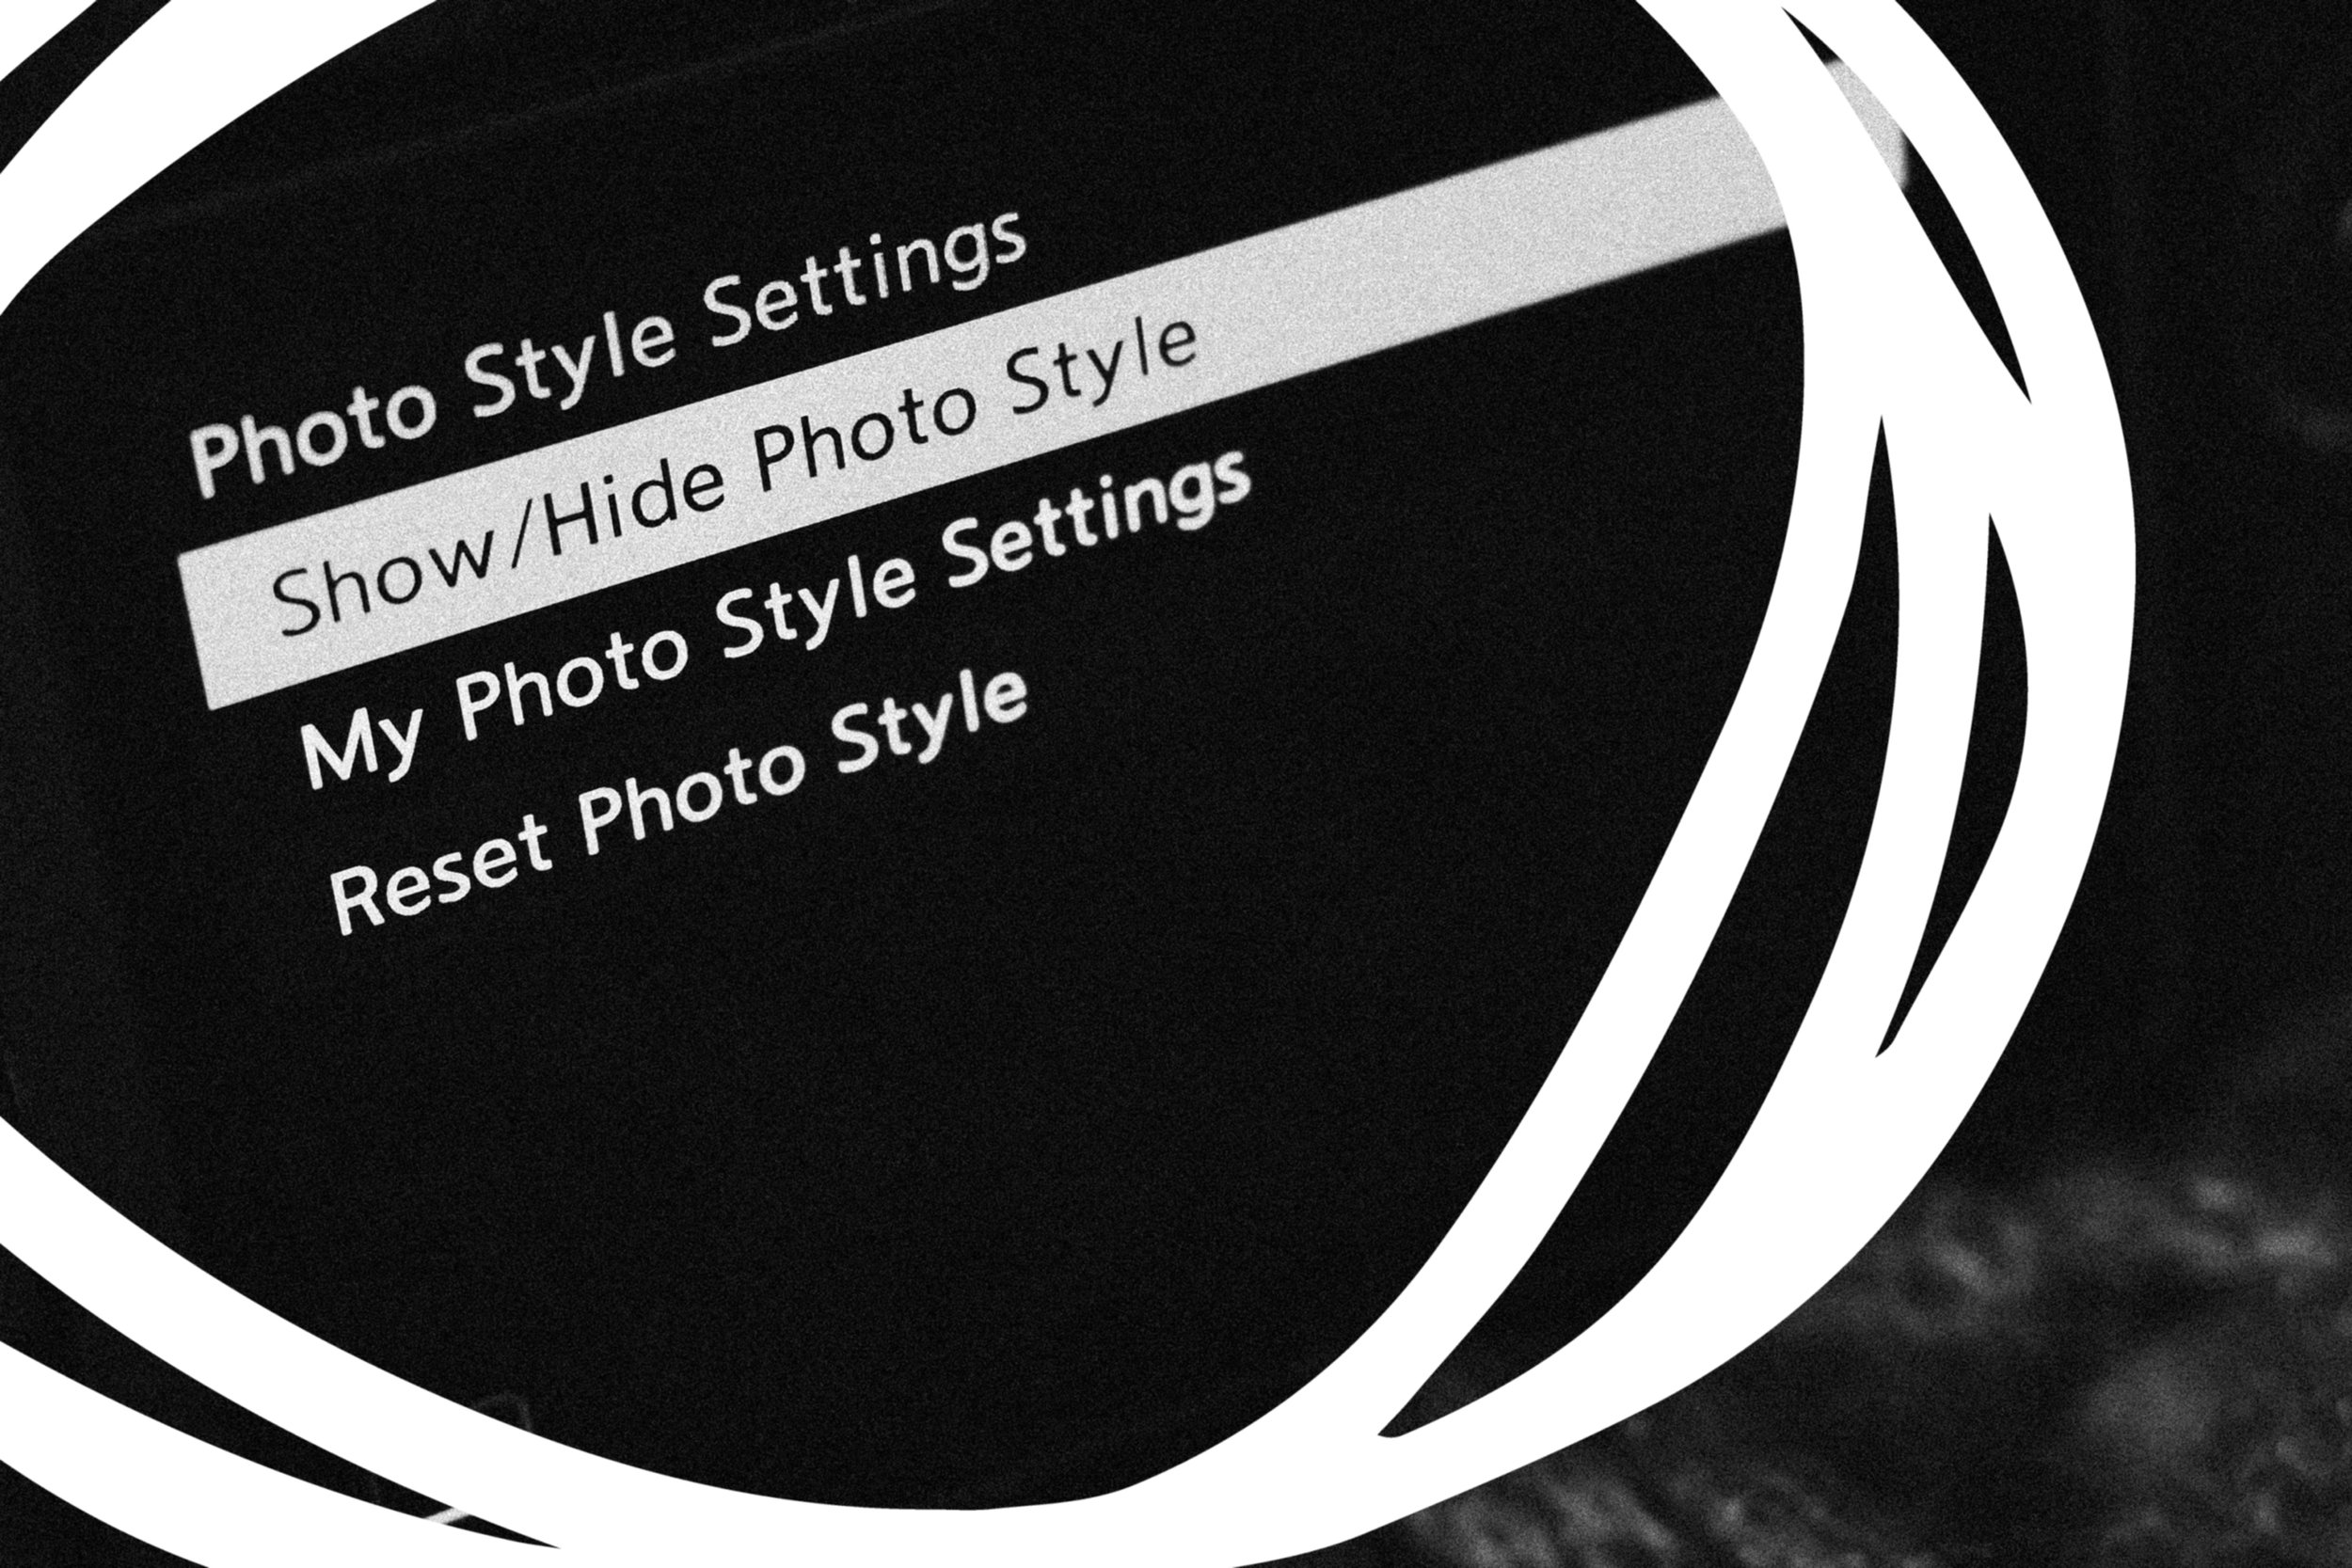
Navigate to Image Quality, Photo Style Settings, Show/Hide Photo Style and scroll right to the bottom where you can turn on all of your My Photo Styles.
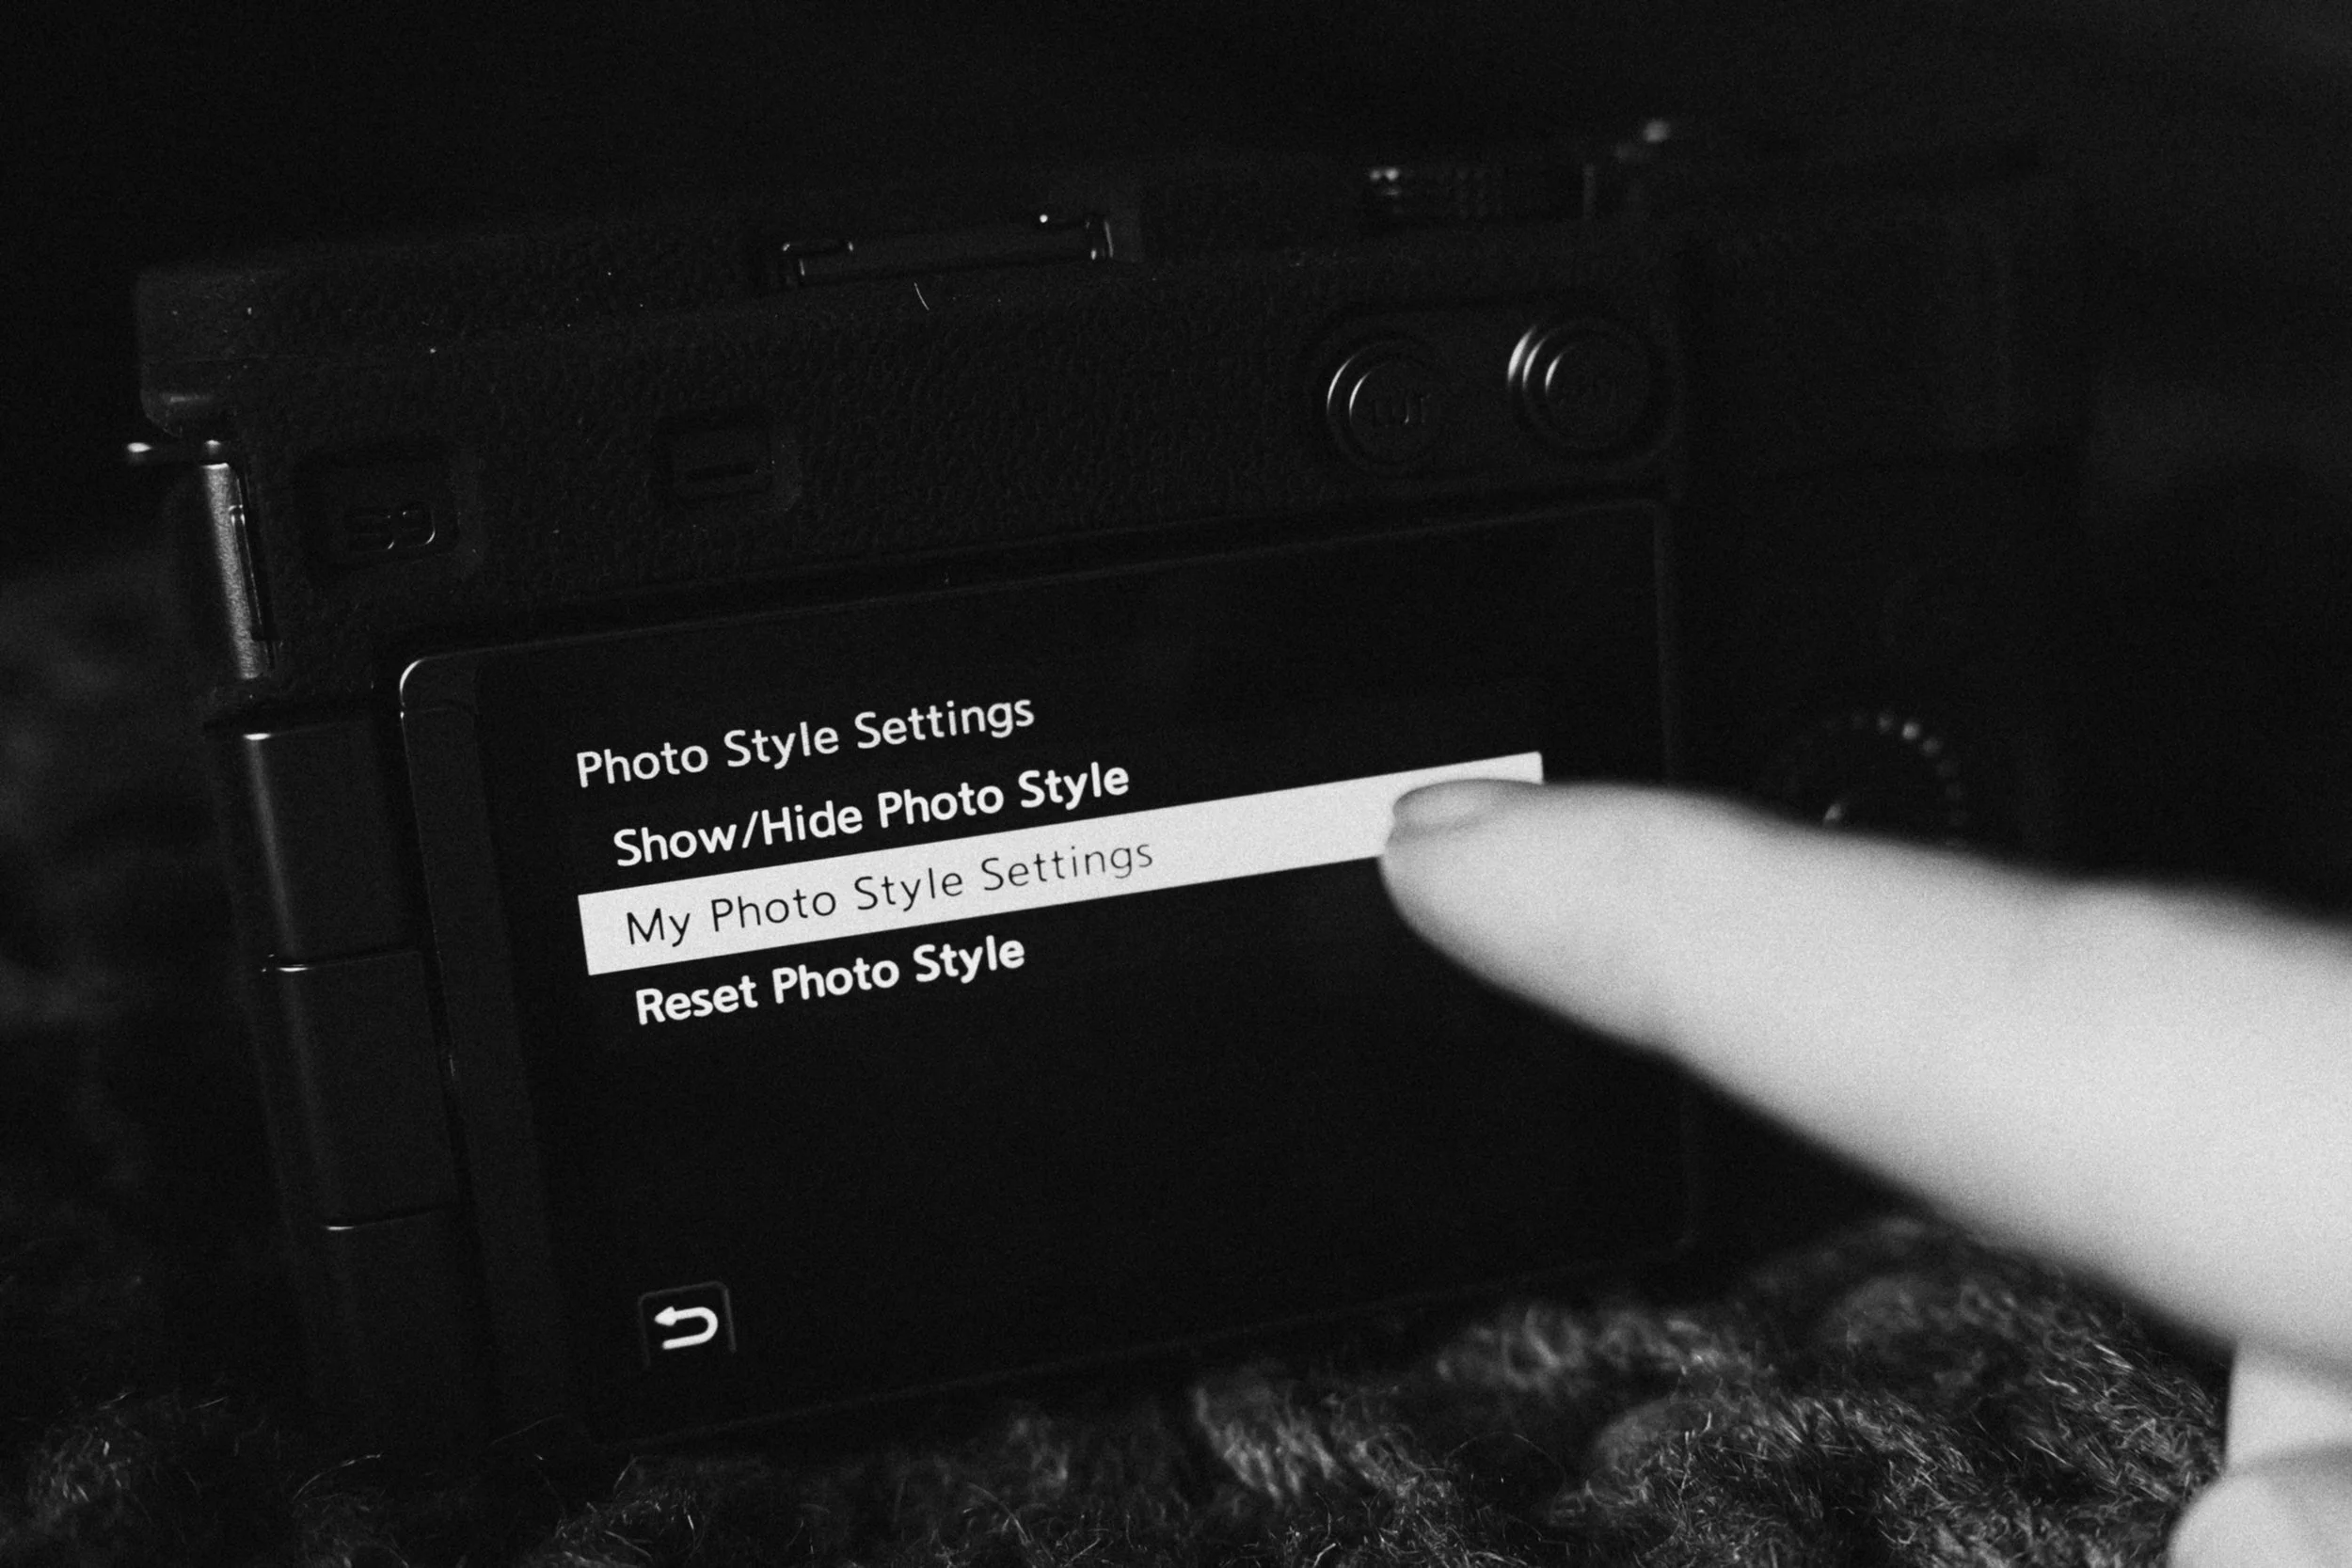
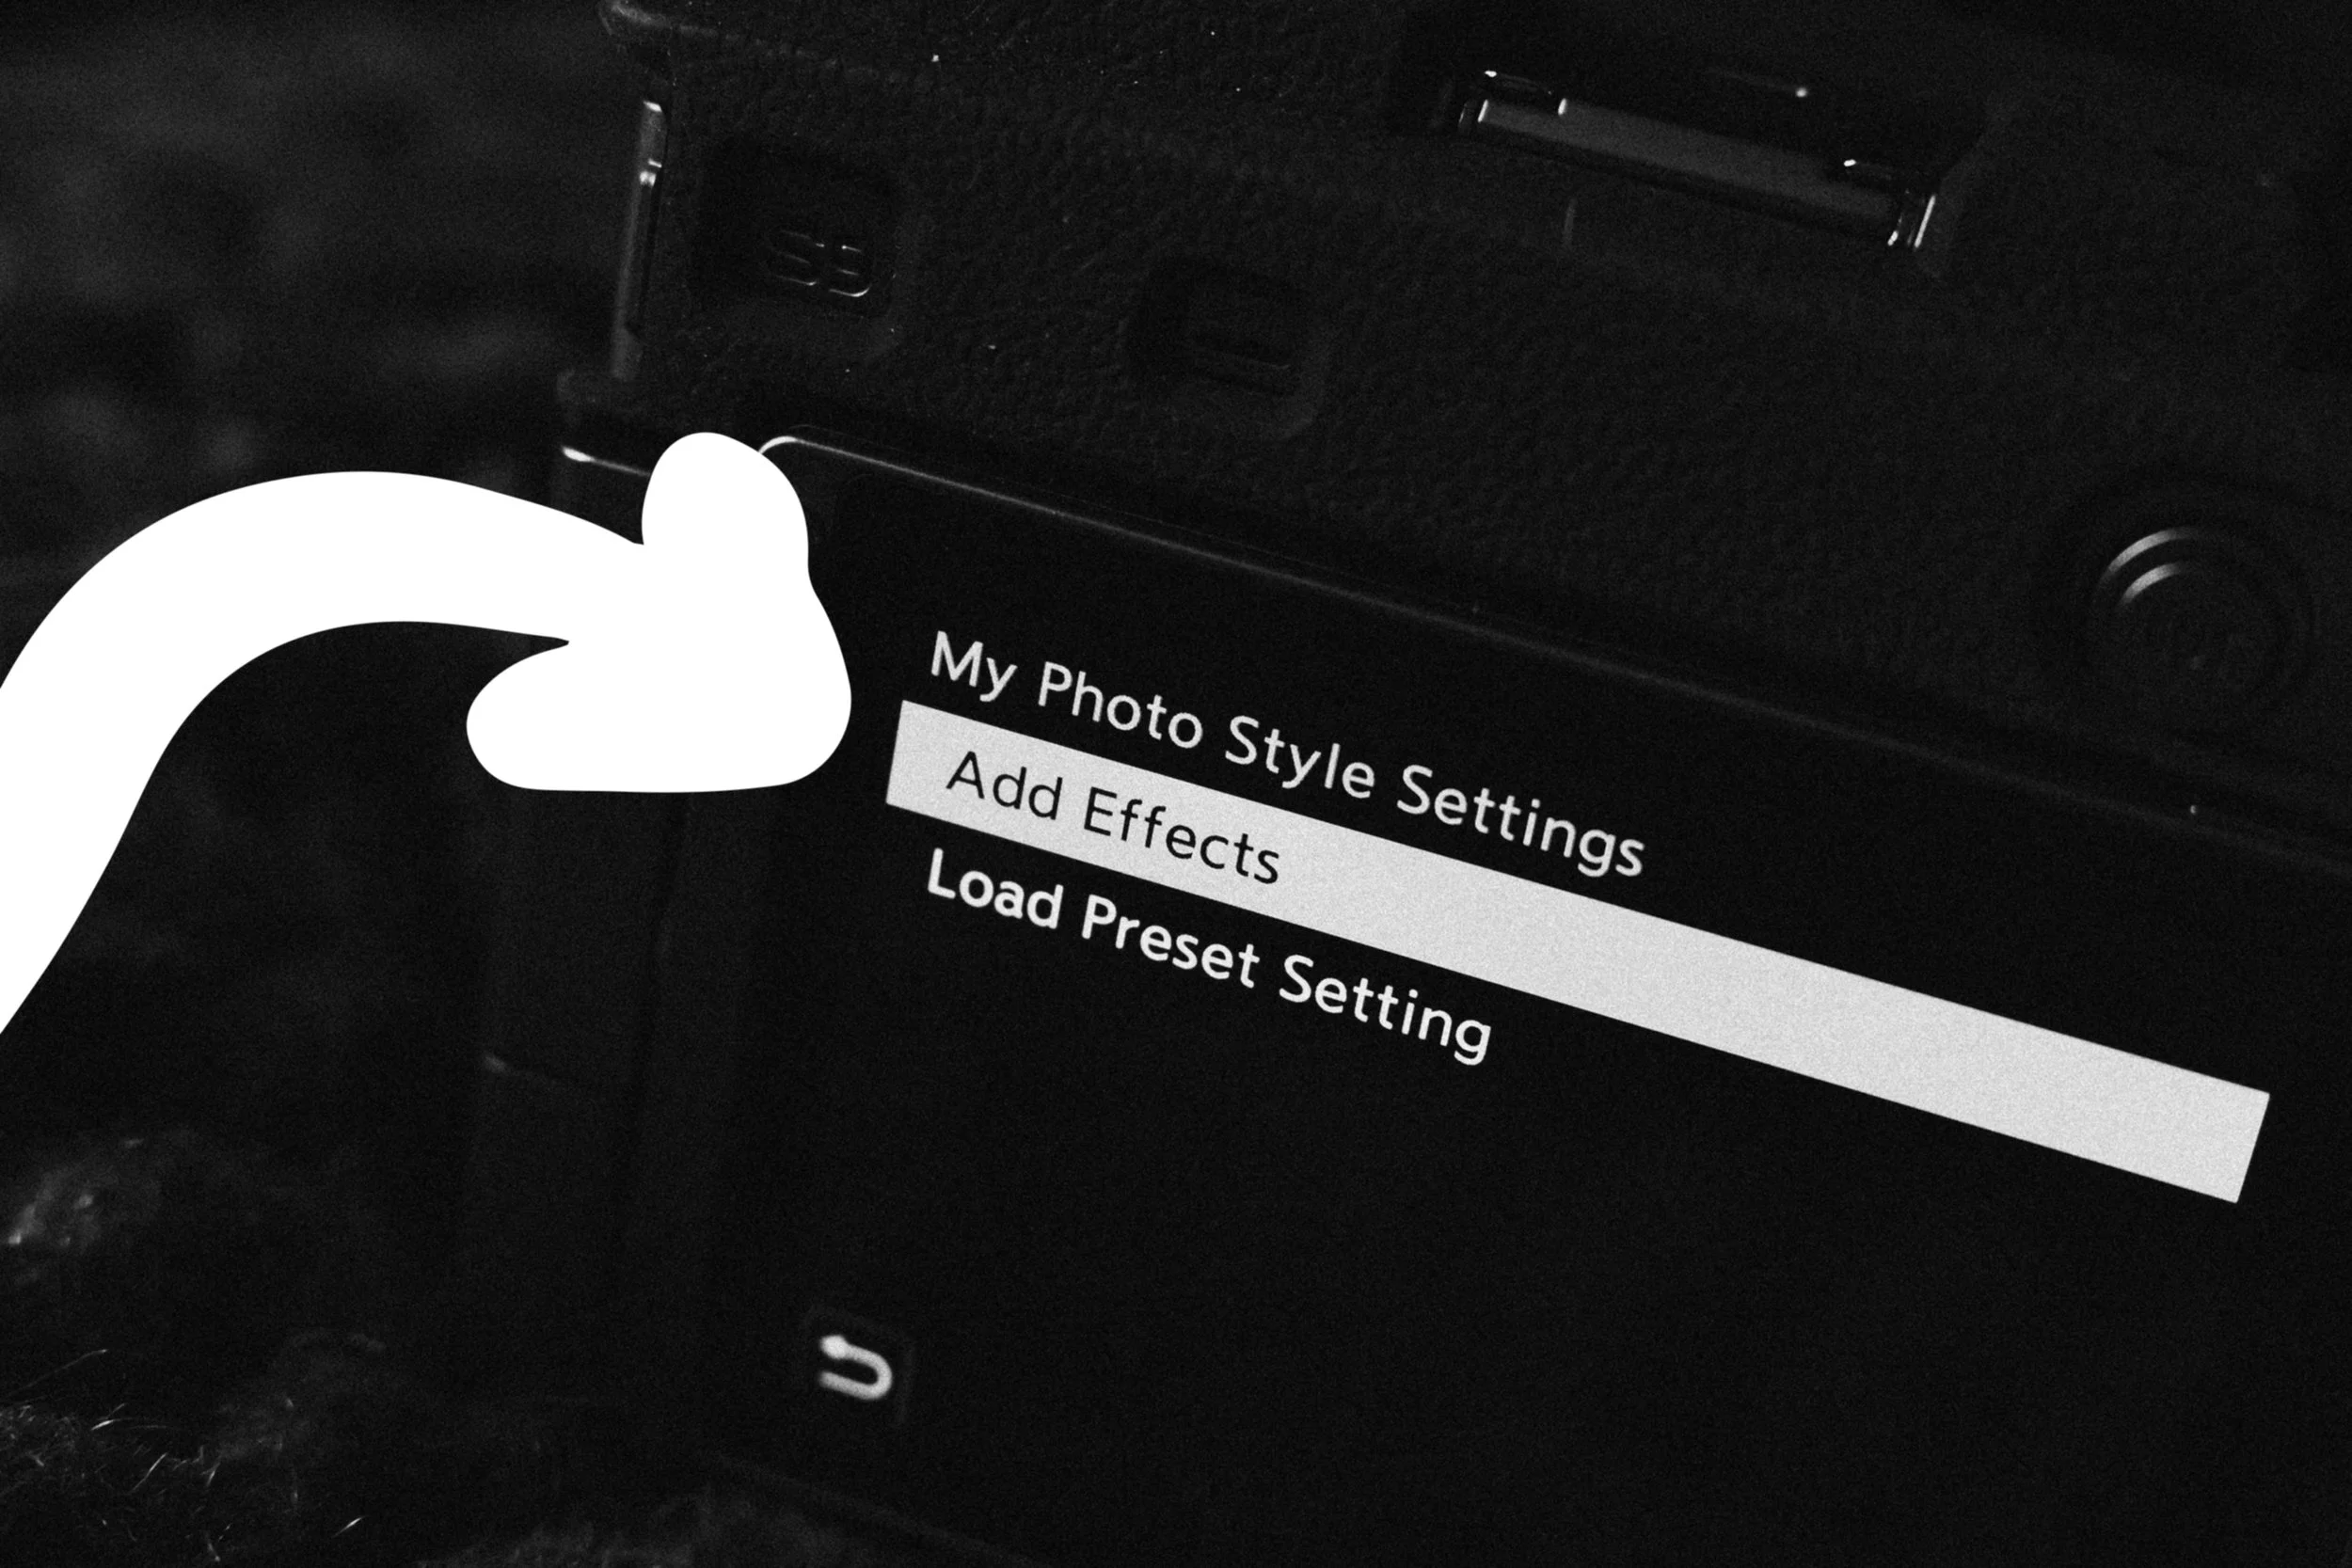
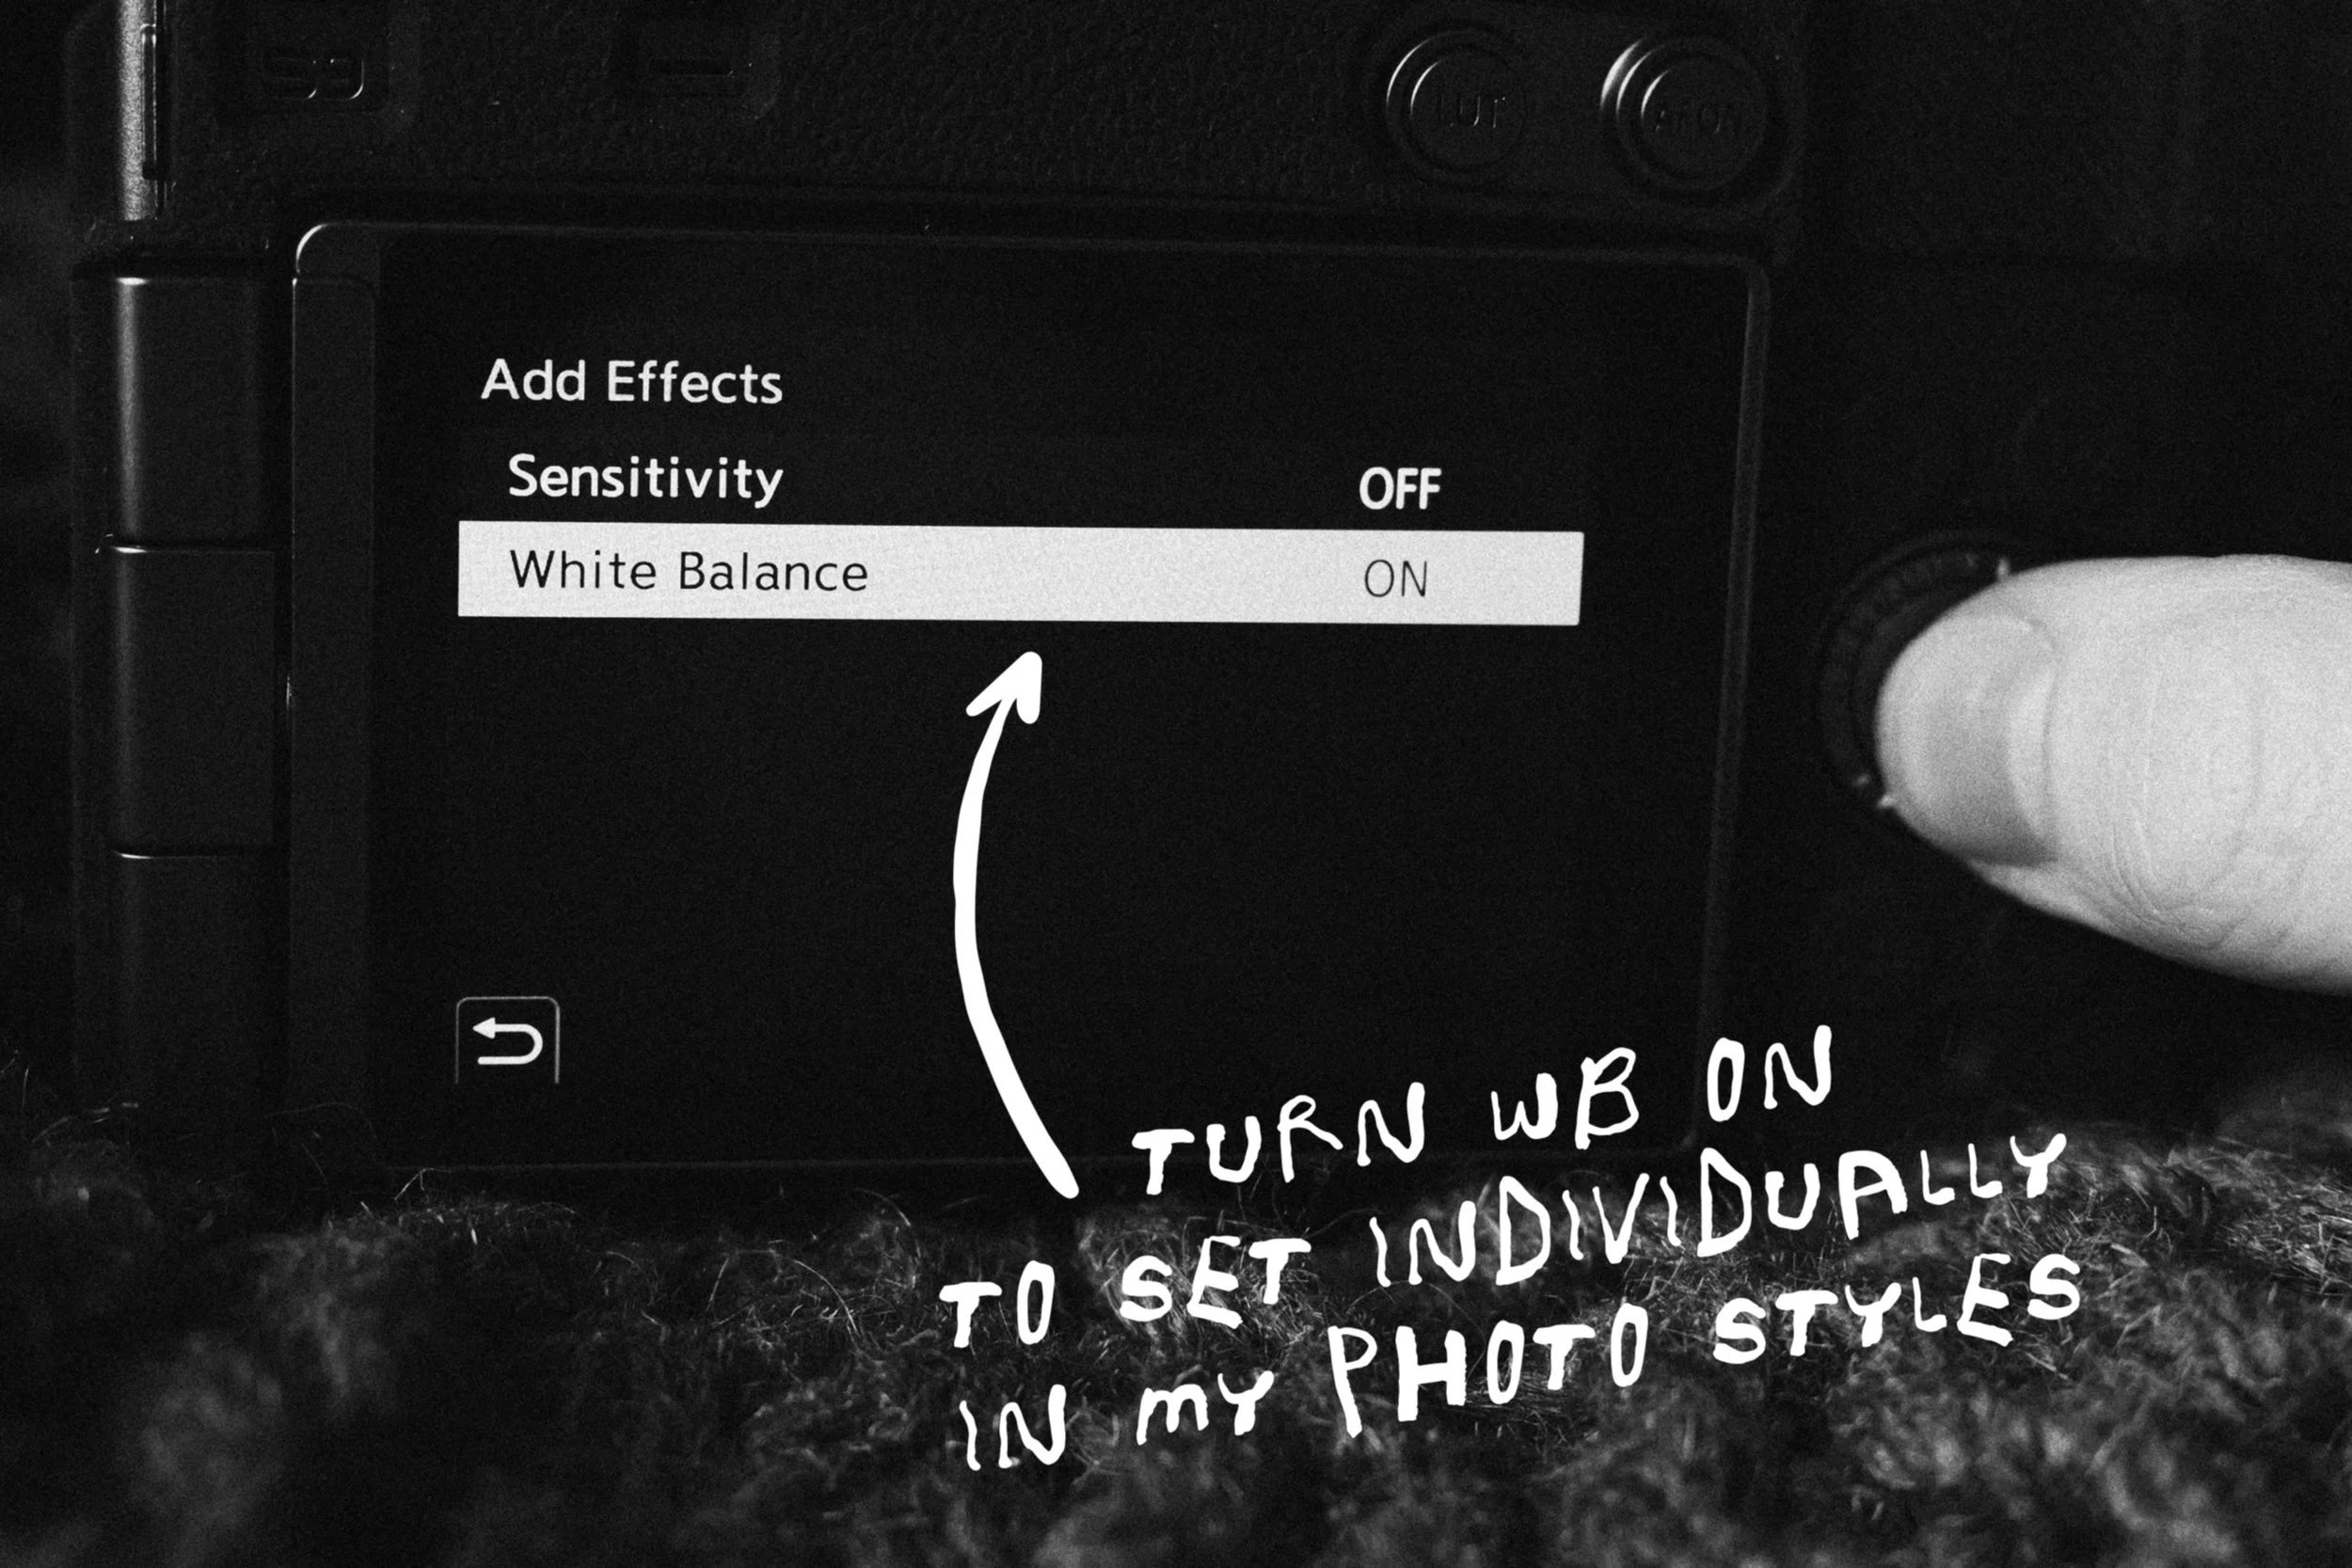
While you are in Photo Style Settings, something I really recommend is to go down to My Photo Style Settings, select Add Effects, and turn White Balance ON. What this will do is allow you to set and save the White Balance for each individual My Photo Style which I think is essential when creating custom ‘looks’ inside your LUMIX camera.
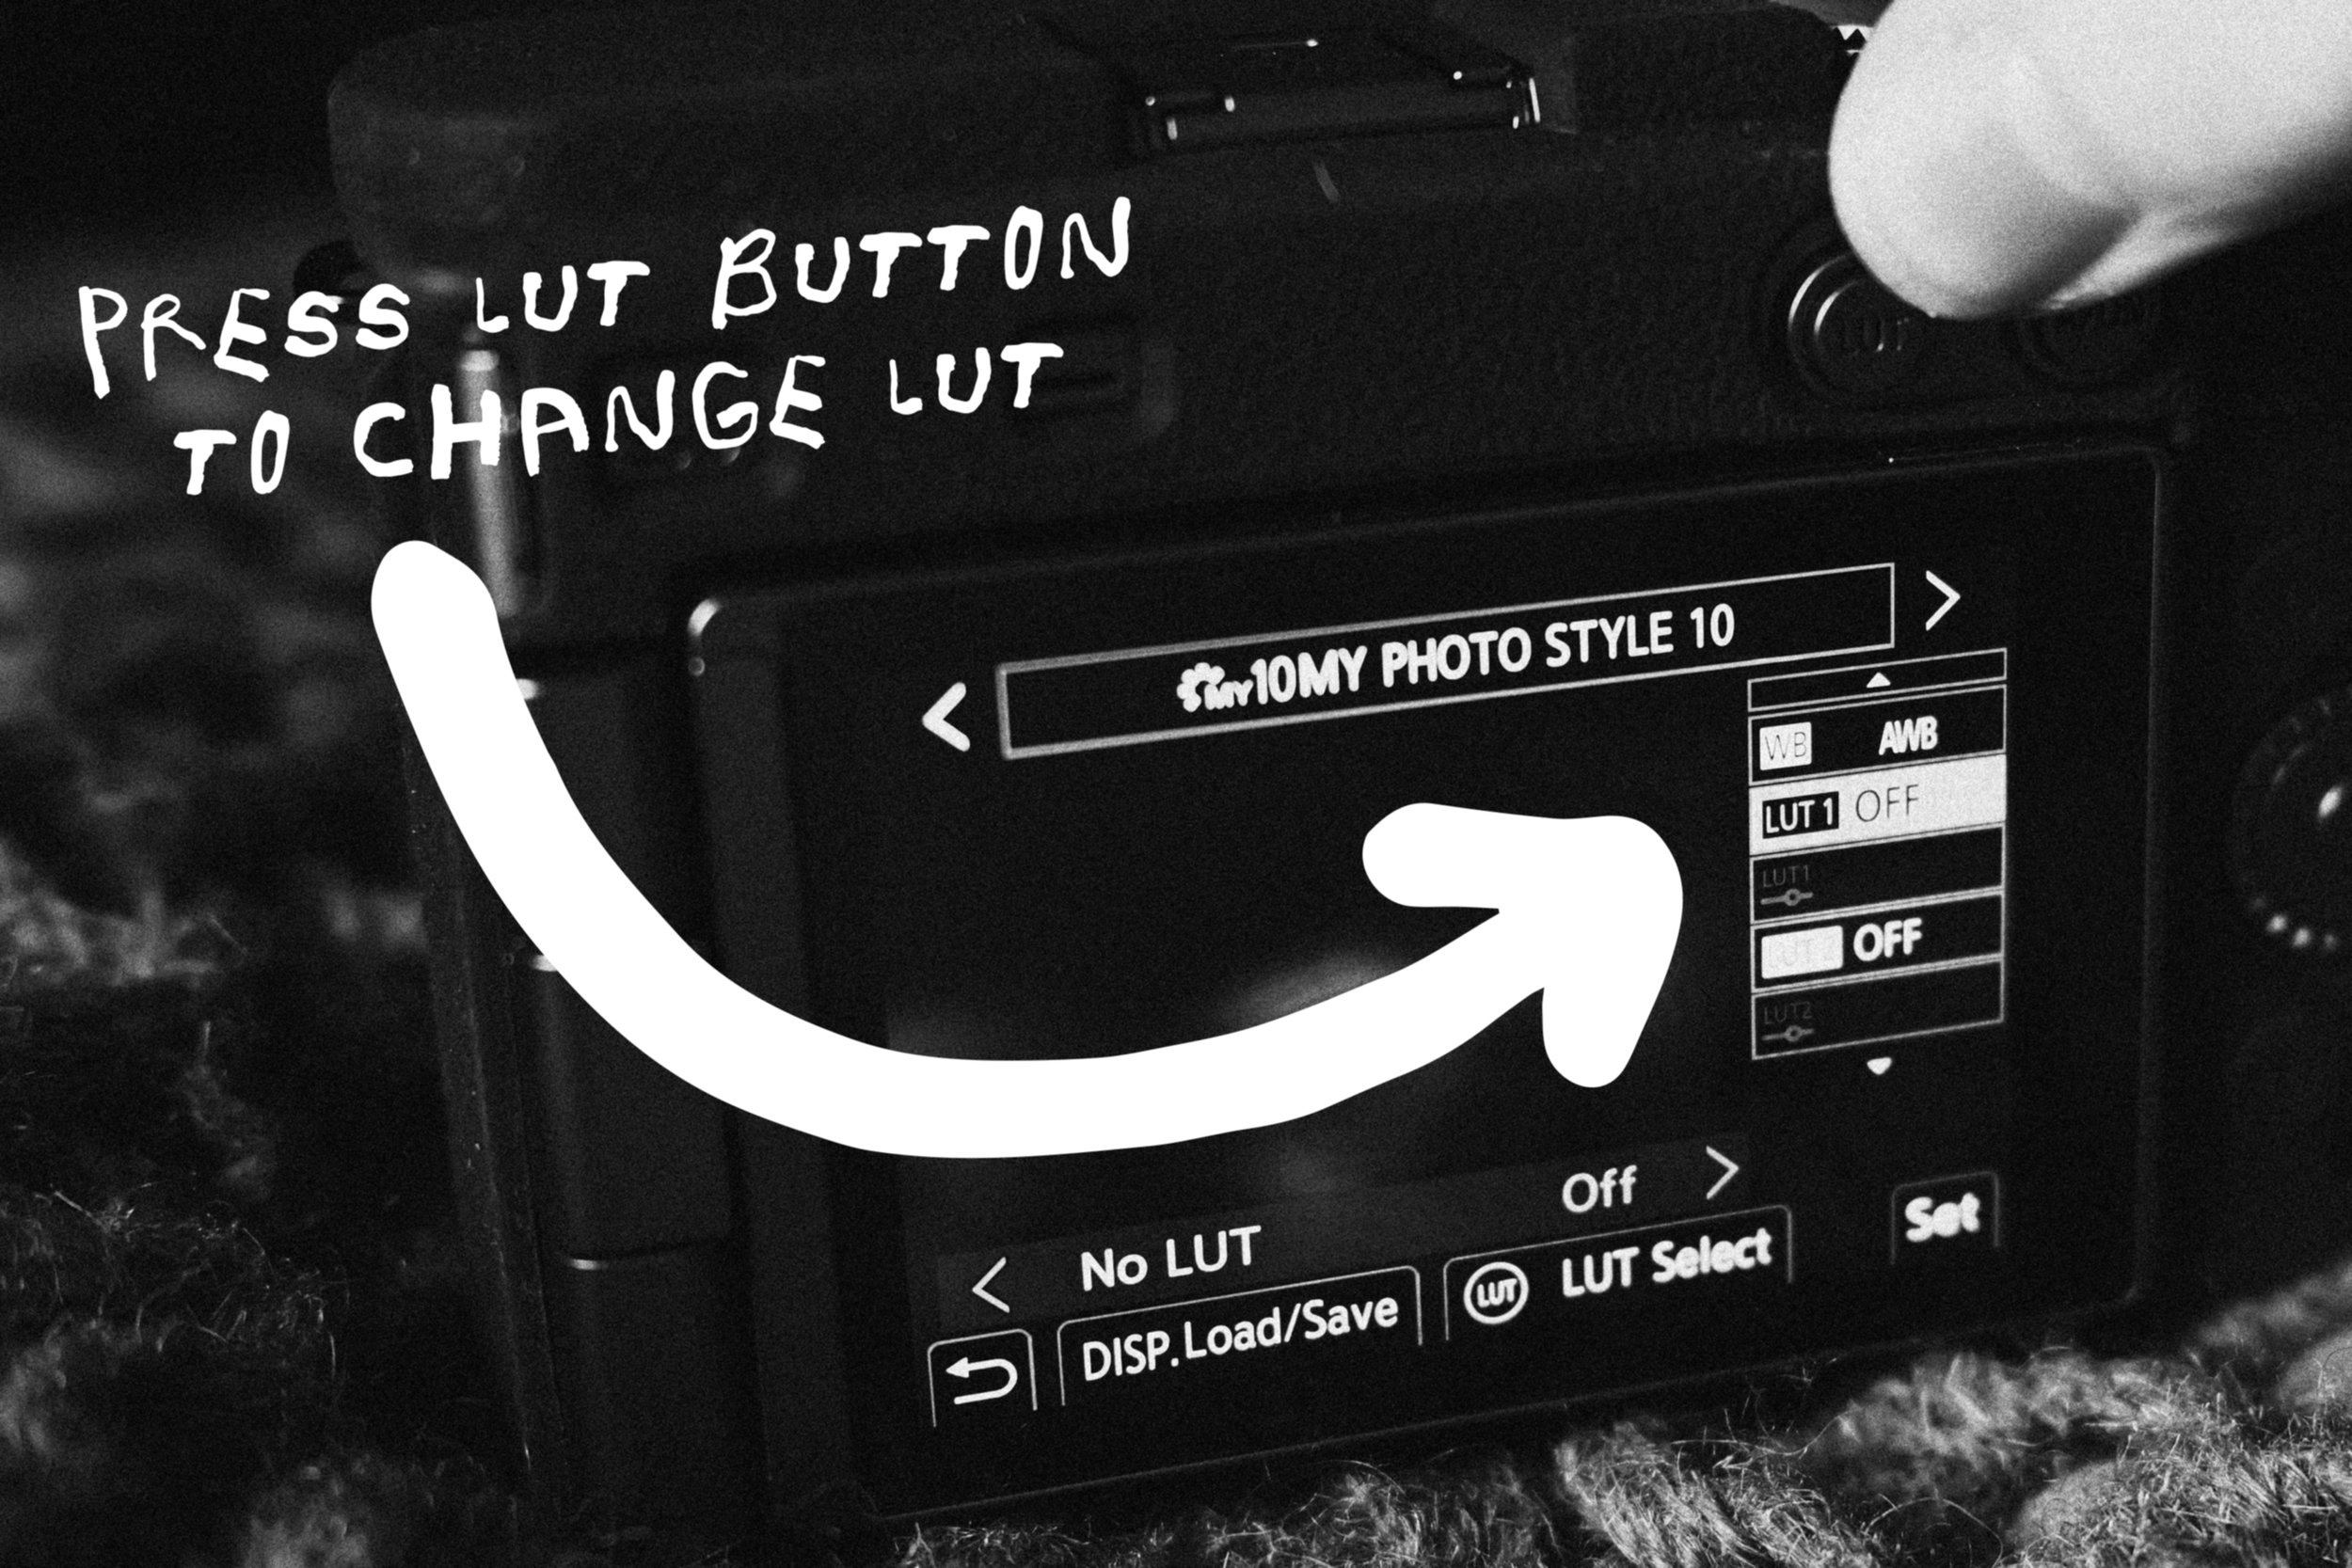
Remap LUT BUtton
If you have an S9, something that might be helpful at this point is to remap your LUT button to Photo Style so you can press it to easily cycle through the ‘looks’ you’ll have saved in the My Photo Style slots. To do that all you need to do is long press on the LUT button and select Photo Style.
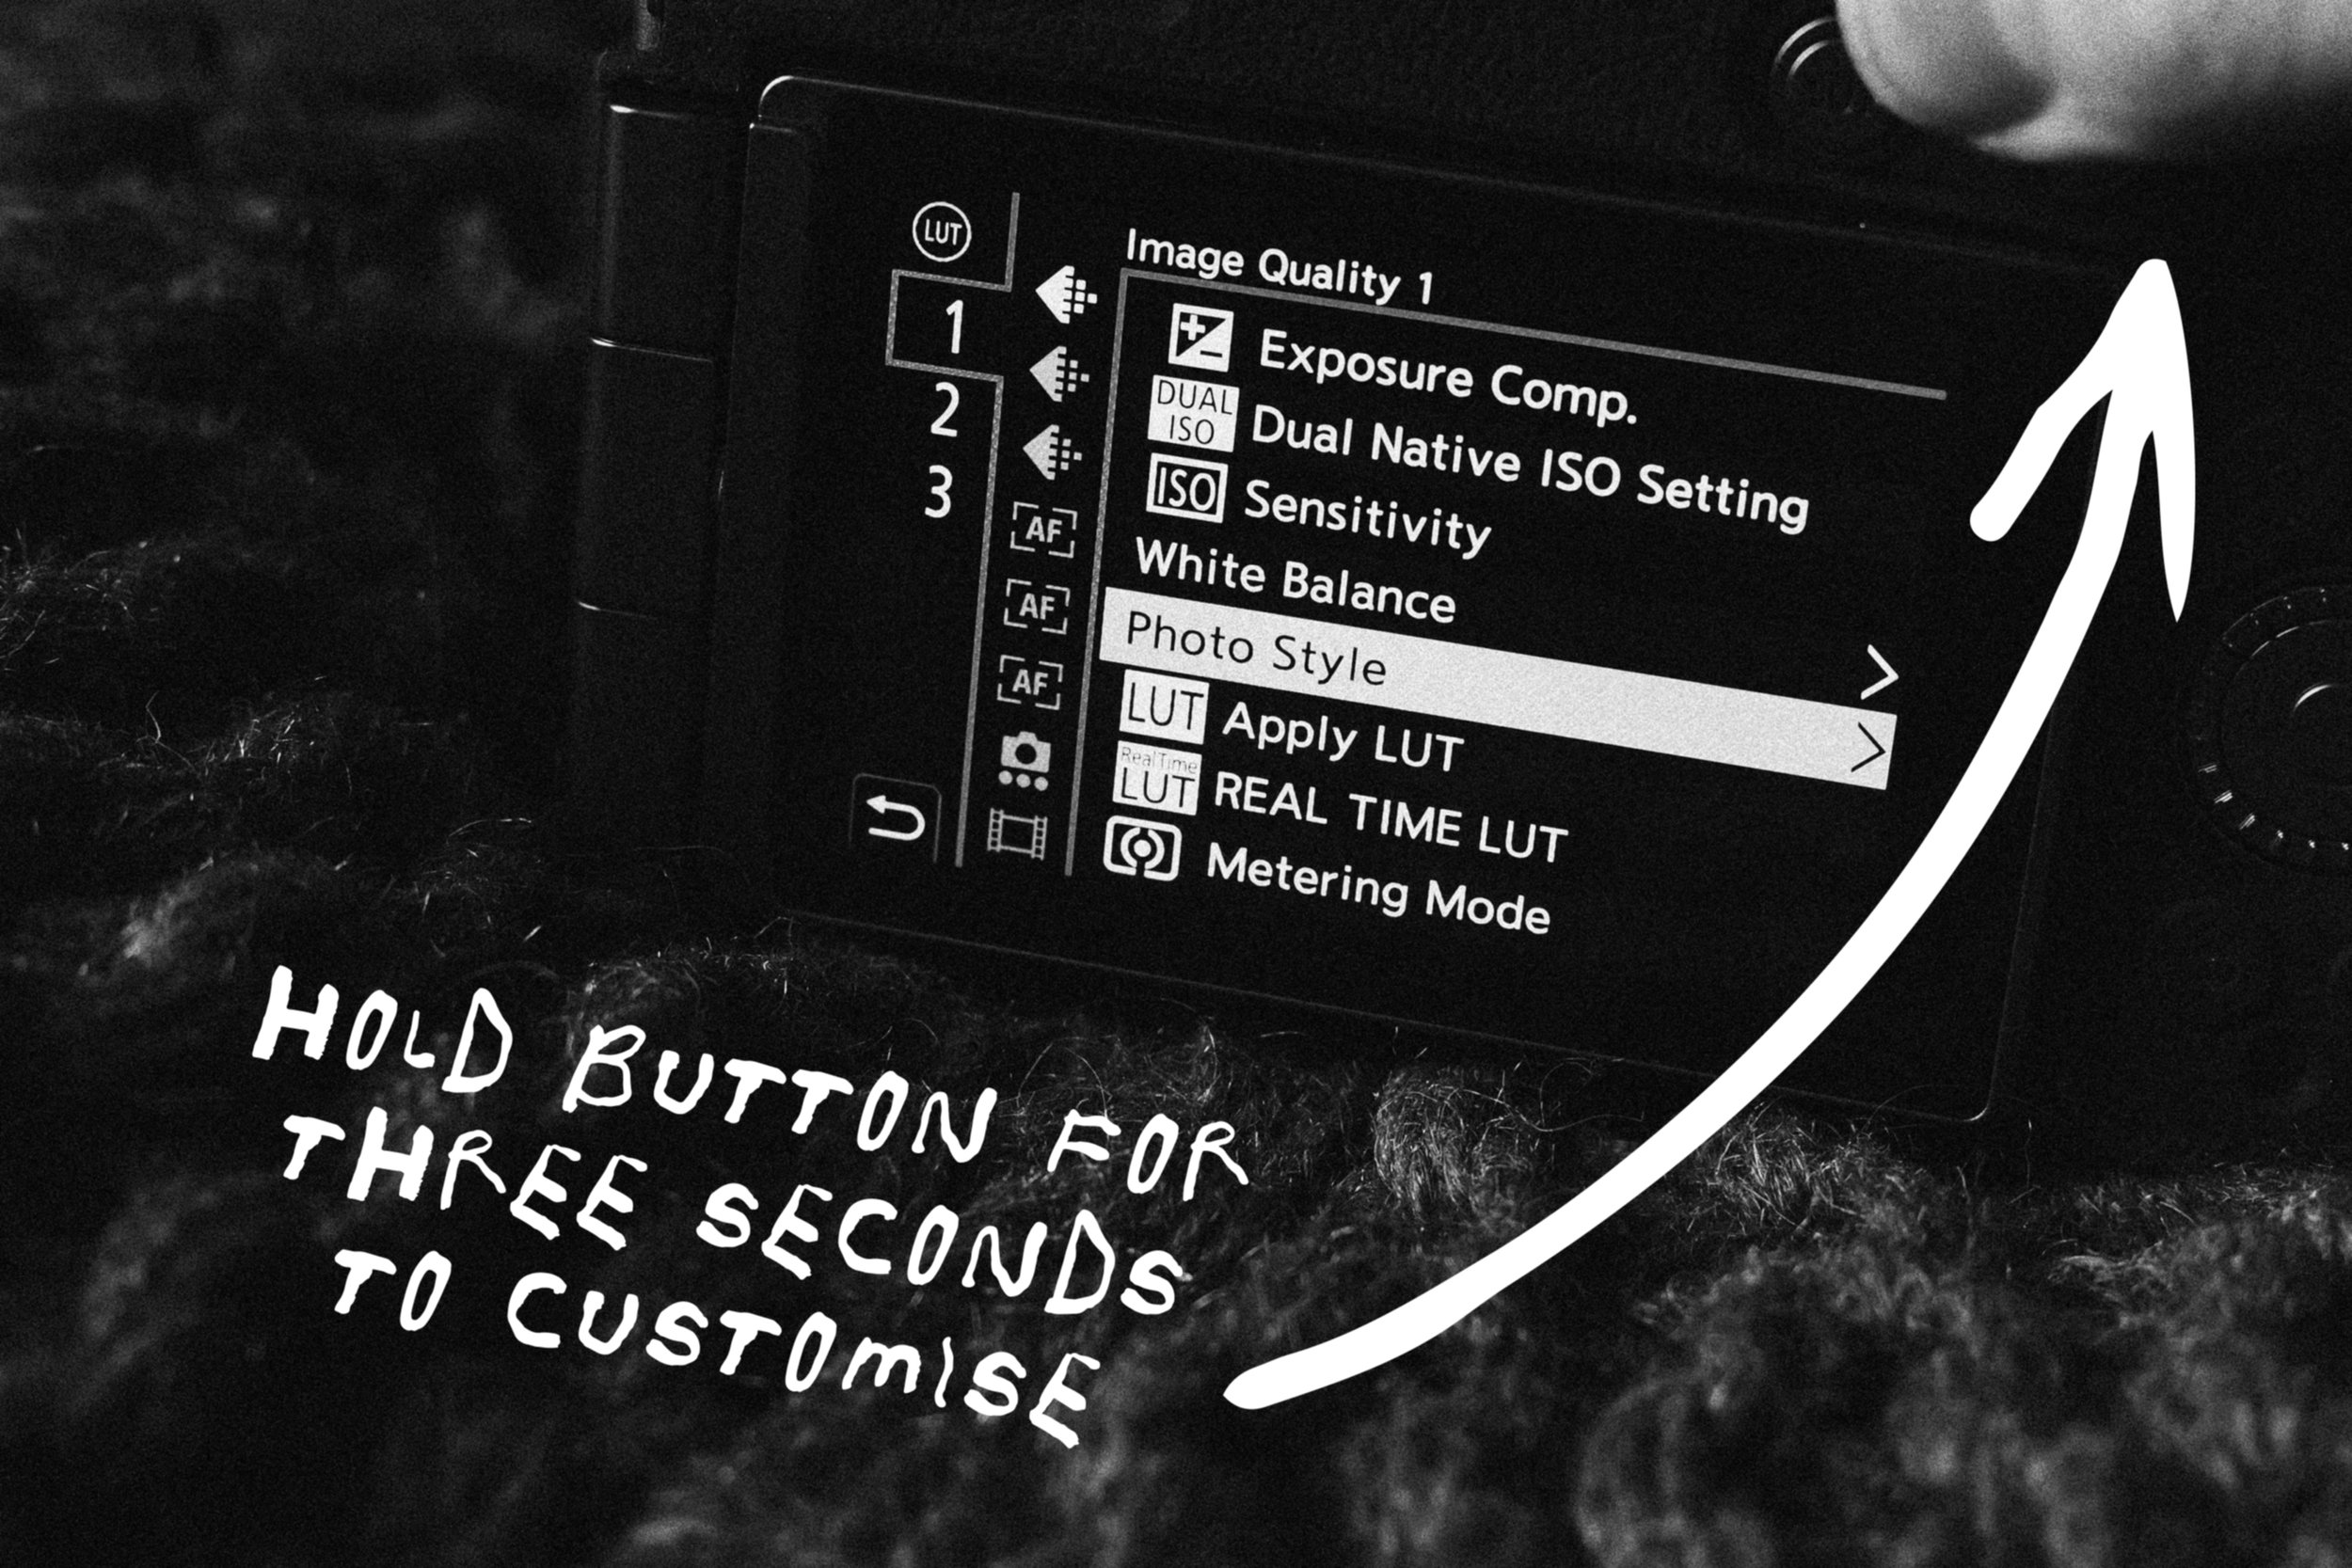
This seems to be a very popular way to customise the S9 and a tip I picked up from several LUMIX Reddit users. Personally I have Photo Style set to the top of My Menu to free up my LUT button for another function. If you don’t have an S9 this could be an option for you as well.
i.Dynamic Range
A kind of slept on feature with LUMIX cameras in my opinion is i.Dynamic Range. With every LUMIX ‘look’ I create for shooting JPEGs, I also select an i.Dynamic Range setting to go with it.
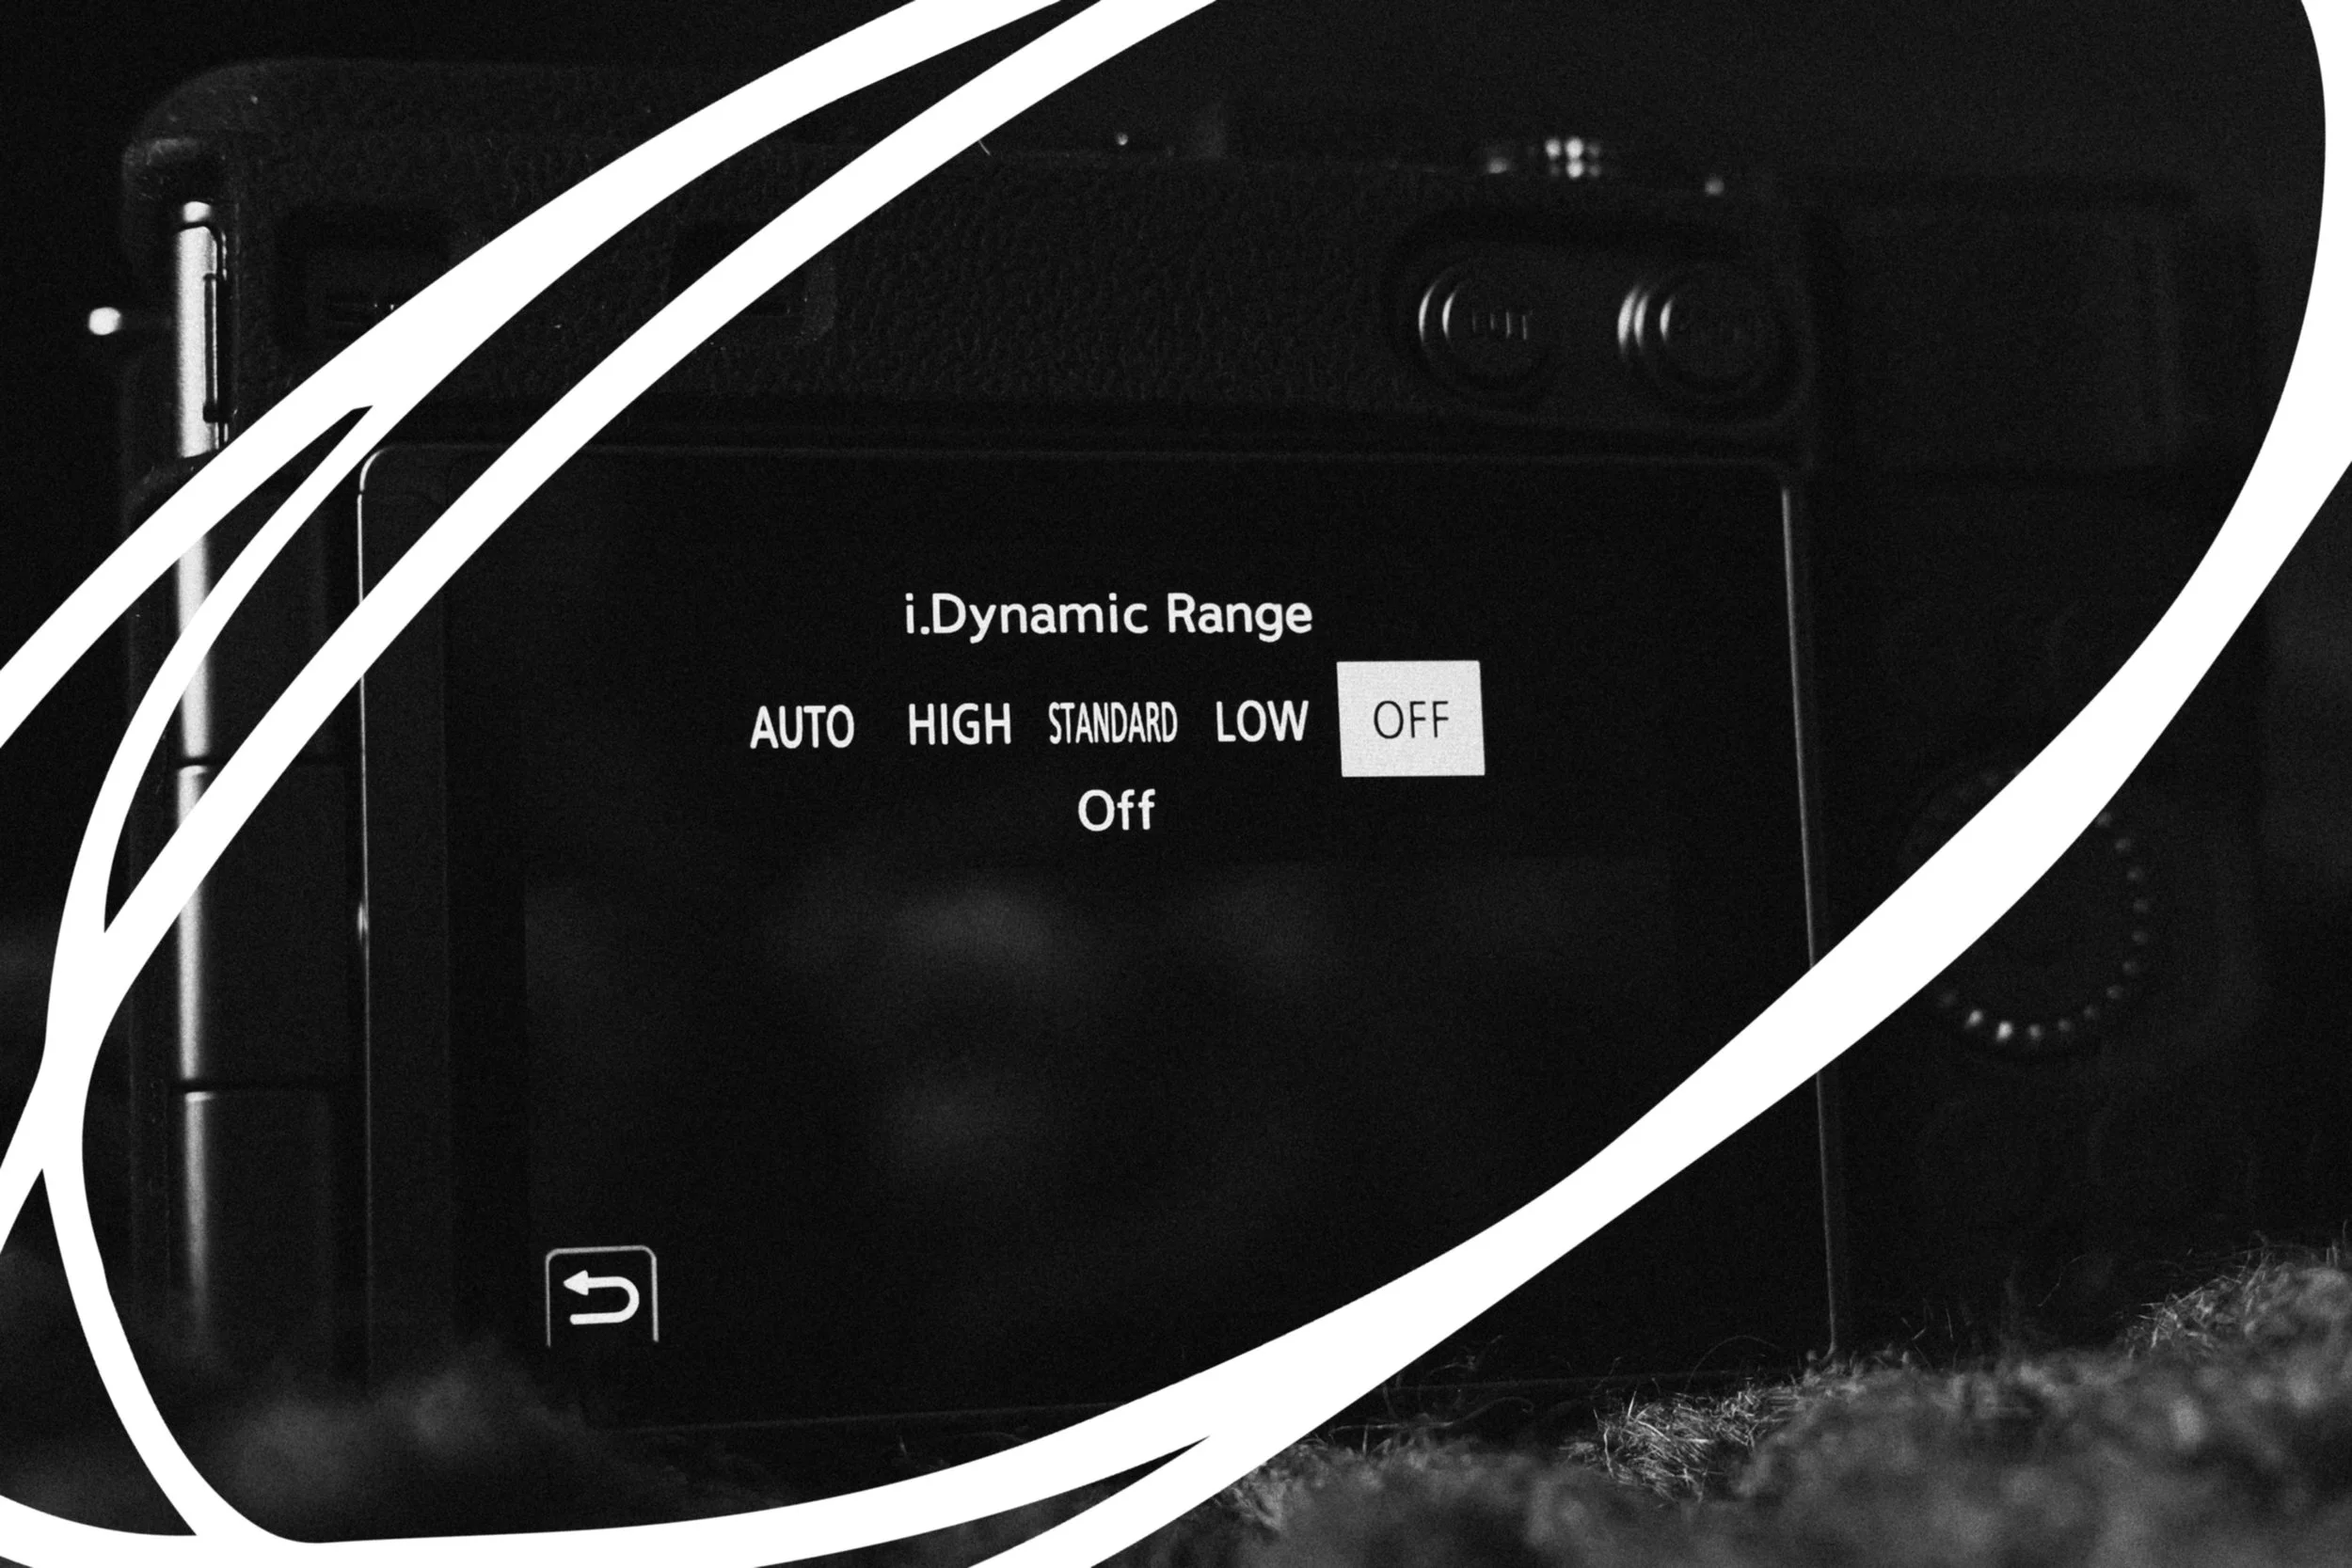
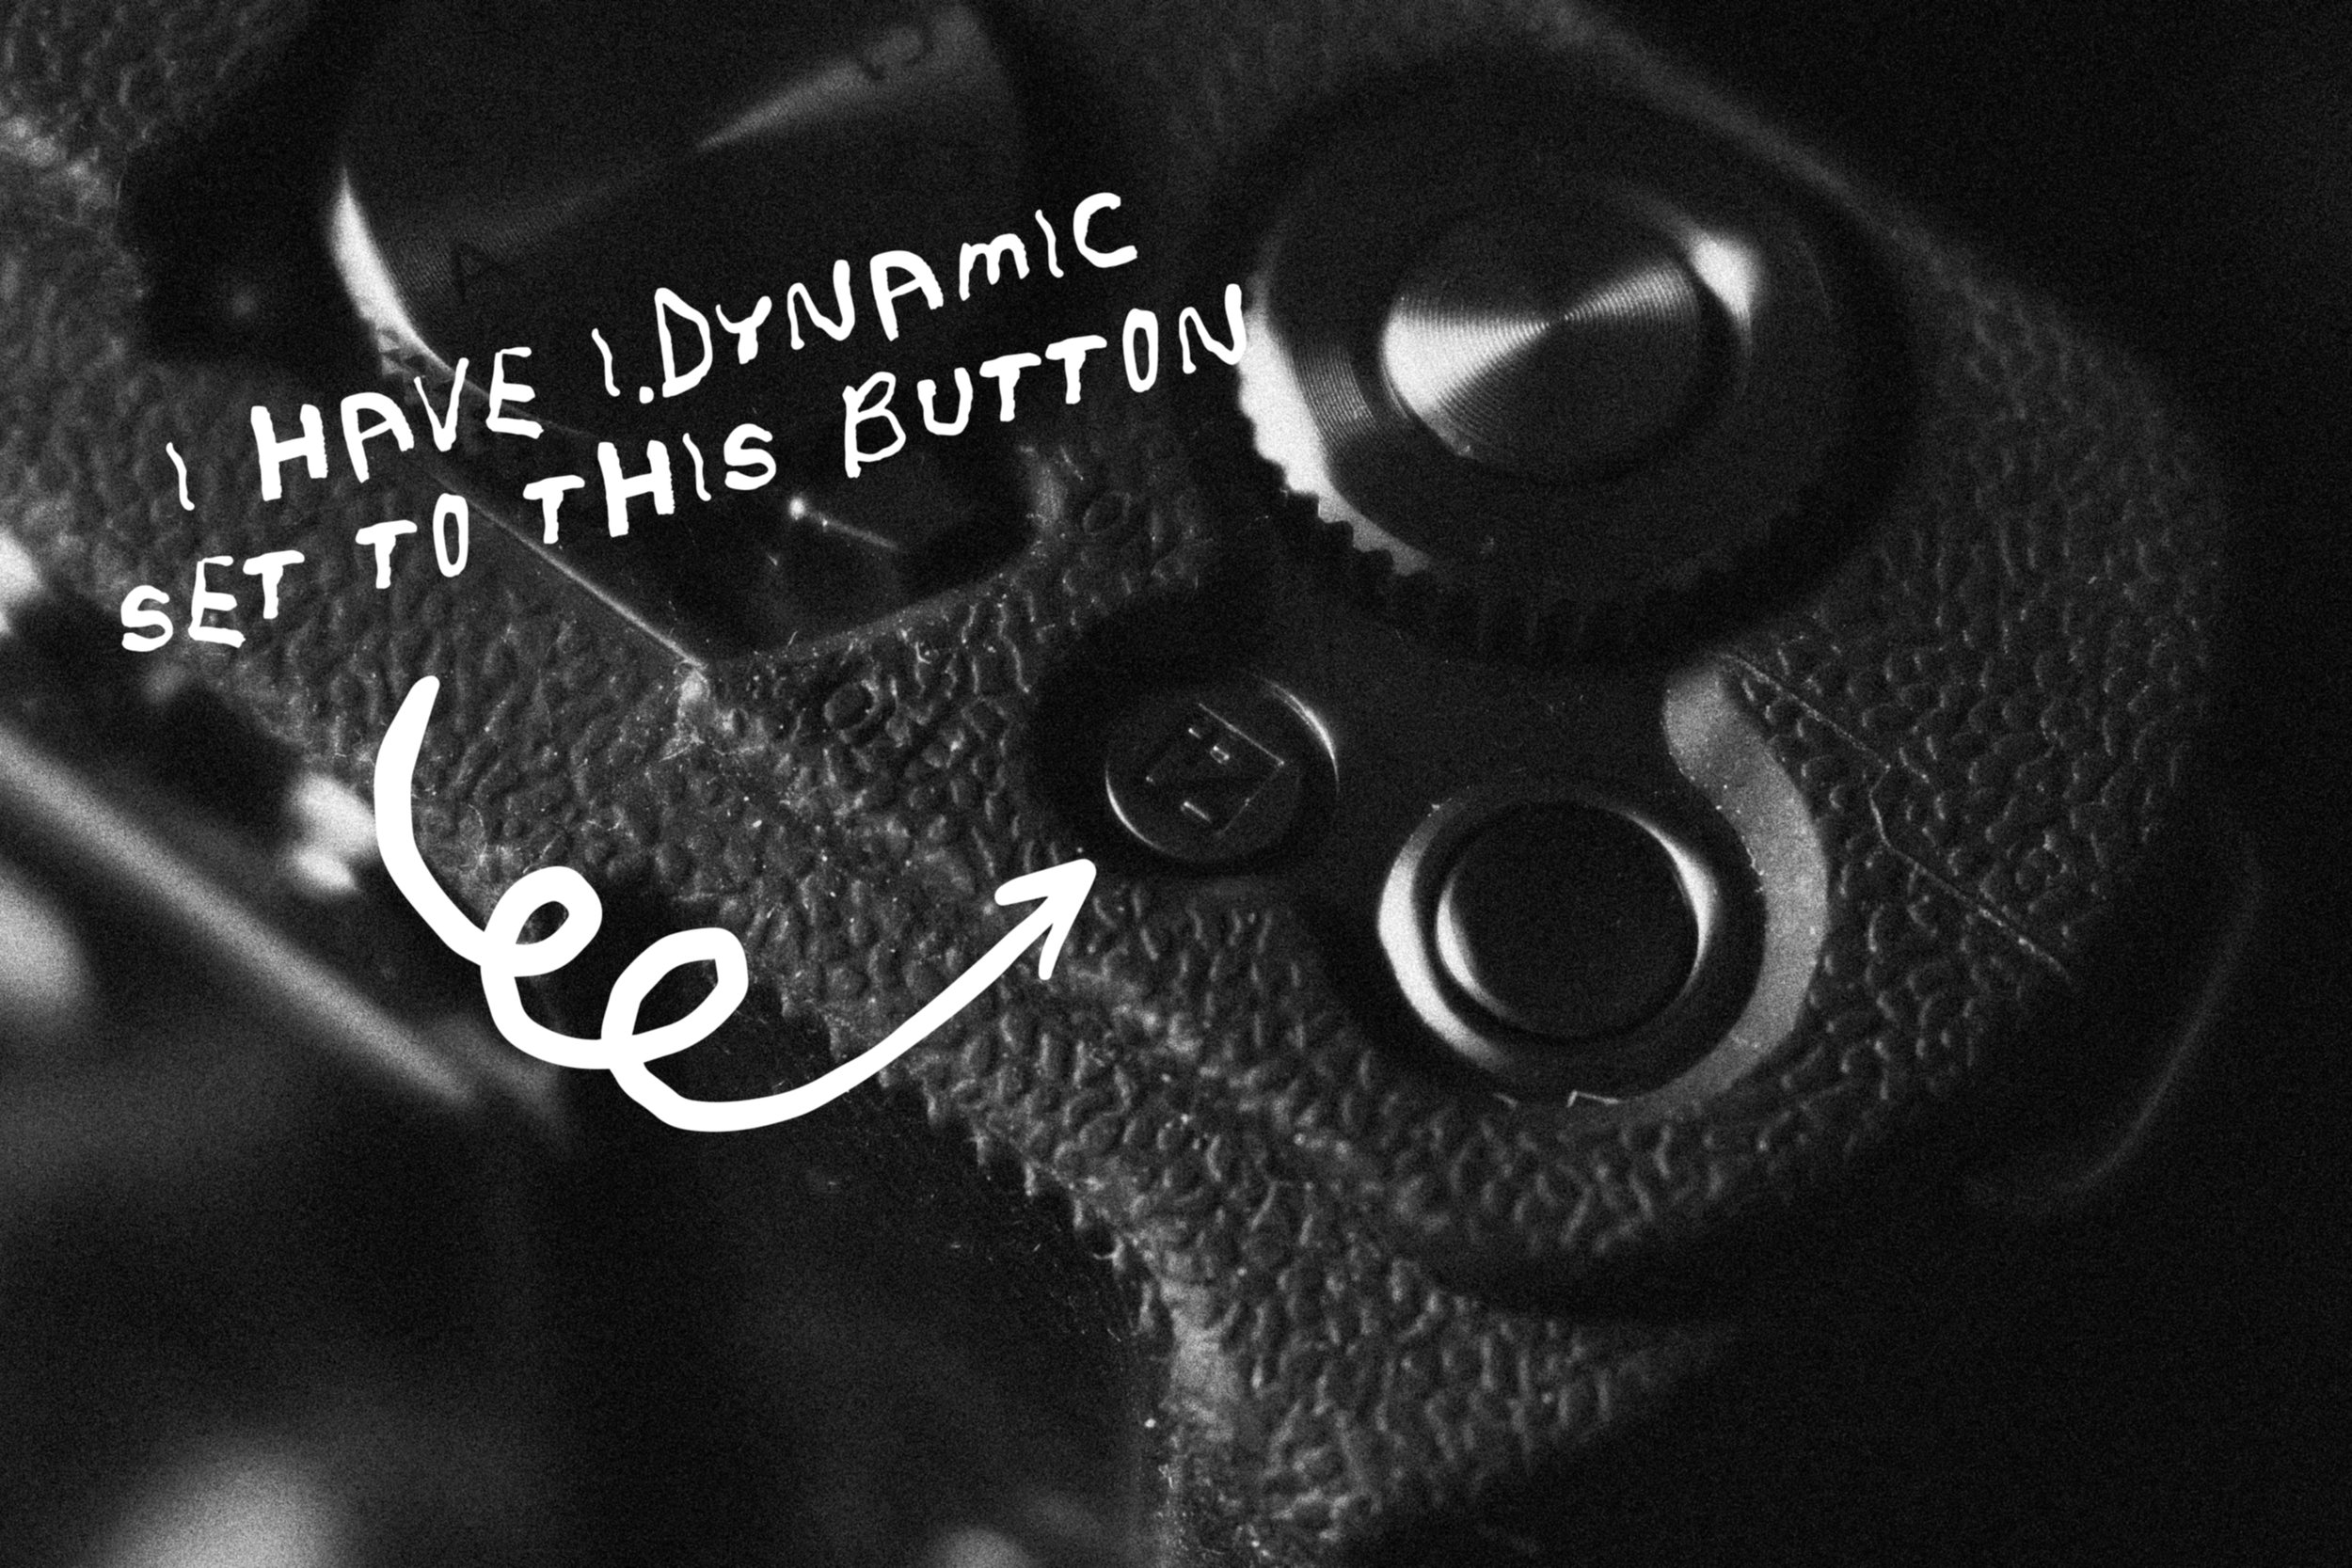
If you were just shooting RAW you wouldn’t need to touch this setting, but for getting the most out of your in-camera JPEGs I feel it’s a must! On my S9 I have my Exposure Compensation button mapped to change the i.Dynamic Range, something I do a lot.
Honestly I wish LUMIX would allow us to add an i.Dynamic Range option into each specific My Photo Style slot just like we can with White Balance. It would be such a time saver and make the experience of shooting JPEGs that extra bit better.
Histogram & LCD
Something I like to do especially with my S9 because of its lack of viewfinder, is to turn ON my Histogram to avoid the highlights blowing out. With the Histogram turned ON you can monitor your exposure easily, even if visibility is tricky in the sun.
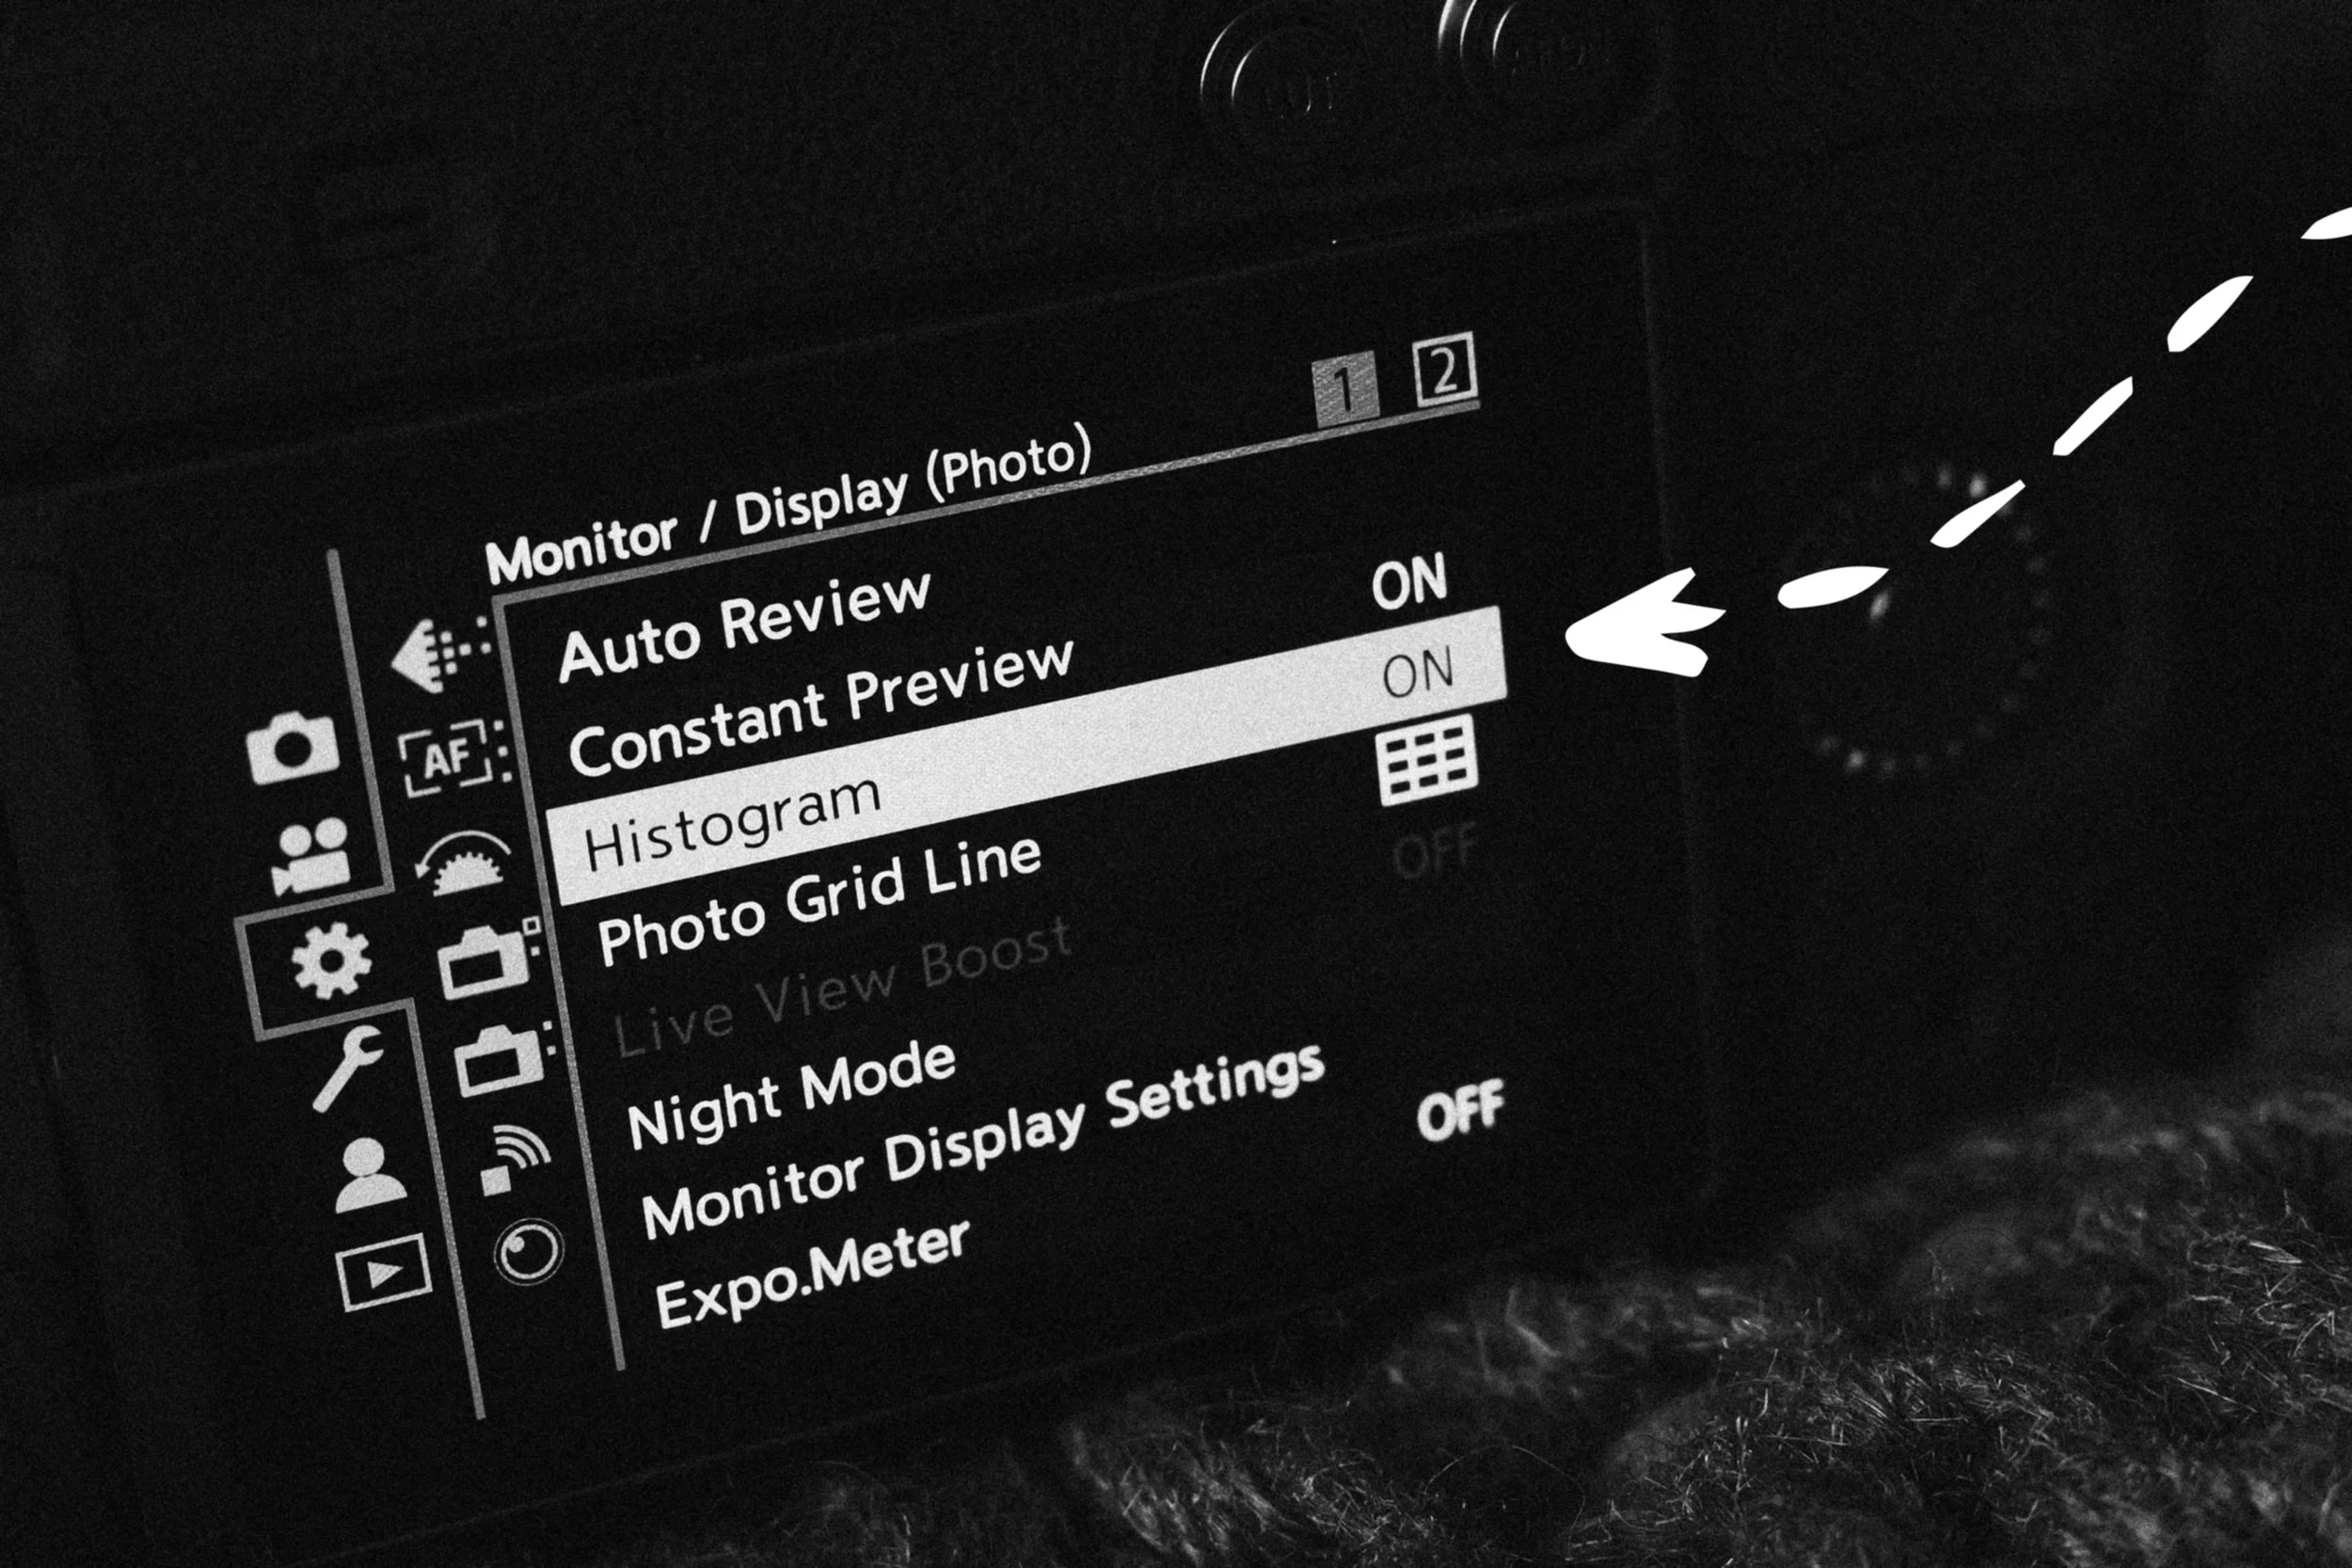
If you are not sure how to read the Histogram, you could turn on the Zebra Pattern which puts a stripy pattern over the blown out highlights. As you dial the exposure down, the stripy pattern will disappear. I personally find it distracting and my preference is the Histogram. It’s super handy and has saved my JPEGs from blowing out so many times.
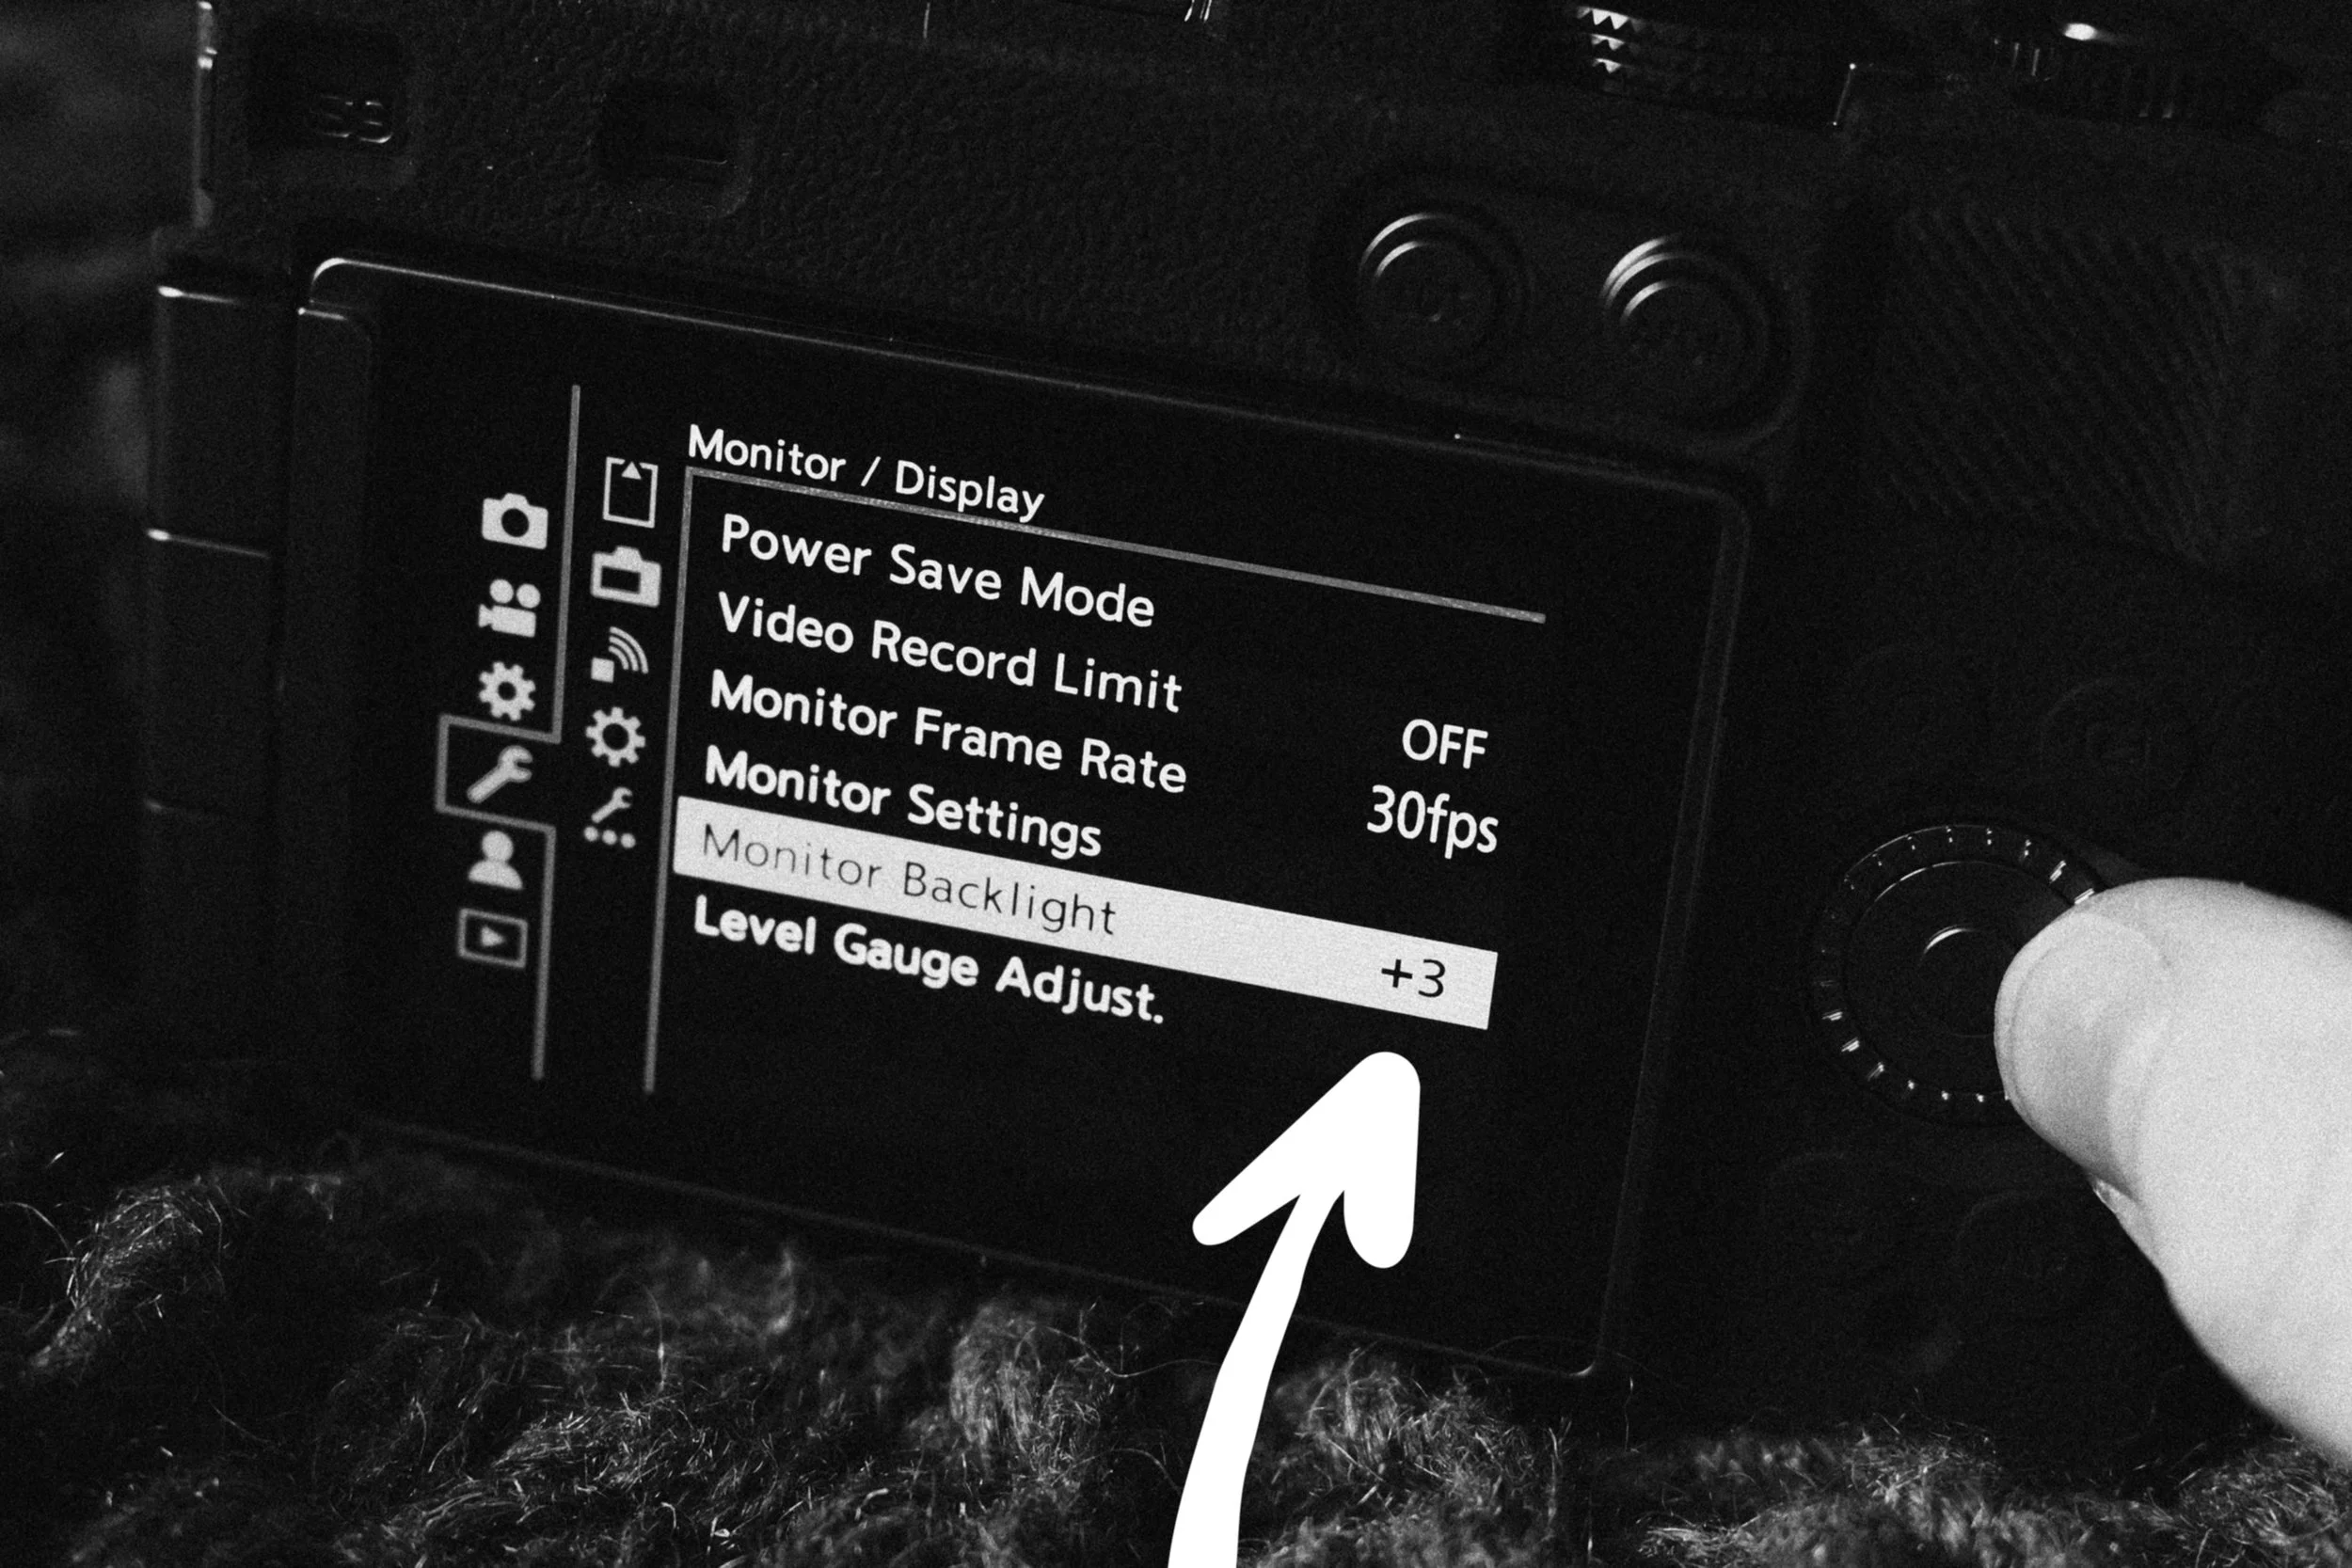
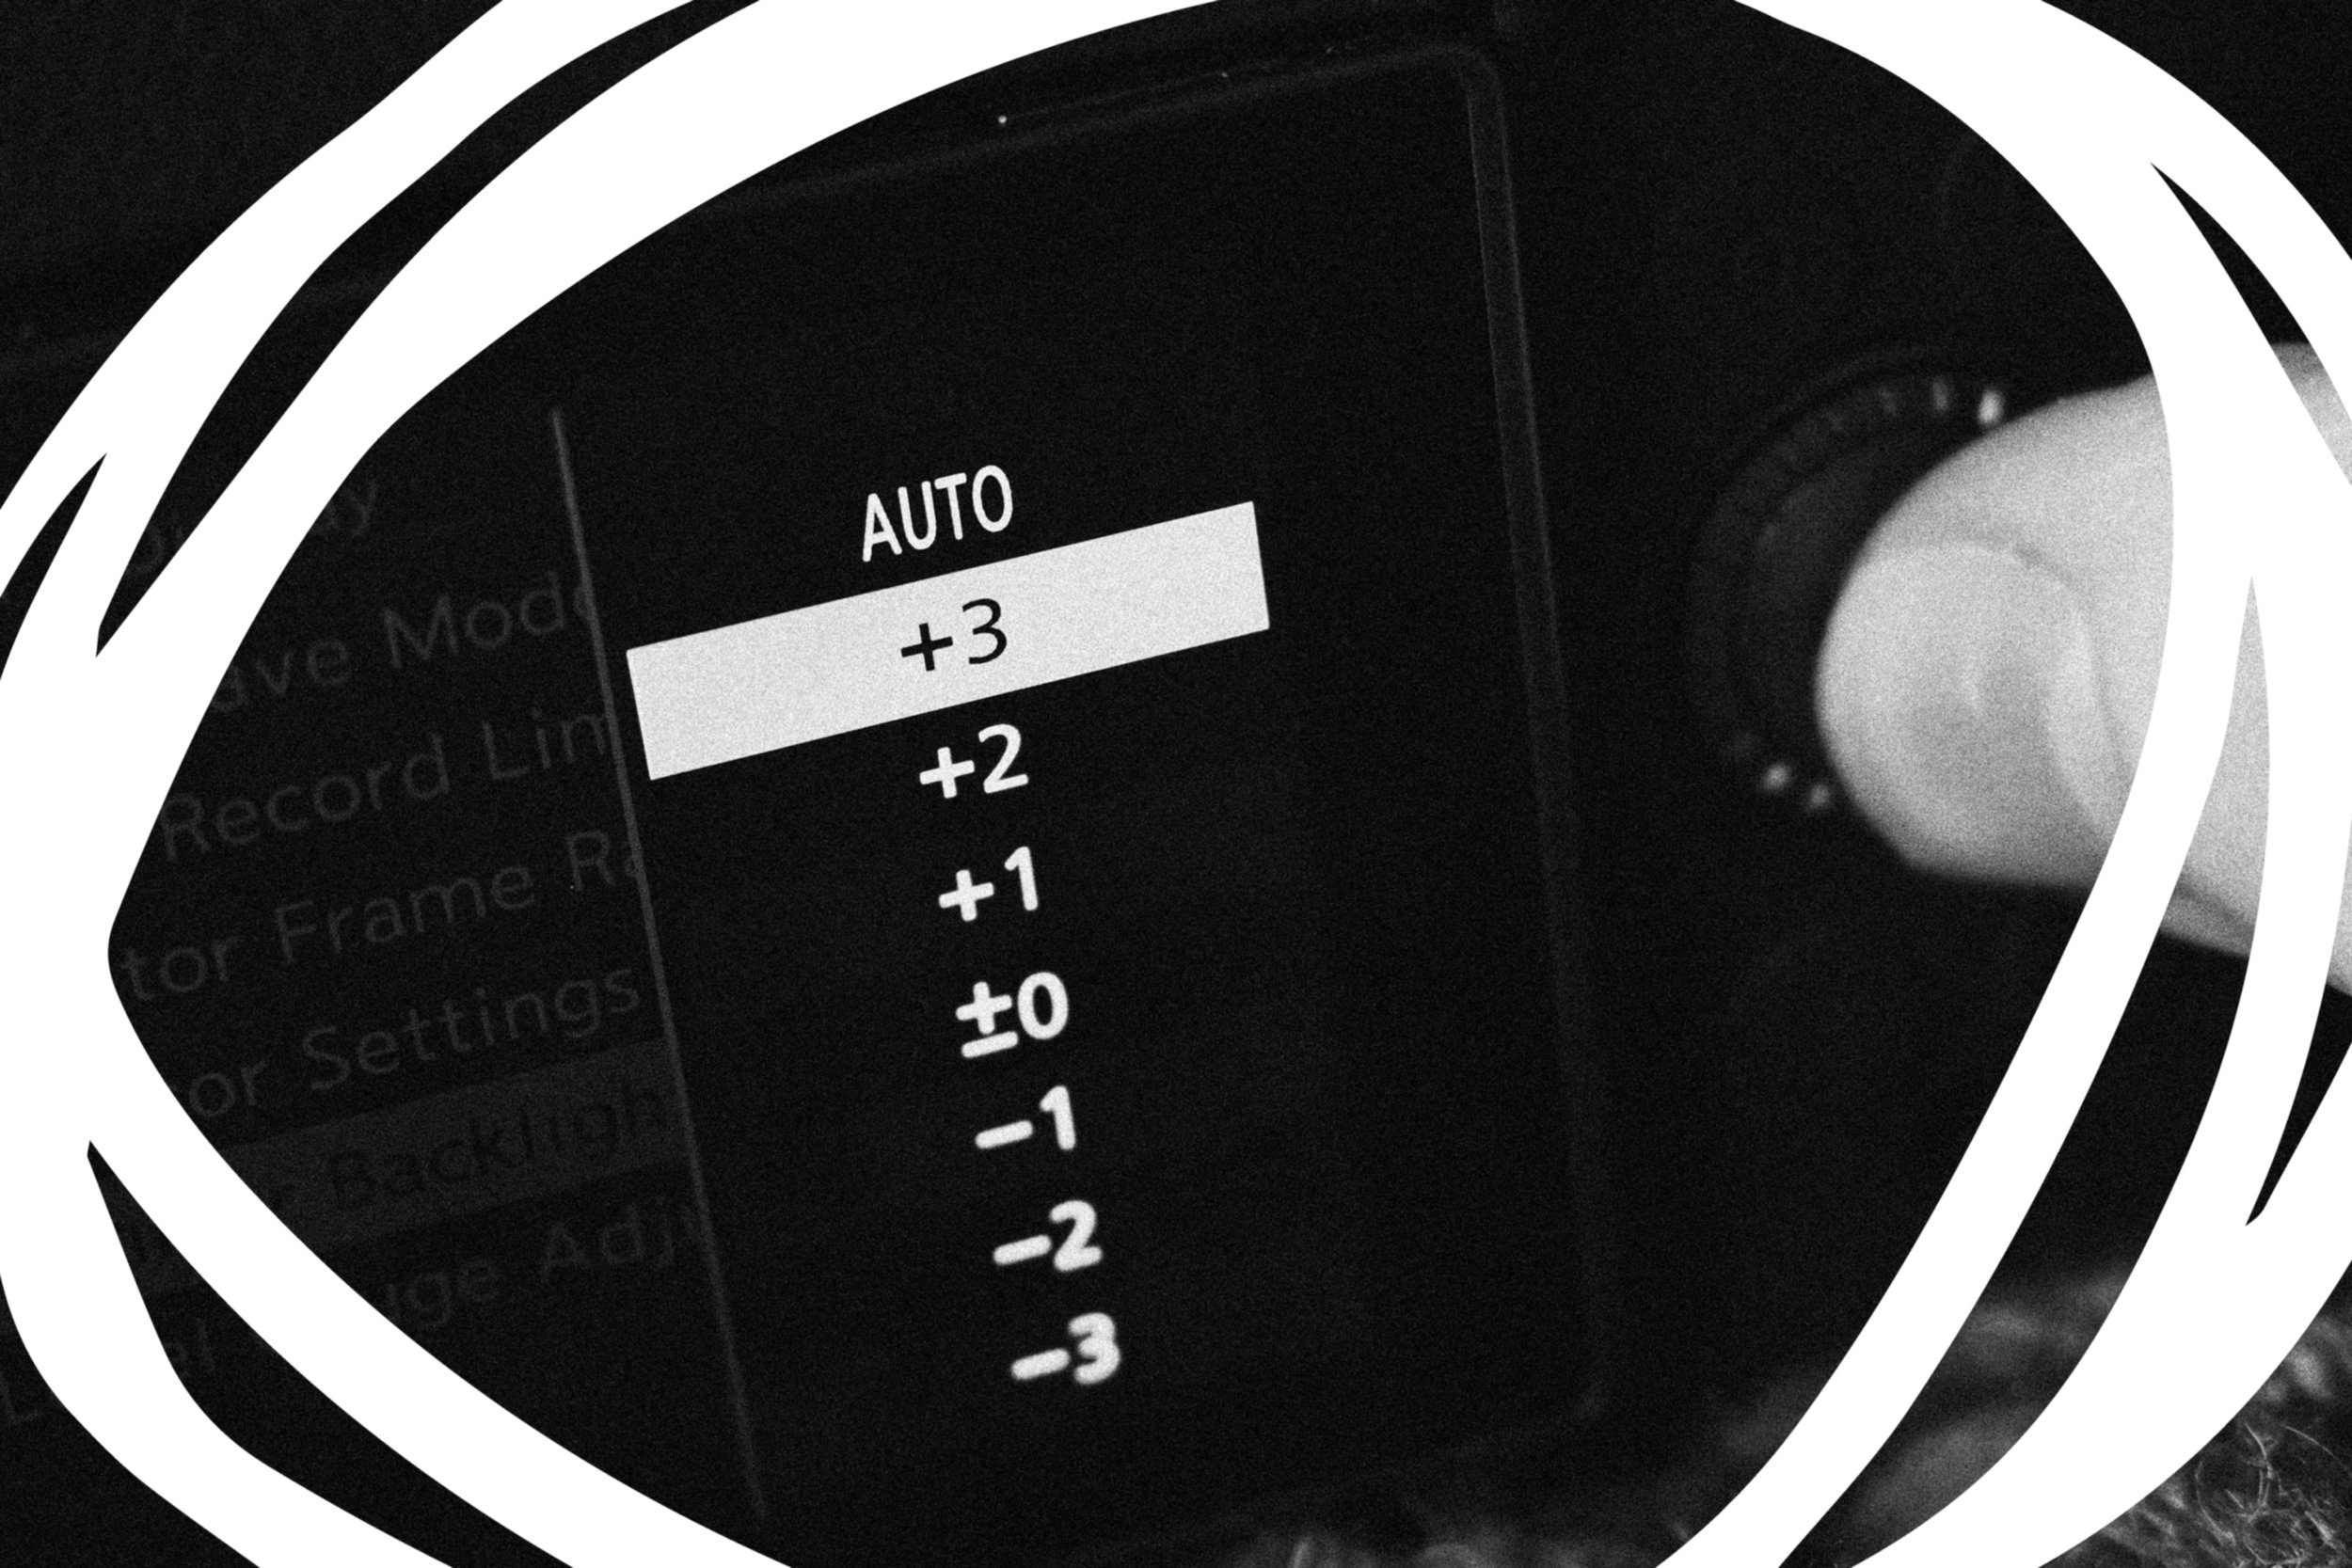
I also recommend turning the Monitor Backlight setting all the way up to the brightest setting. This will massively help you see what you are shooting, in any scenario. Combine this with the Histogram and you’ll be perfectly prepared when it comes to properly exposing your shots.
Downloading LUMIX LUTs
Once all these things are set up how you like them, all that’s left is to gather up some LUTs to shoot your JPEGs with. If you don’t already know, LUTs are kind of like presets or filters for your images. They are more commonly used for colour grading video footage but with our LUMIX cameras we can use them to capture photographs too.
All a LUT file really does to your image (when loaded correctly into your LUMIX camera) is take the camera’s own colours and tones, and change them to the colours and tones written into the LUT file. I always imagine my LUTs inside my LUMIX camera are talking to the camera saying things like… “right we have a yellow tone, let’s make it more golden… oh look bright green, let’s tone that down a little”…
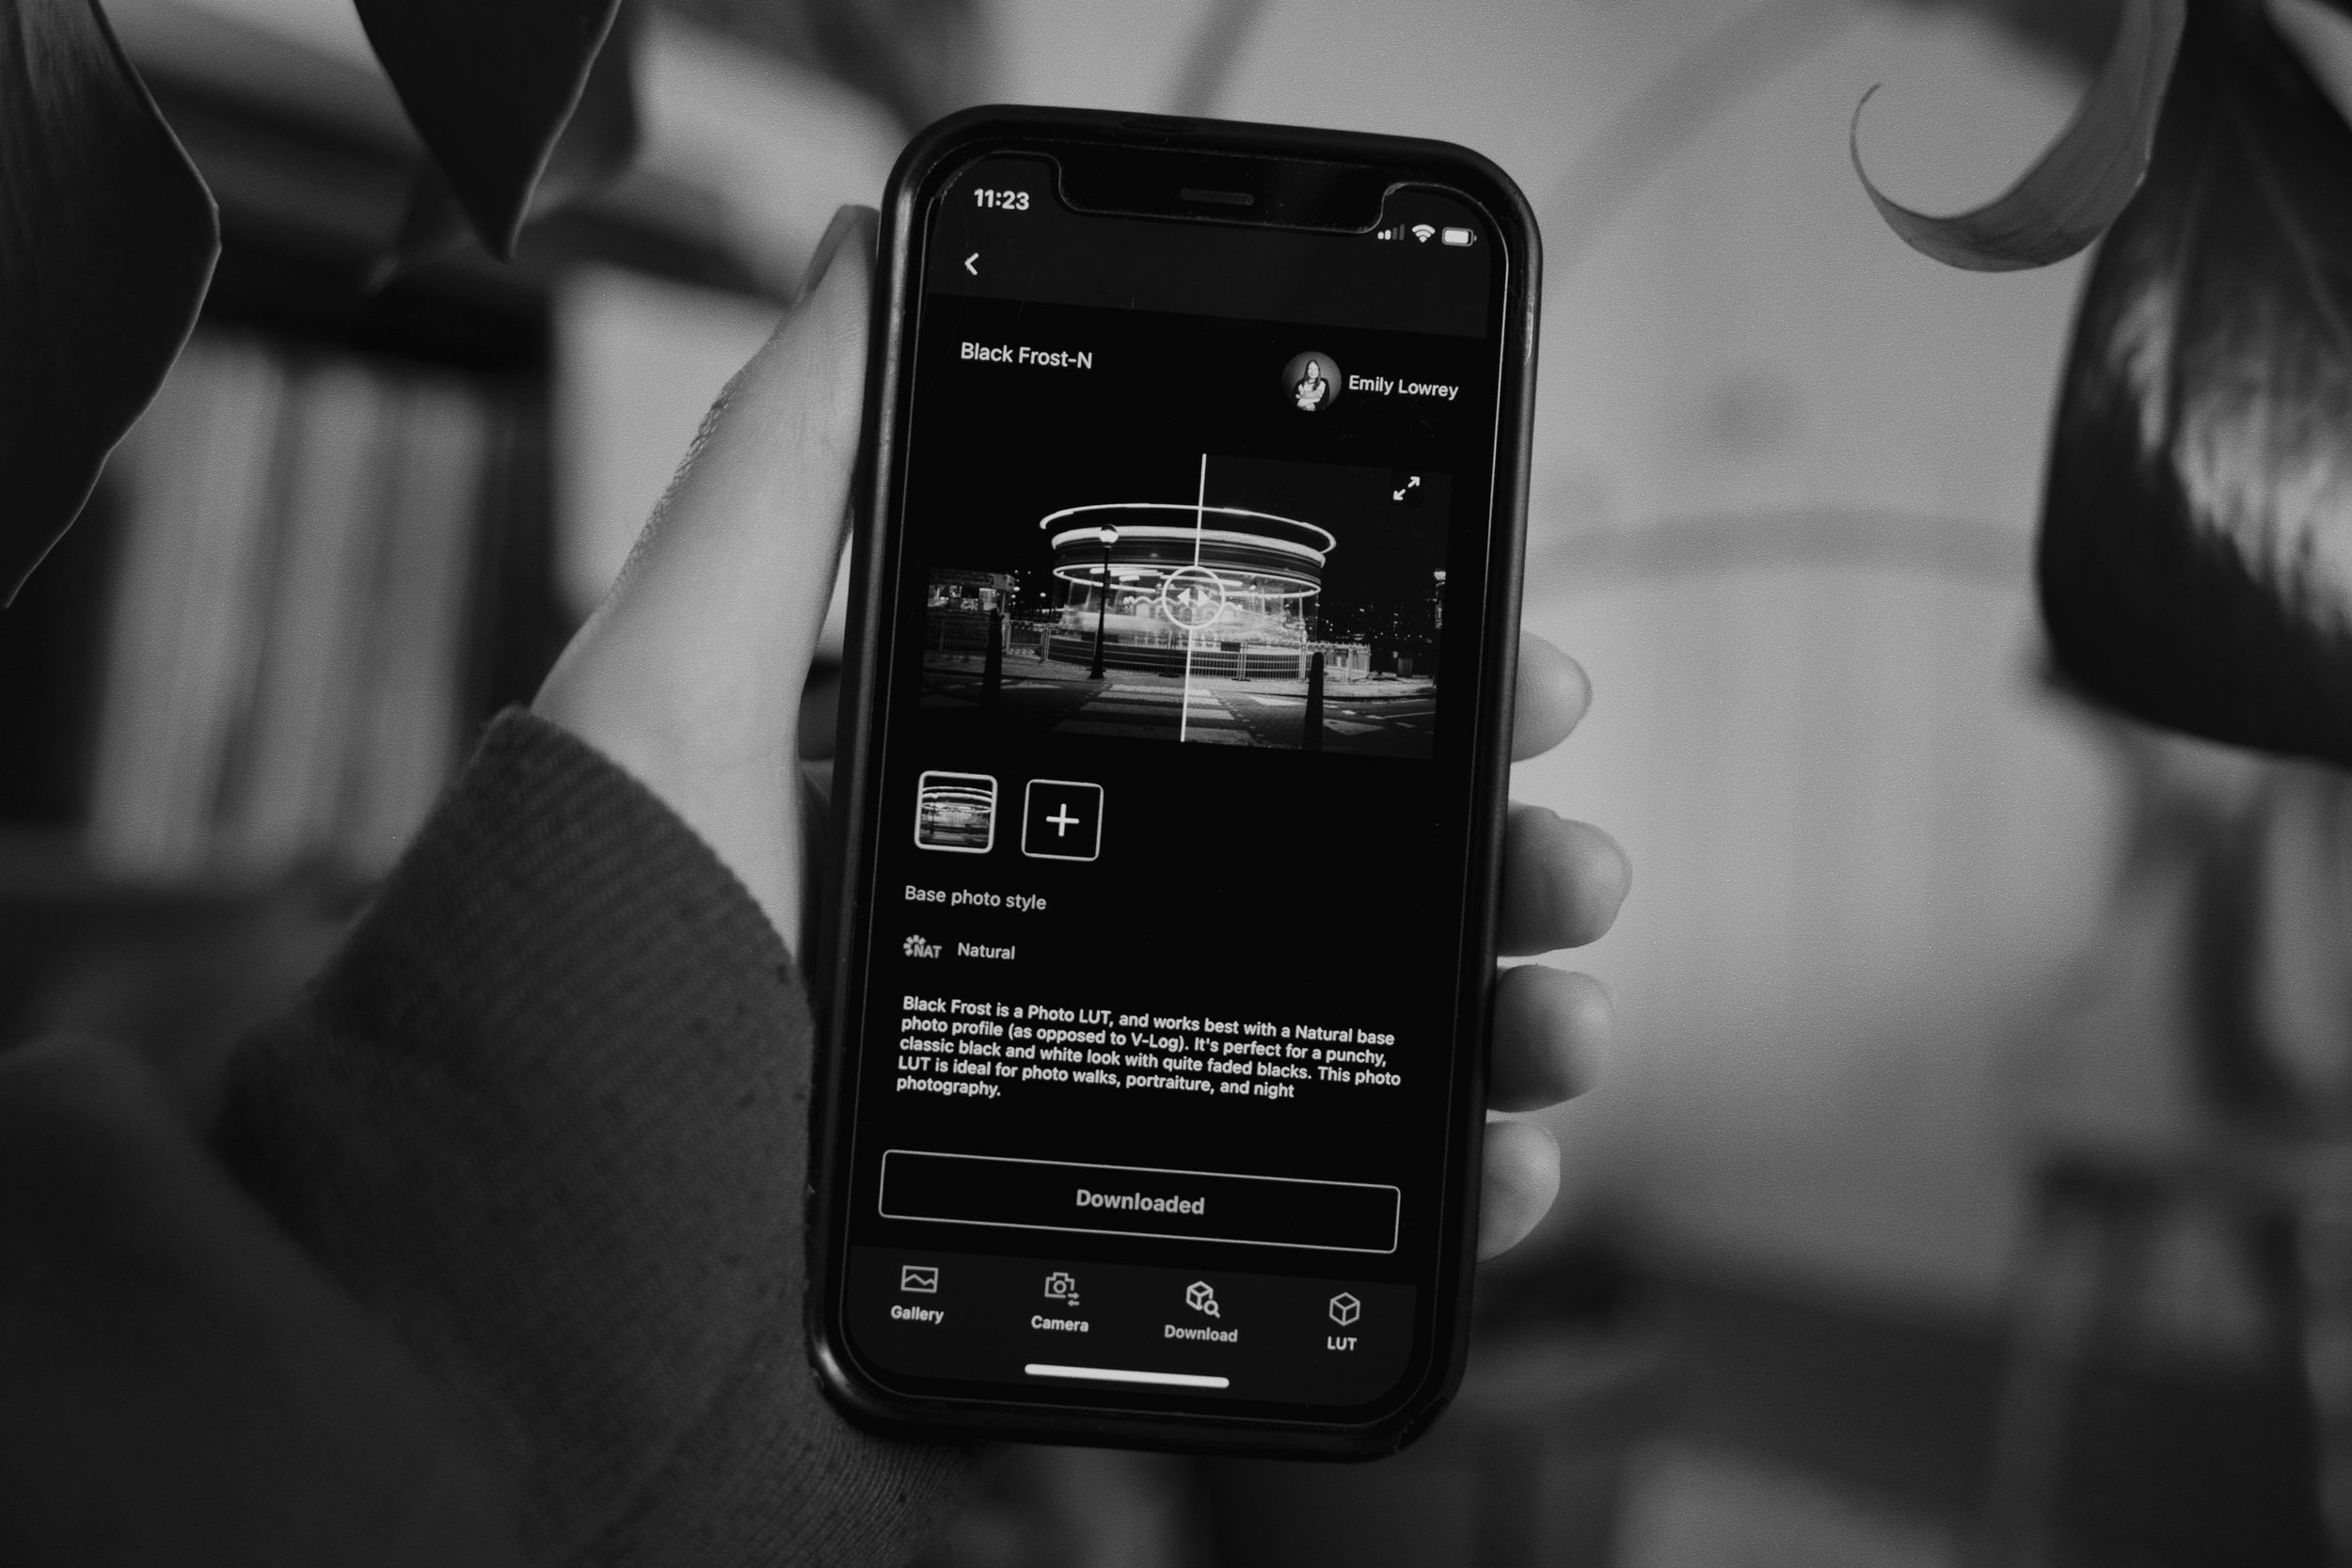
Maybe you already have collected some LUT files you like, but if not you can find loads of great free LUTs over on the LUMIX Lab App or you can browse through and download all the LUTs I’ve designed by hitting the button below…
If you are using the LUMIX Lab App the steps to take are… Download the app, find some photography LUTs that you like the look of, download and transfer them to your LUMIX camera’s LUT Library. If you need a little extra help with this, follow my guide here…
https://www.rossandhisjpegs.com/blog/getting-started-with-luts
Getting great looking JPEGs straight out of the camera can be as easy as choosing a LUT from the LUMIX Lab App, transferring it to your camera, hitting the LUT button and away you go.
What some people don’t realise however is that there is a whole world of customisation available inside their LUMIX camera waiting to be explored. There are settings just asking to be tweaked and played around with. So on to the next part of this blog post which includes loading your chosen LUTs into one of your My Photo Style slots and tweaking/saving some in-camera settings to create your first LUMIX ‘look’.
Designing LUMIX ‘looks’
My Photo Style
Inside your LUMIX camera, there are ten My Photo Style slots. In your camera’s menu open Photo Styles, move across until you find My Photo Style 01 and then move down through all of the setting options until you reach LUT1. It’s here that we’re going to load our first LUT.
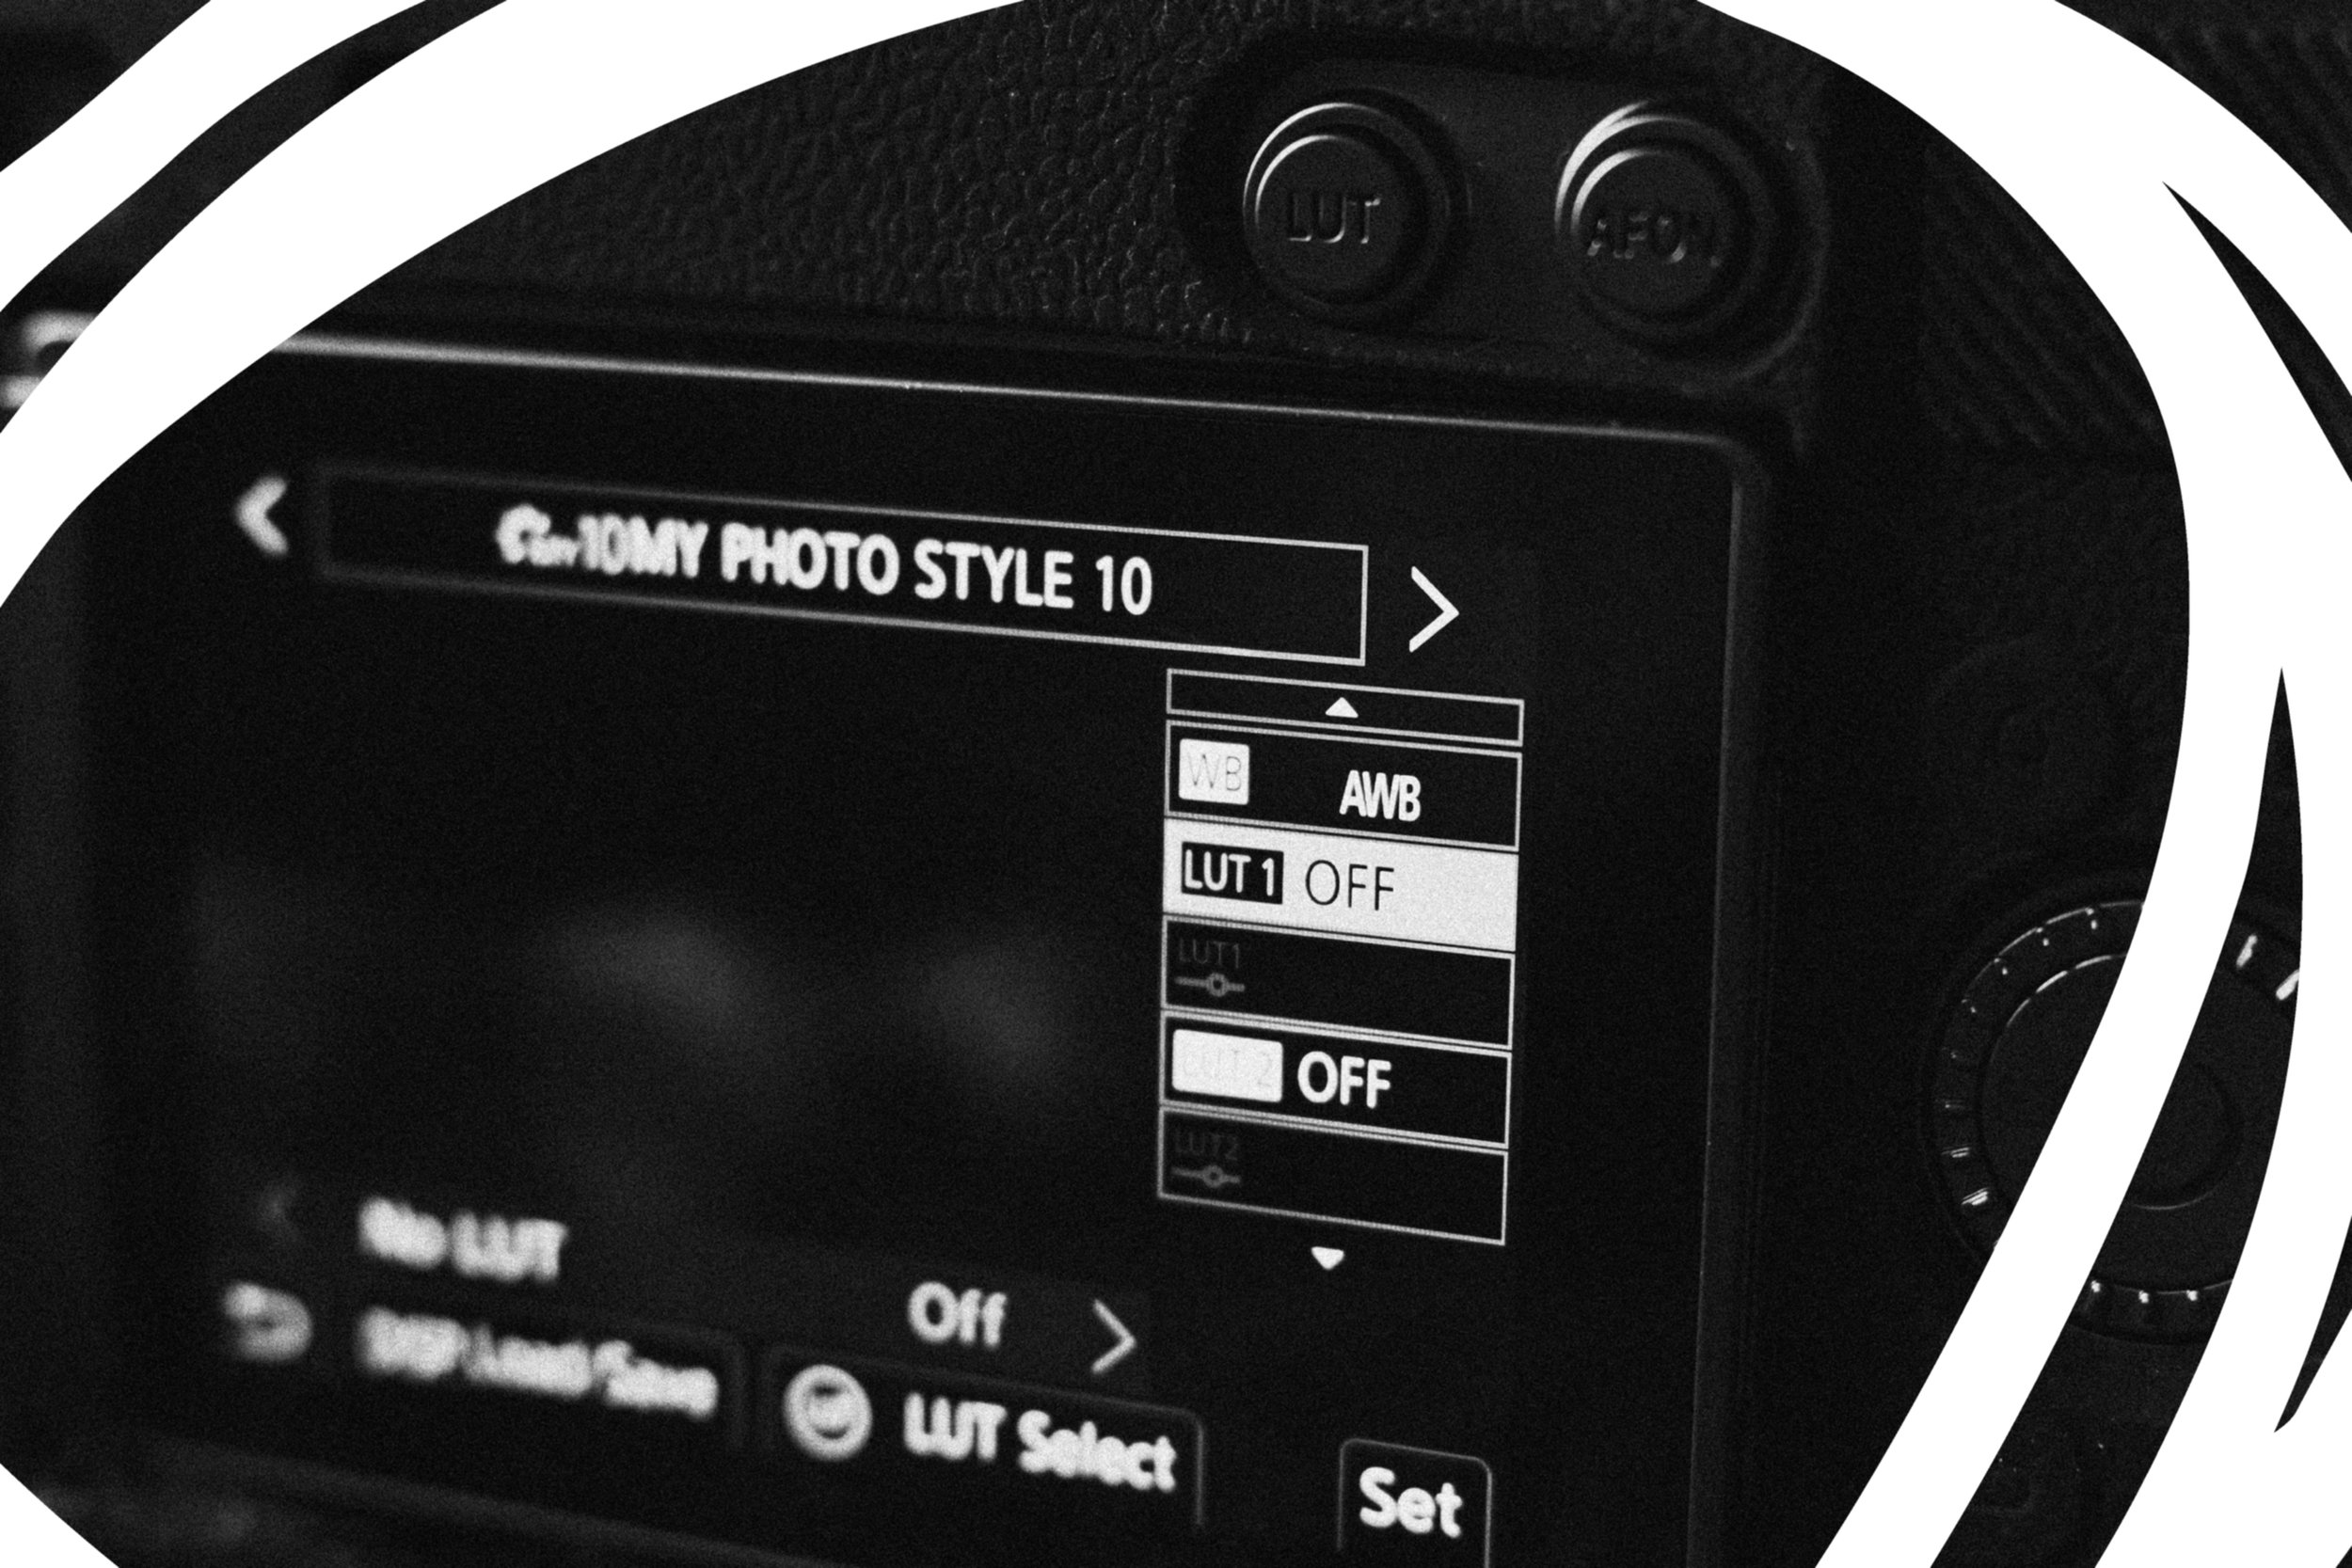
Choosing A LUT
On the S9 press the LUT Button (different on other LUMIX cameras but just follow the on-screen prompts for guidance) to cycle through all of the LUTs you’ve transferred to your LUT Library and select the one you want to shoot with.
LUT Opacity & Stacking
There are two really incredible things about using LUTs specifically in My Photo Styles… The first is that you can adjust the LUT Opacity or the strength of a LUT. Personally I design my LUTs on the strong side for this reason. My theory is that in-camera they can always be turned down with the LUT Opacity, but never turned up.
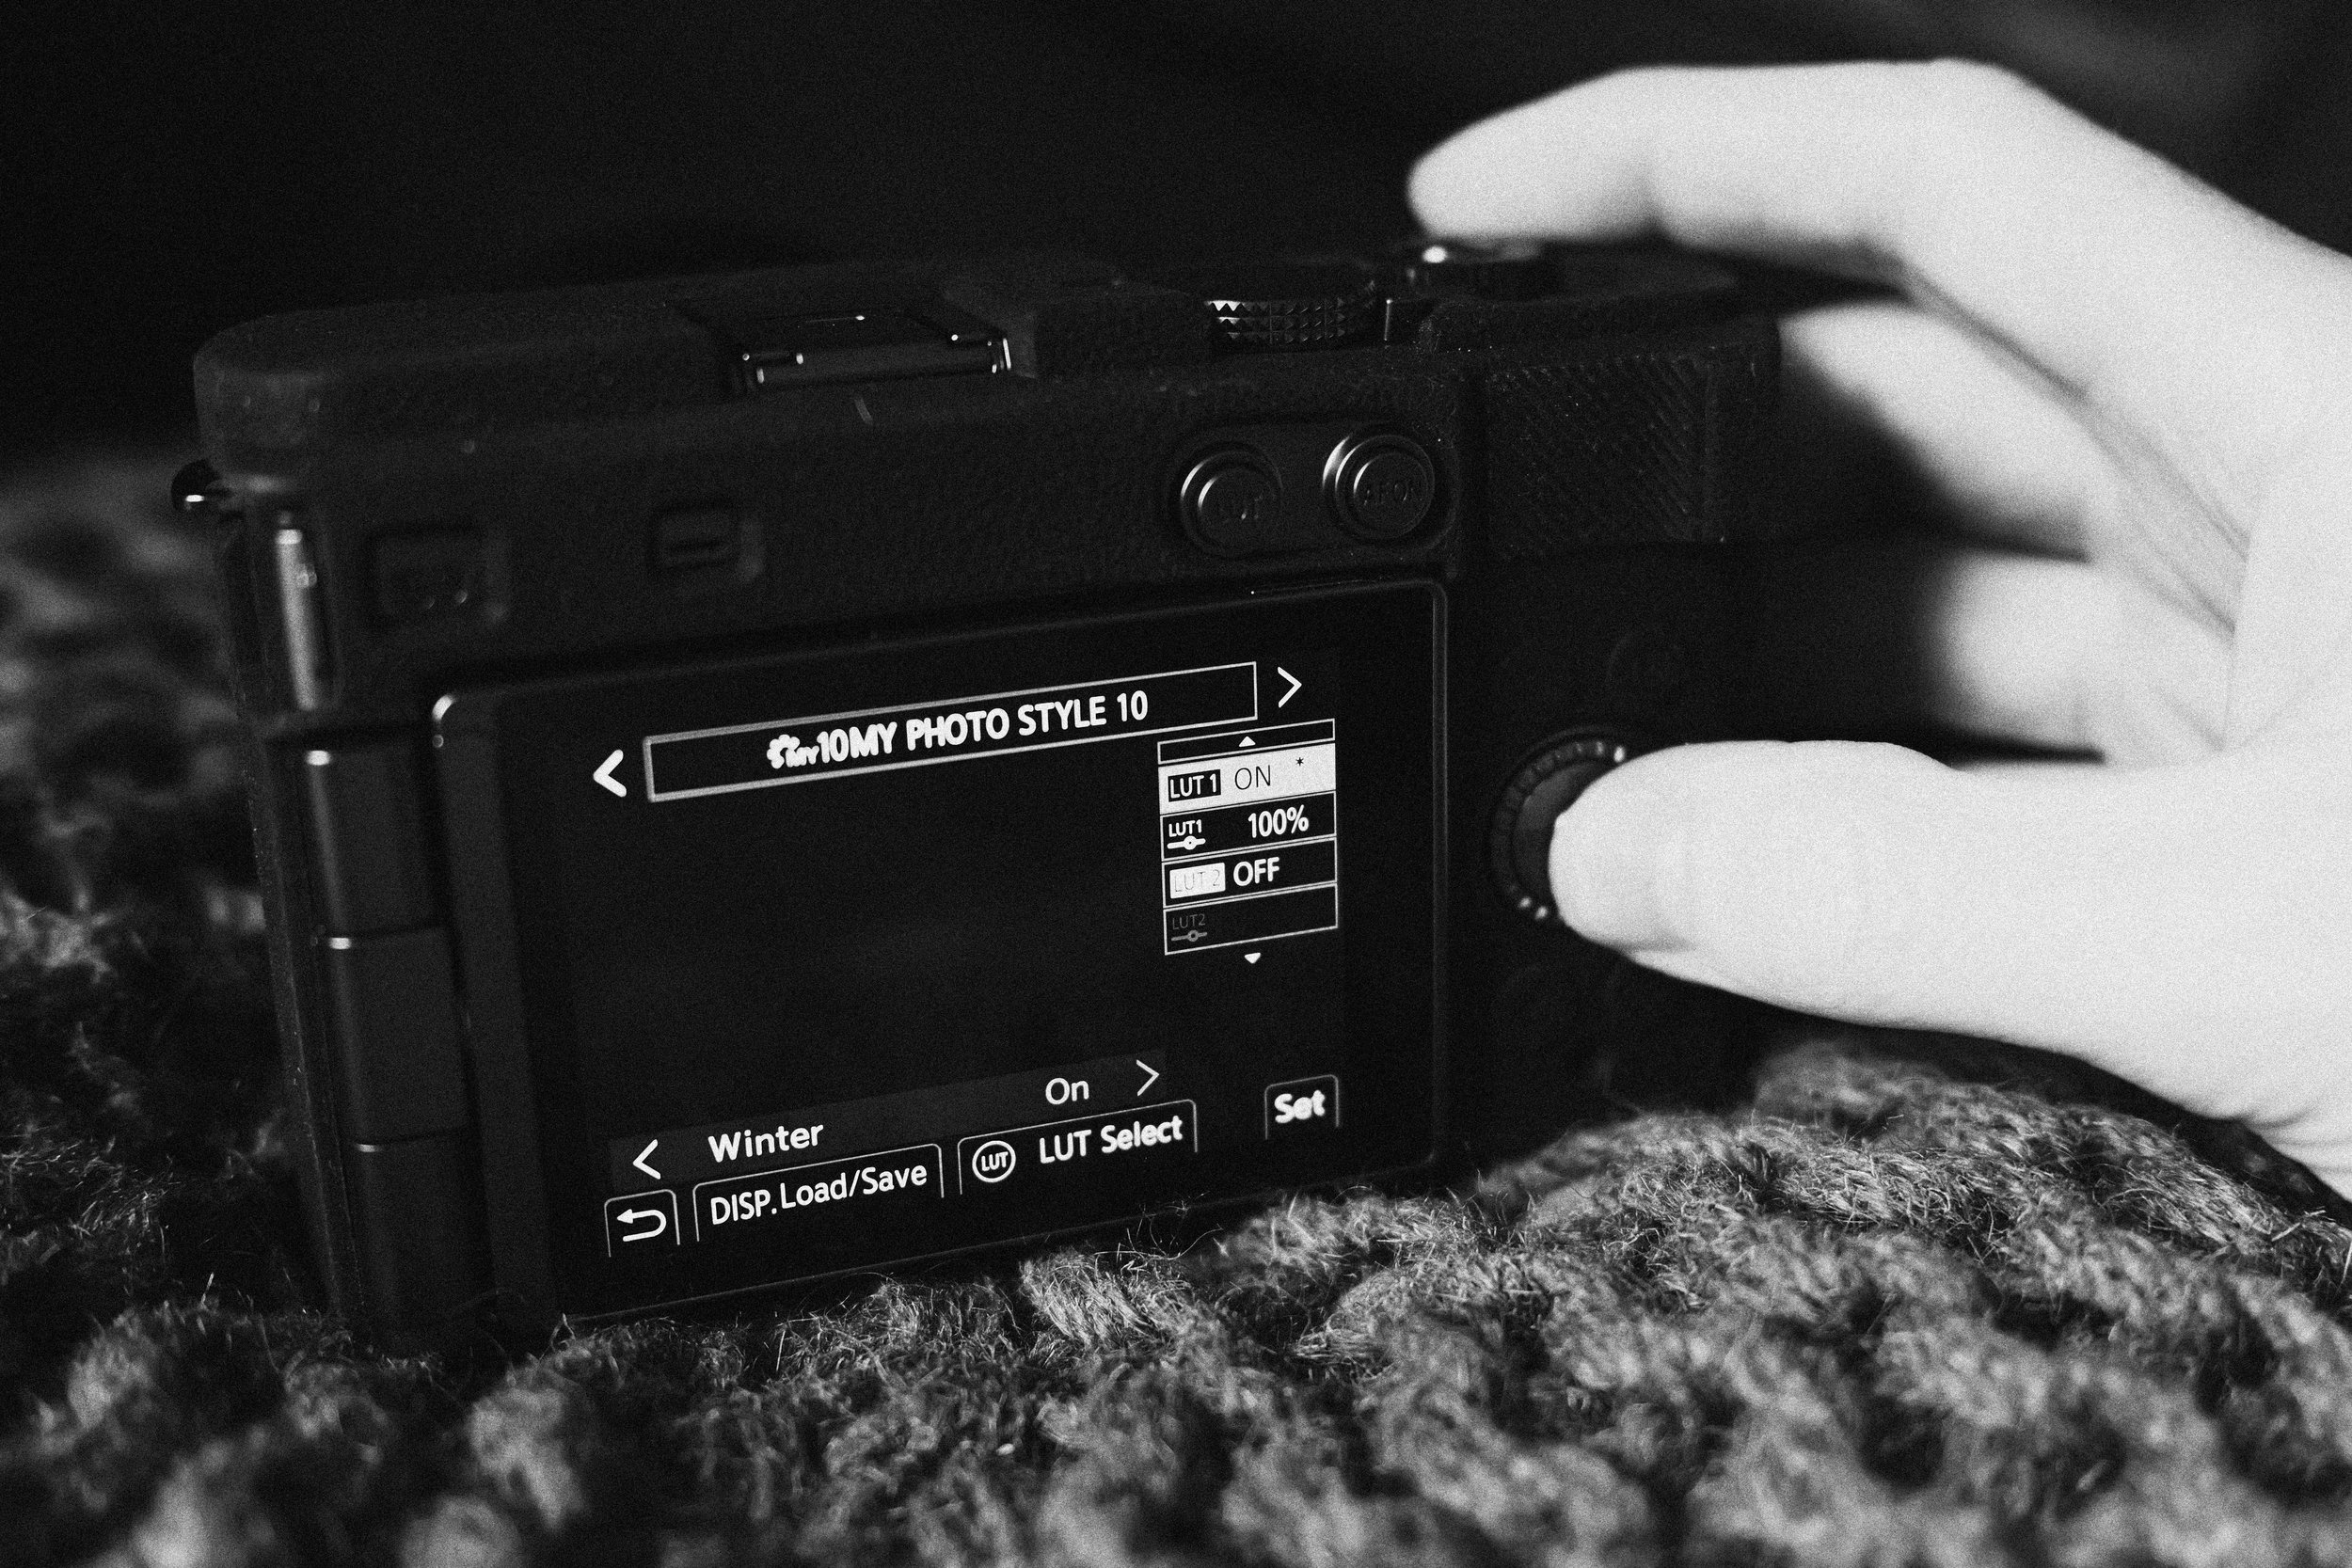
If you are using my LUTs, or LUTs from other creators, and they’re looking far too strong for what you’re shooting… before you write them off or touch any other settings, make sure to adjust your LUT Opacity. My recommendation for my own LUTs is to start at 50% and work your way up or down the LUT Opacity setting until you have it dialled in the strength exactly how you like it.
The second really cool feature with loading LUTs into My Photo Style slots is that you can stack two LUTs on top of each other! By playing around with stacking LUTs and changing their opacities, you can come up with some really awesome, creative and unique ‘looks’ for your JPEGs.
Other Settings
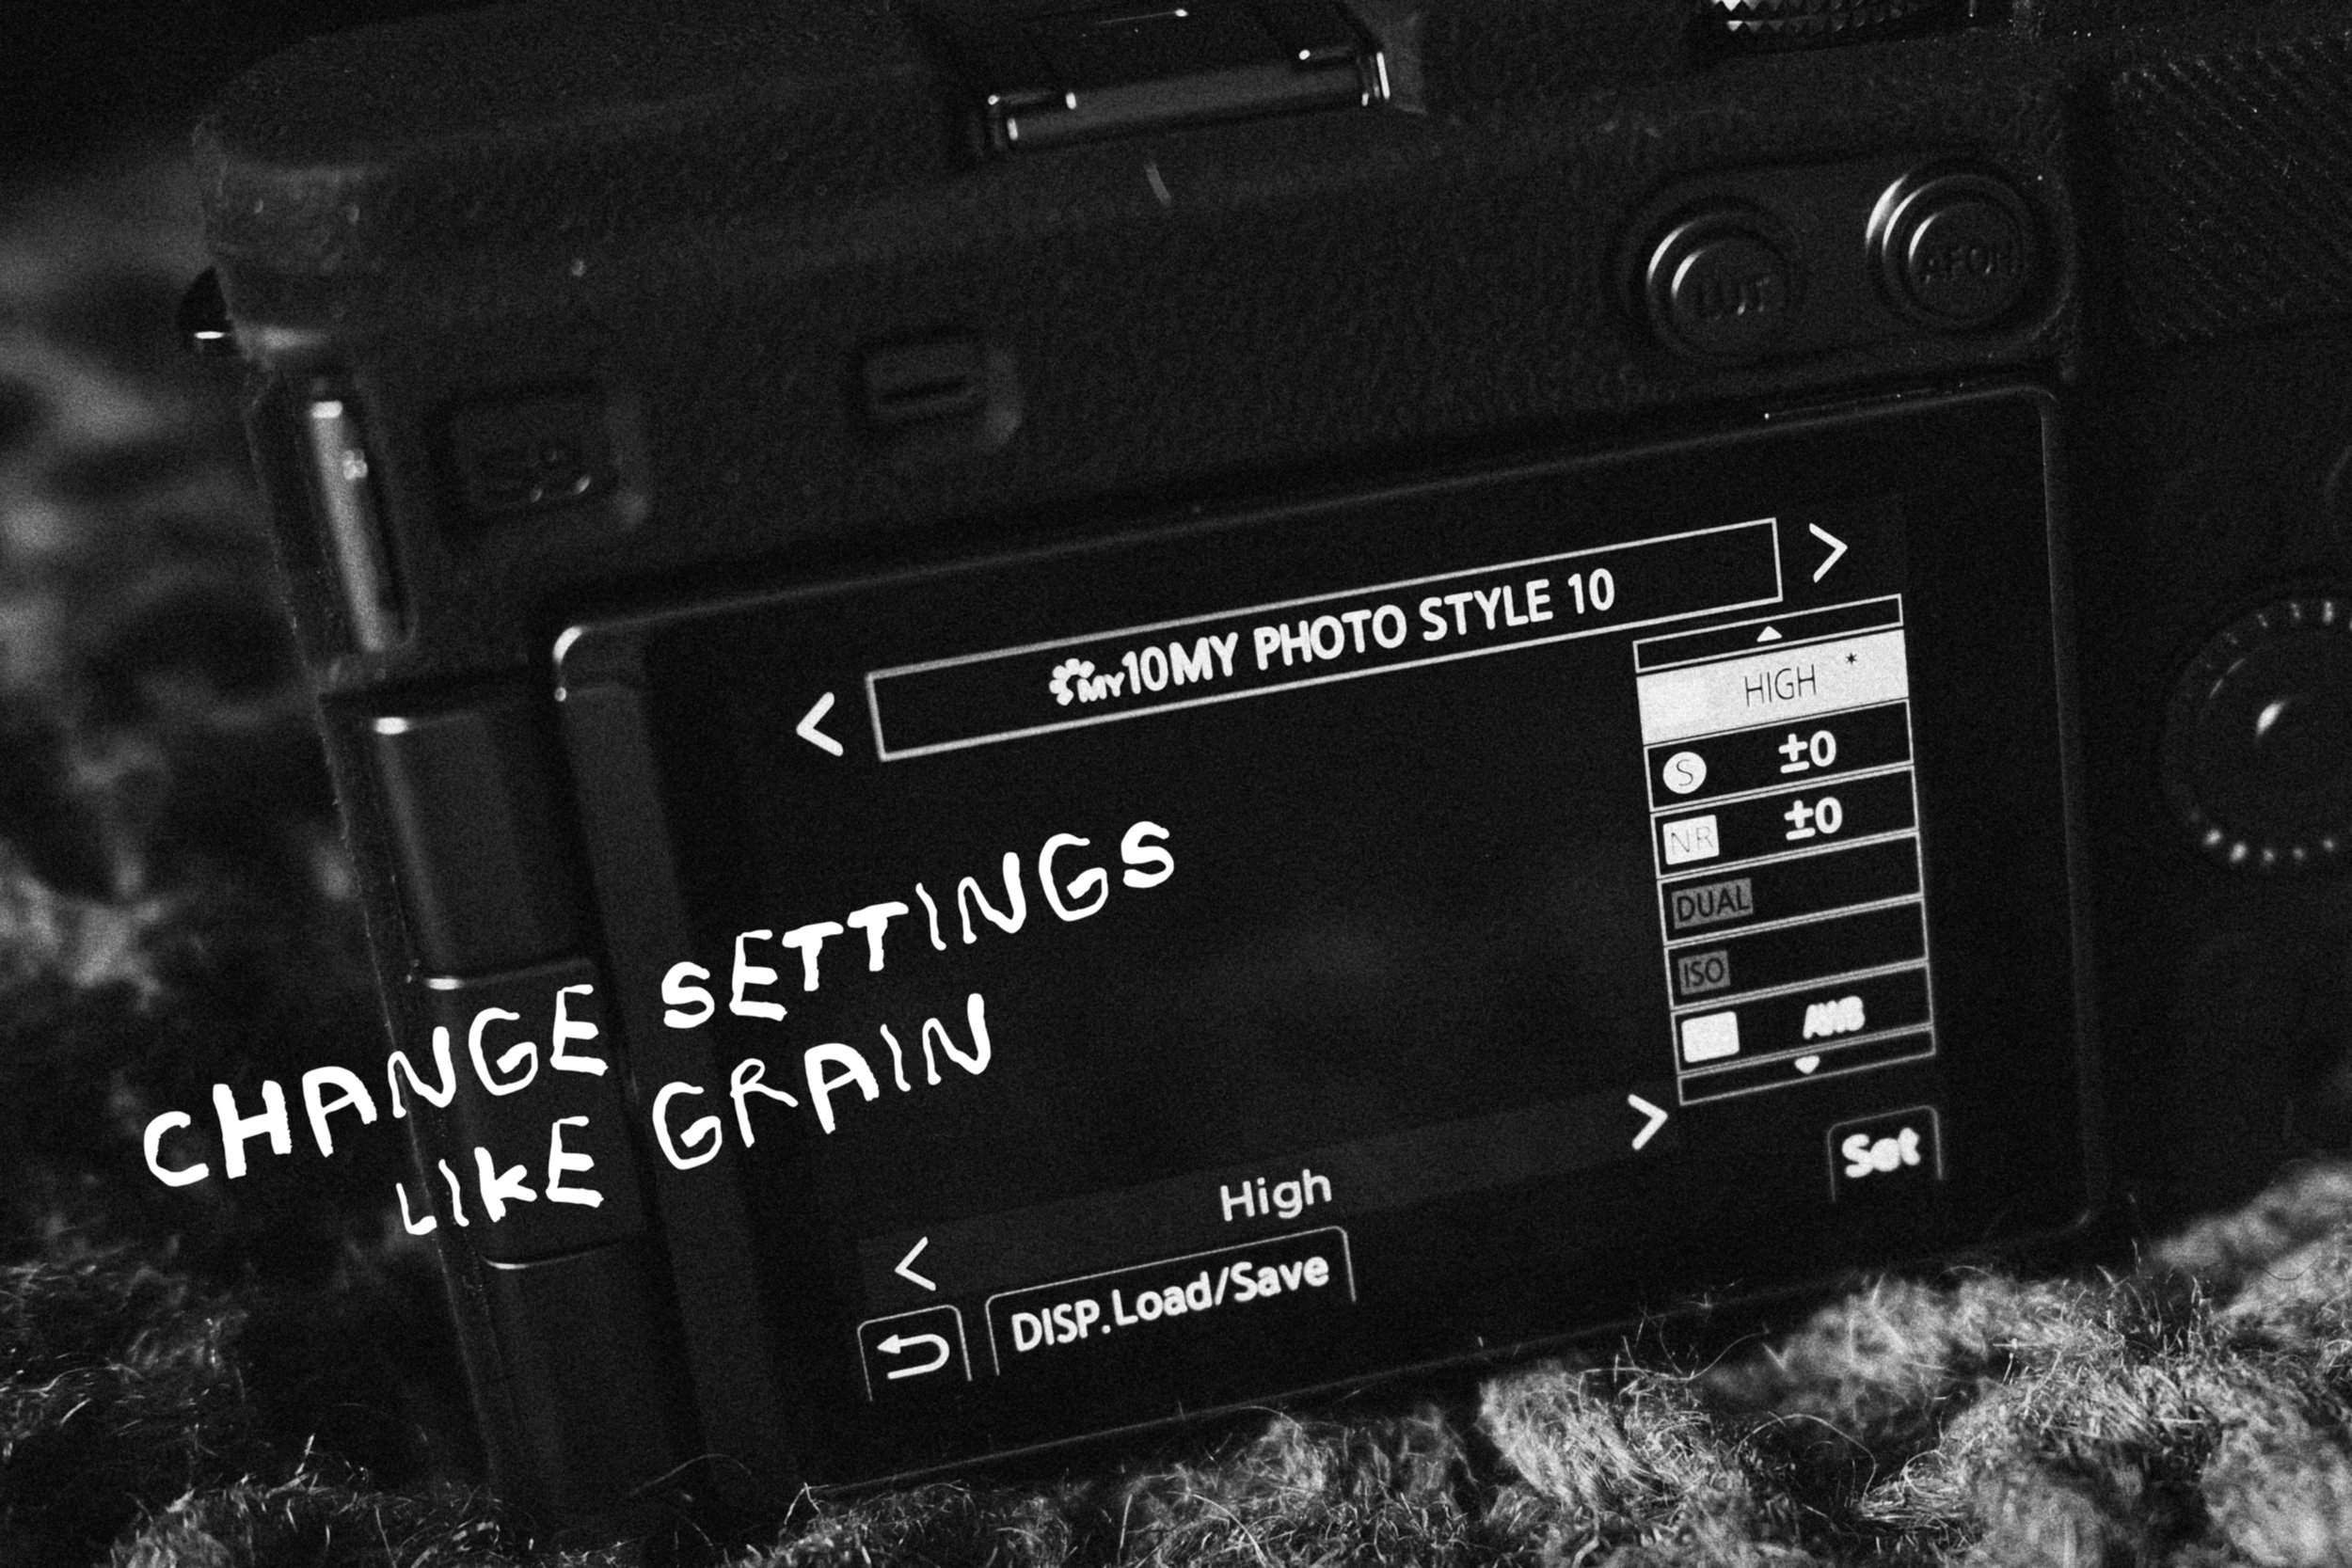
After I have my LUTs chosen and set up, I go back up to the top of the My Photo Style setting list, and work my way down choosing my base Photo Style, adjusting Contrast, Highlights, Shadows, Saturation & Hue.
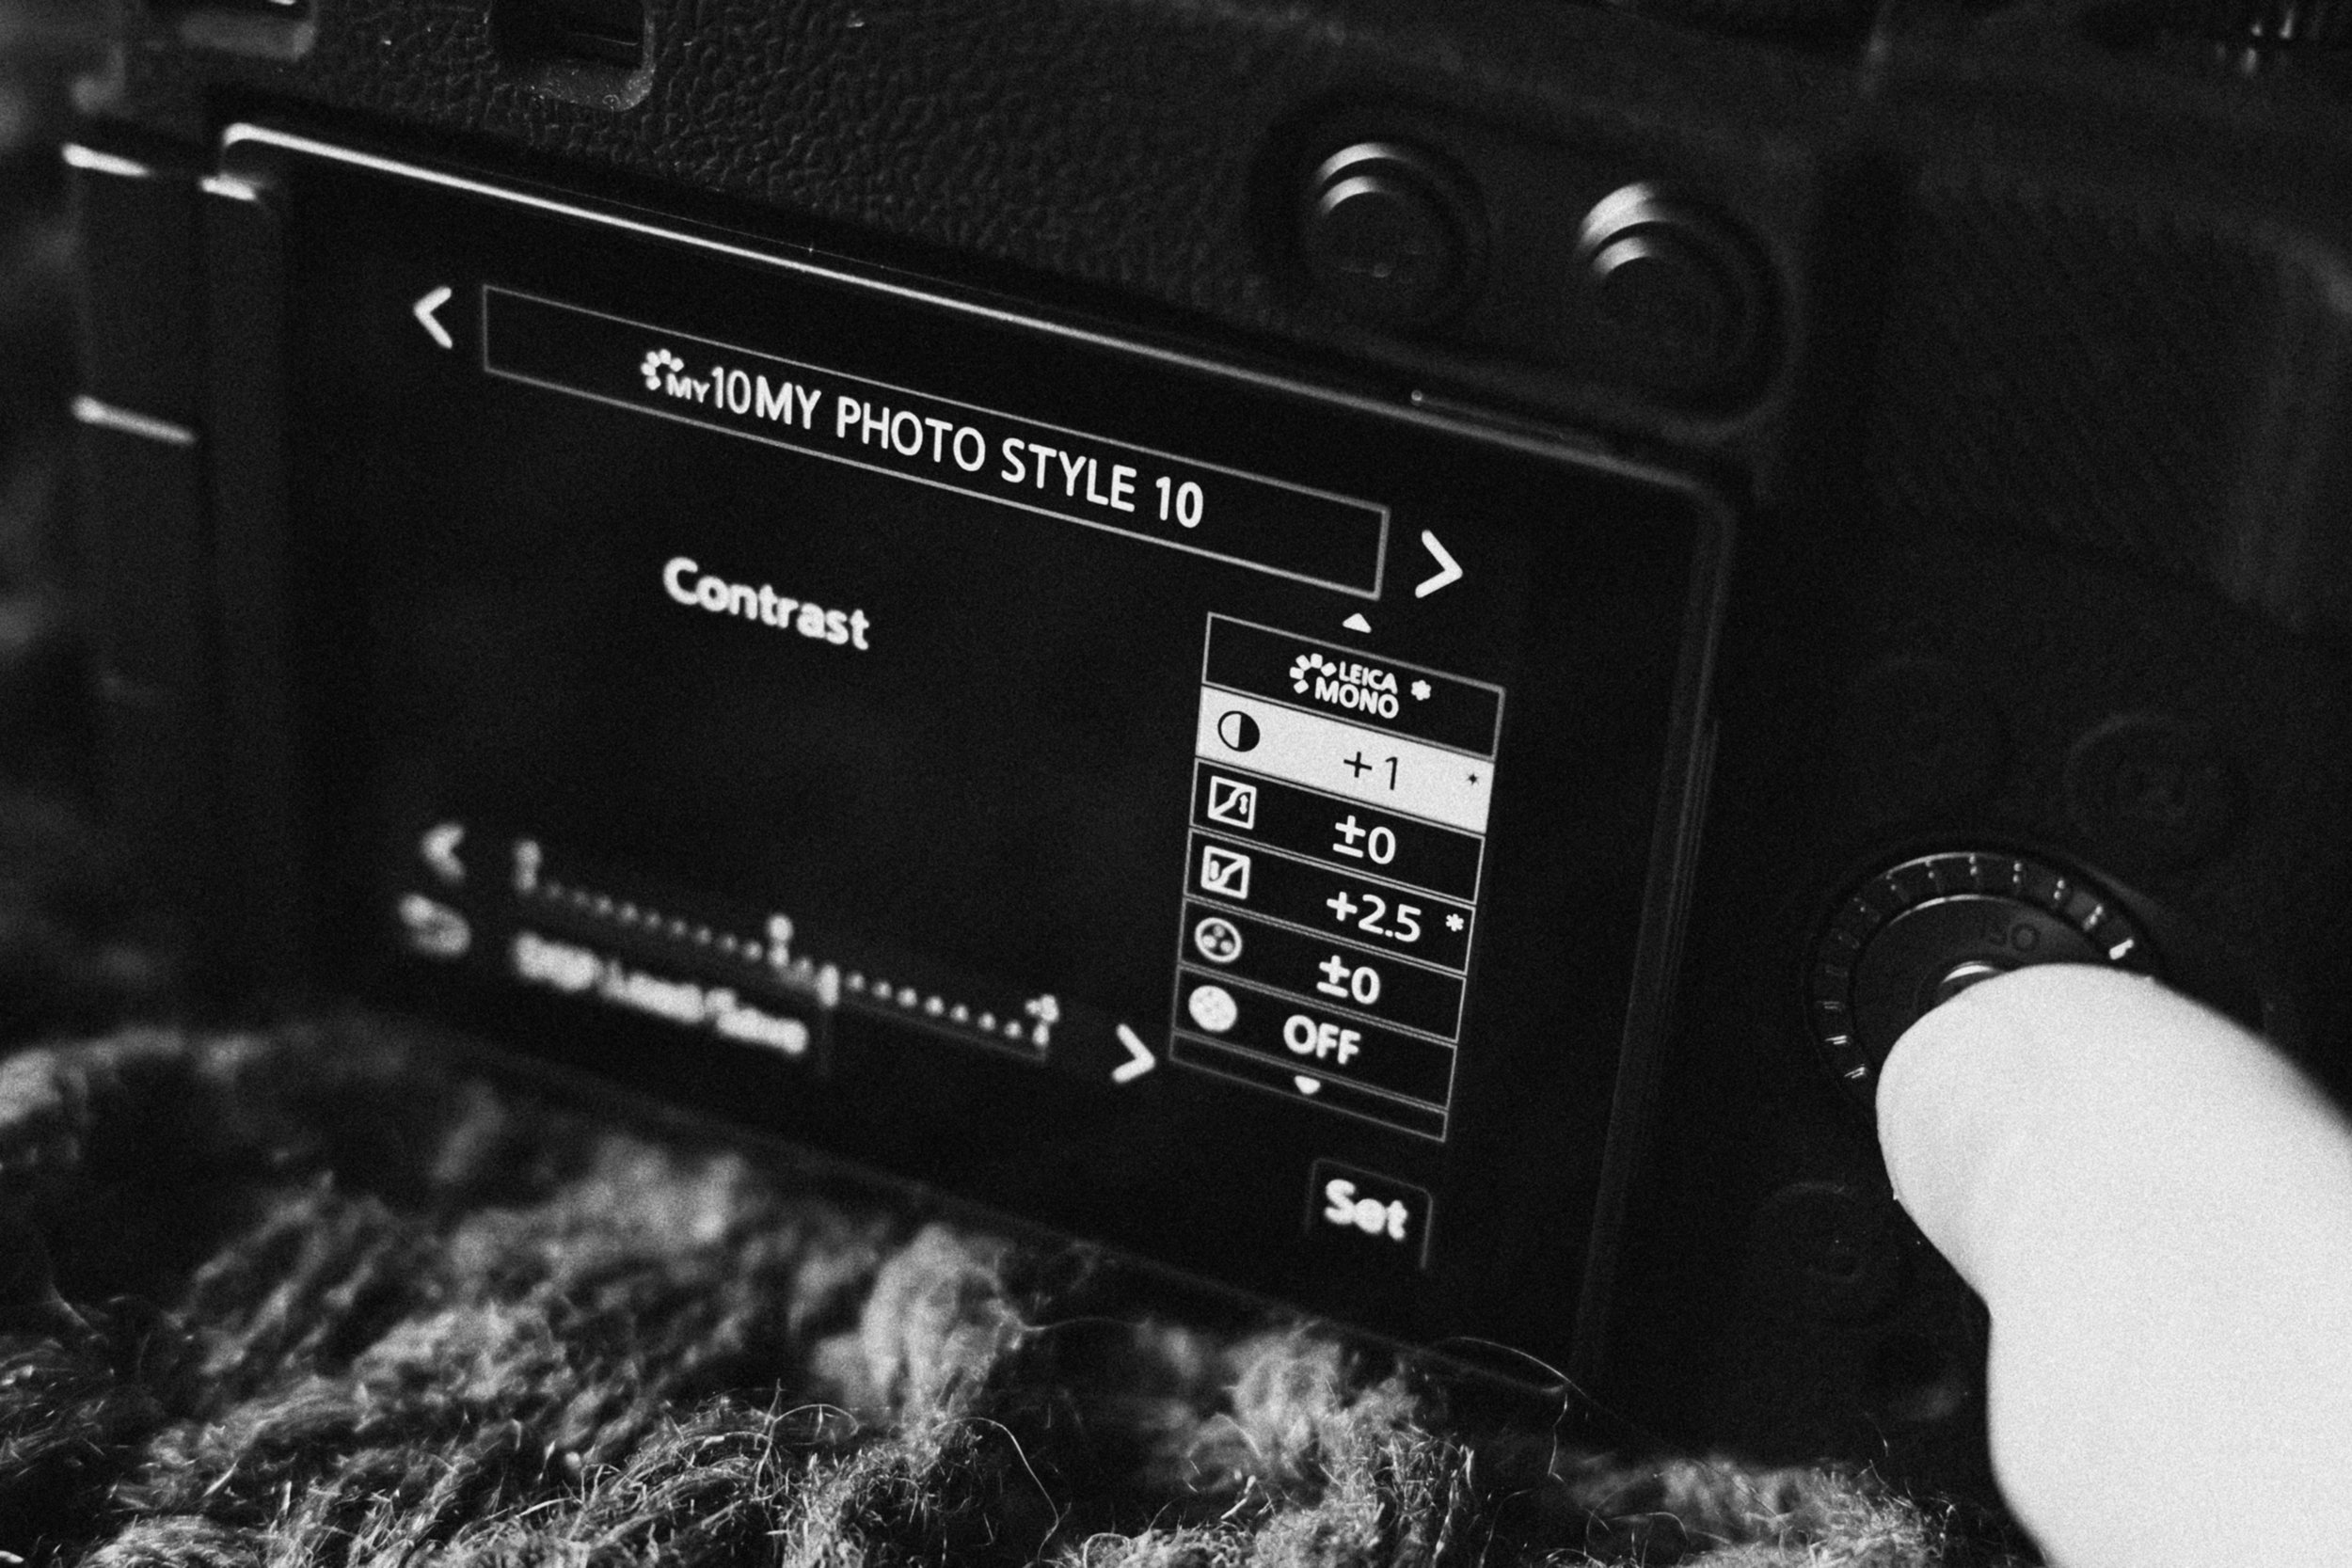
In the My Photo Style settings I can even choose to add in-camera Film Grain, add Sharpness, Noise Reduction and even set and save my White Balance.
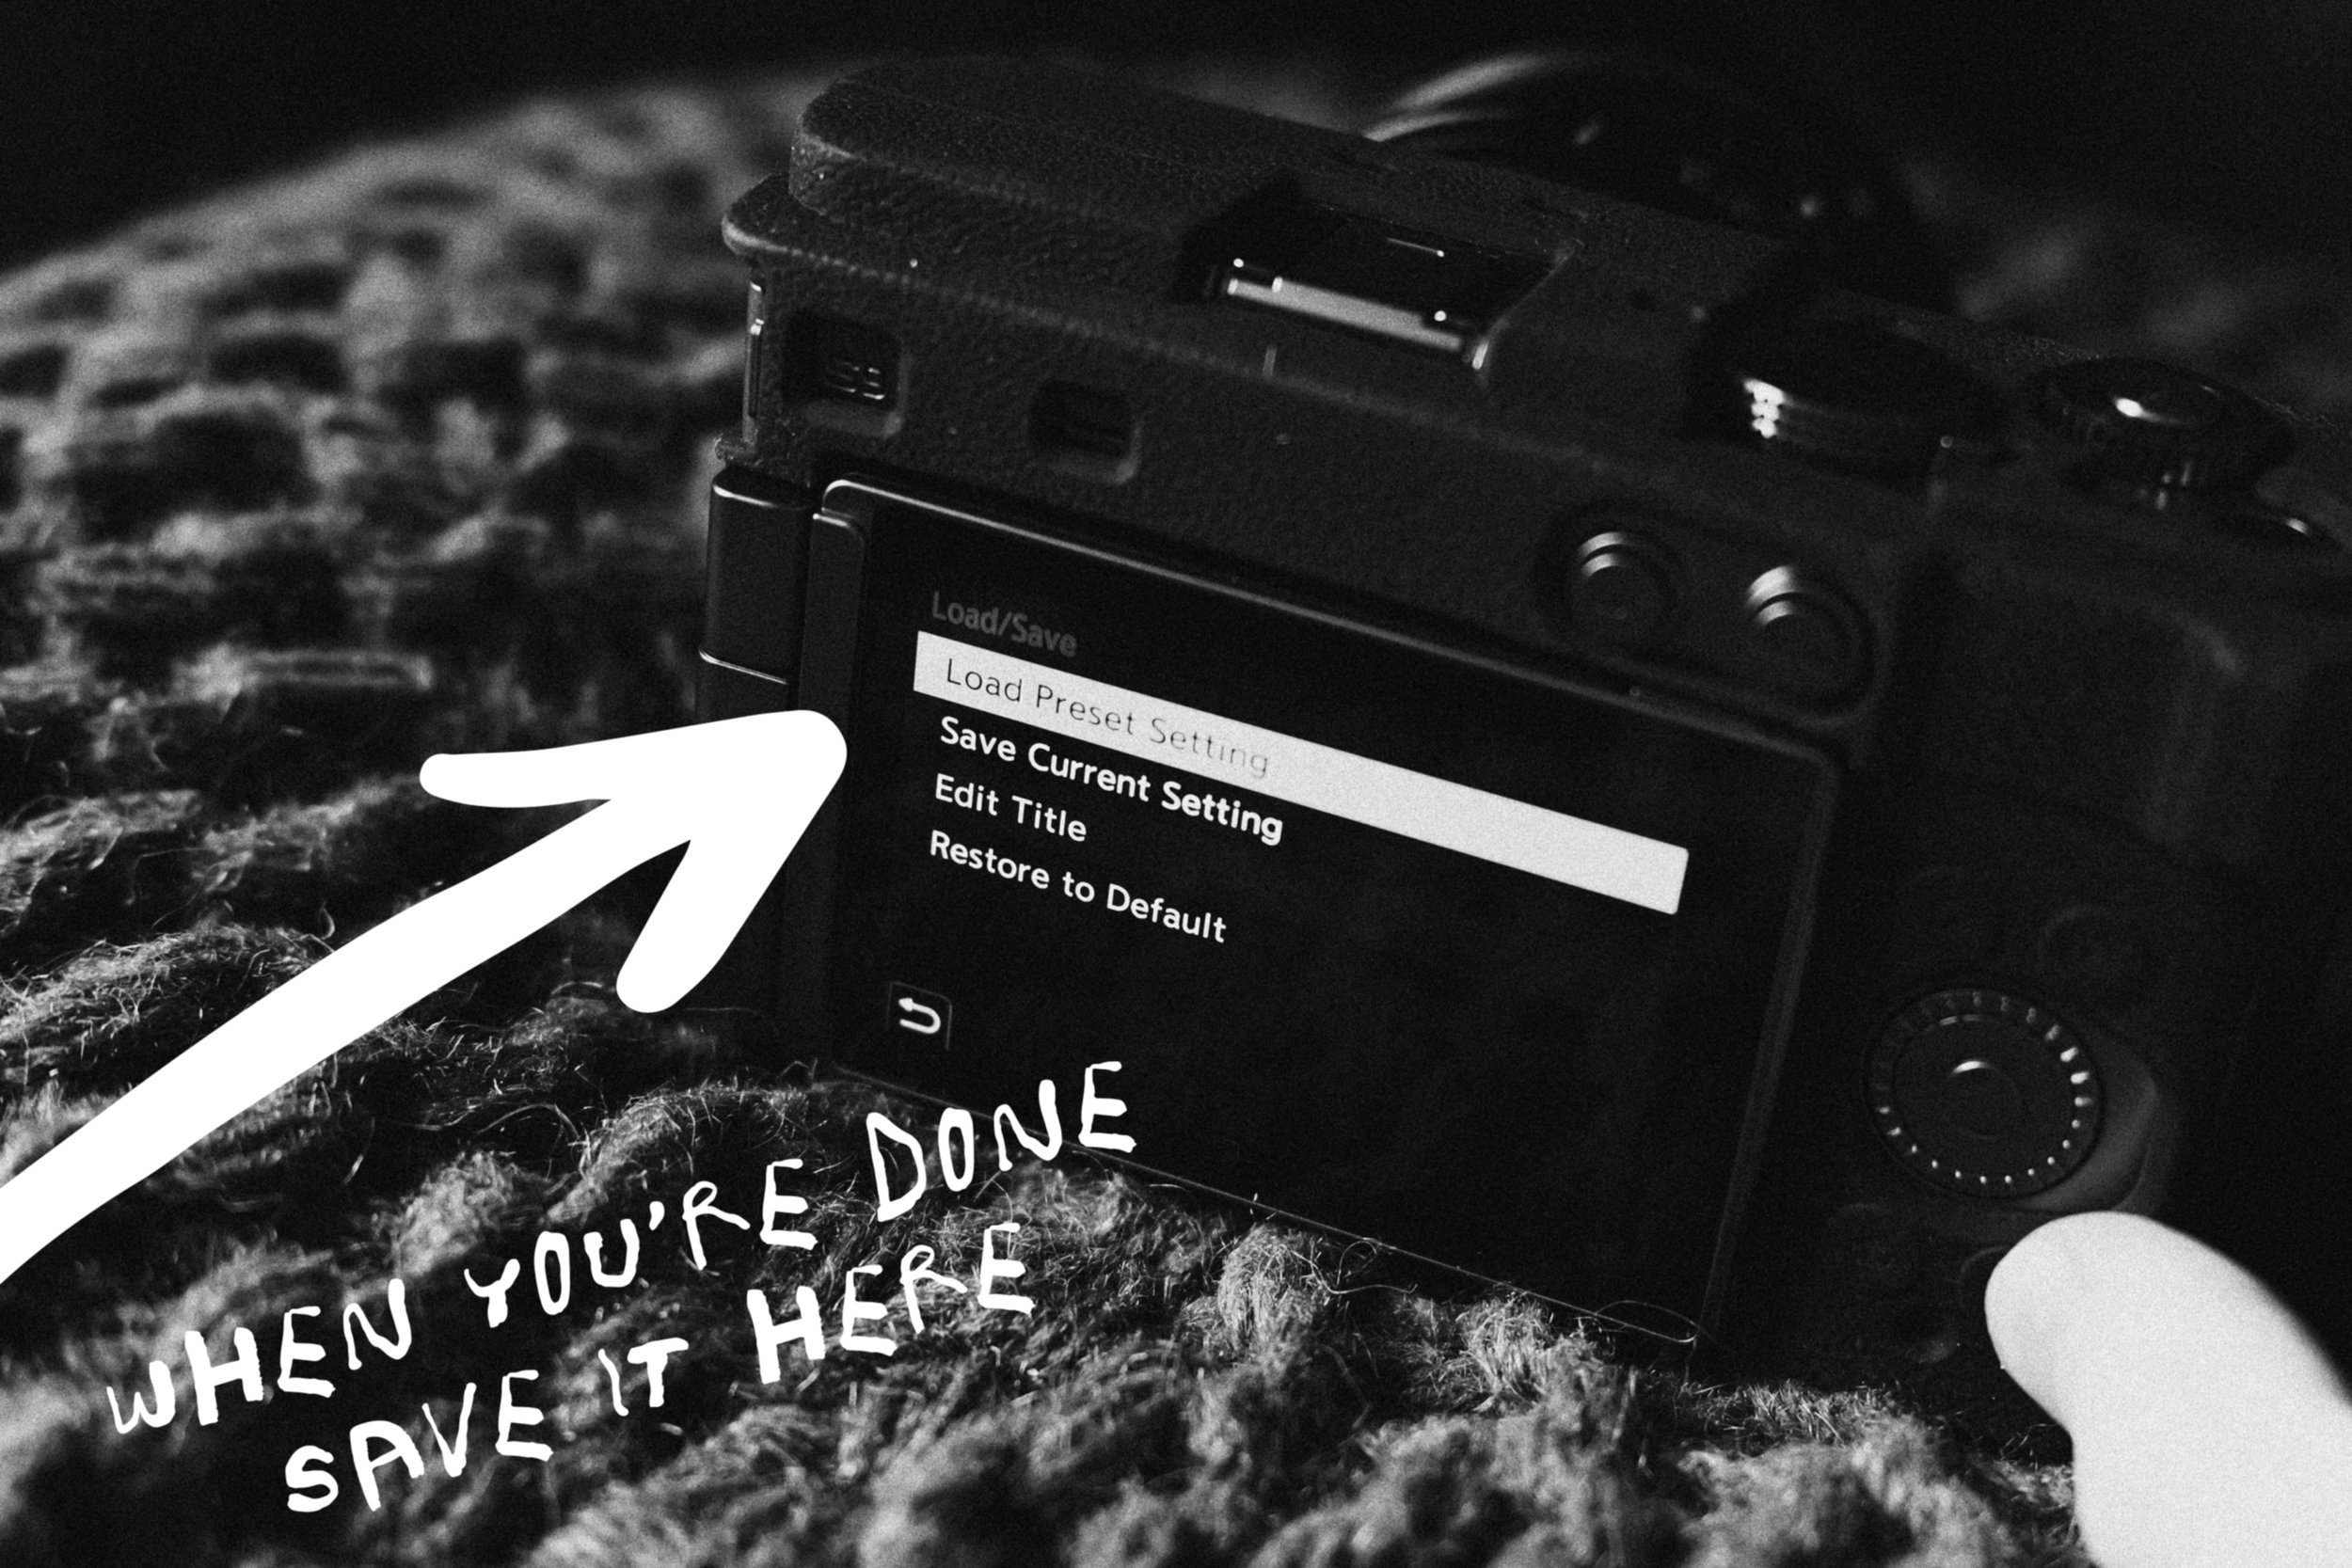
Saving Your ‘look’
Once you have all of your settings decided on, the last thing to do is to save your ‘look’. Simply hit the Display button, select Save Current Setting, edit the title and that’s you done and ready to shoot!
Extra Advice
RAW Processing
A good way to create ‘looks’ for your LUMIX camera that I’ve found is to shoot a few example RAW images, then open them up in the RAW Processing feature inside your LUMIX camera. This way you can easily test out the LUTs, adjust their LUT Opacity and see how all of the other settings affect the final image.
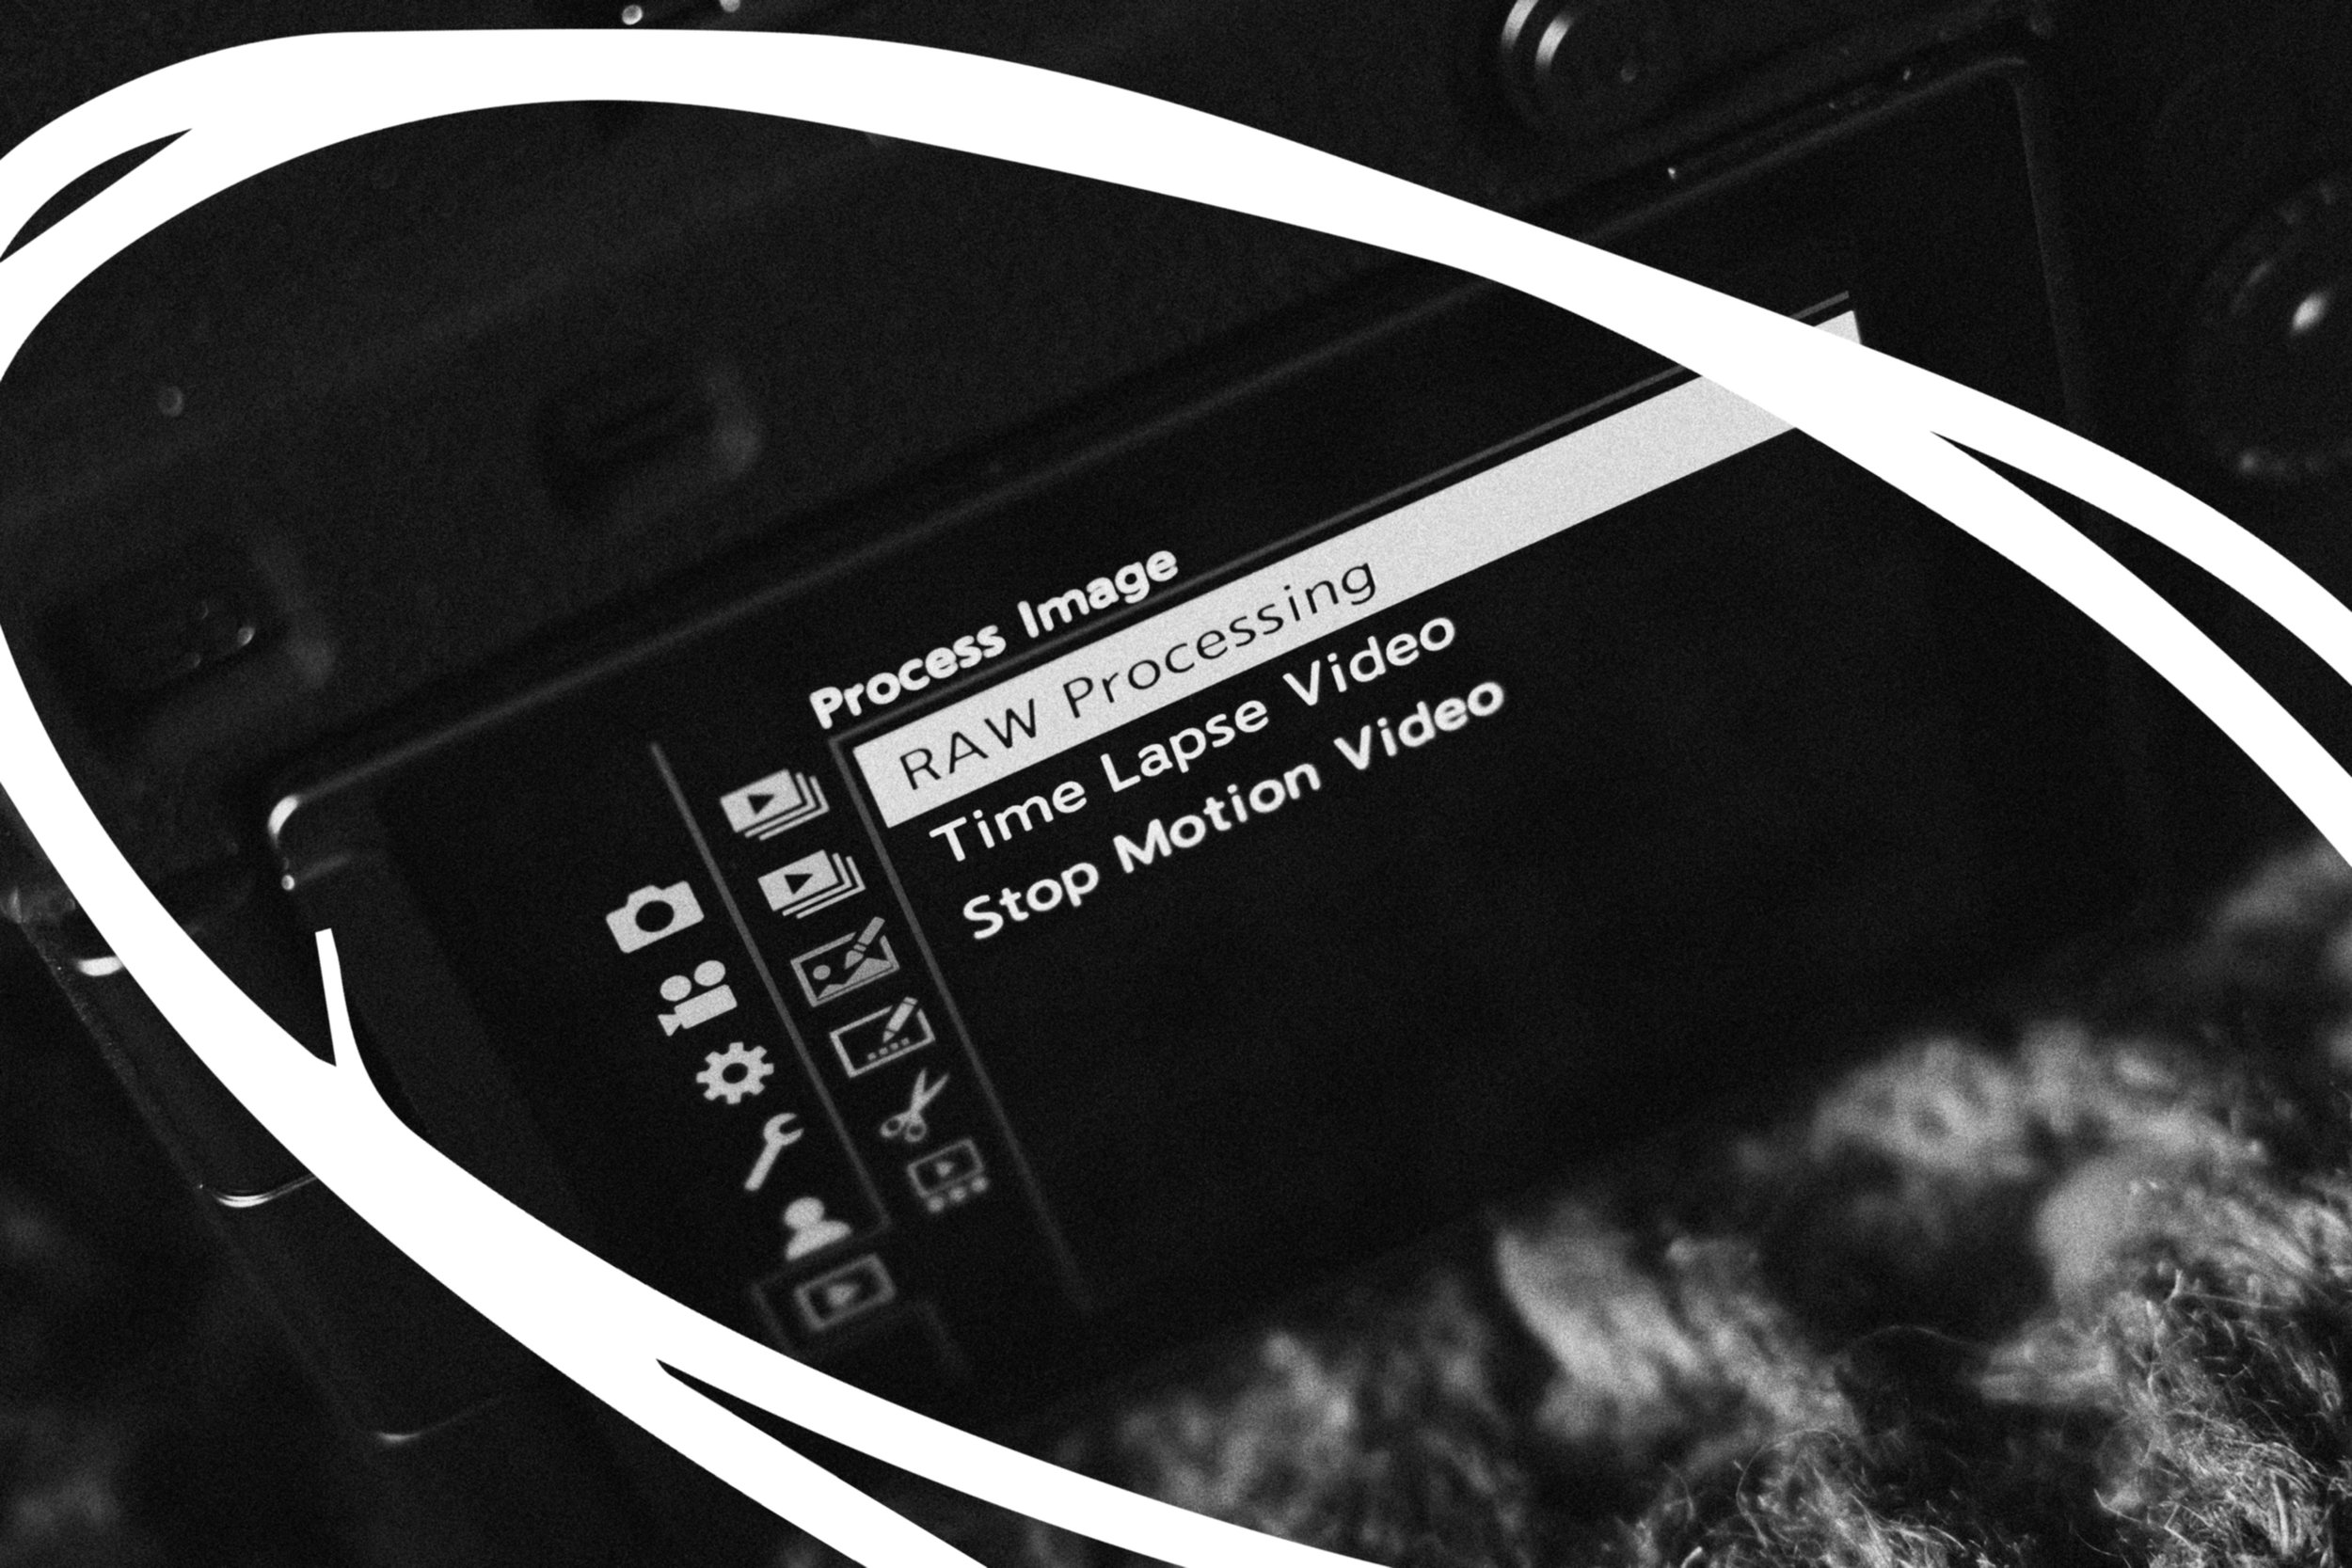
Obviously RAW Processing can also be used to edit or ‘process’ your images after you’ve shot them. If you want to find out a bit more about this feature you can check out my blog post specifically about it here…
https://www.rossandhisjpegs.com/blog/raw-processing-with-luts
i.Dynamic Range
My second tip for shooting JPEGs is to experiment with i.Dynamic Range. What i.Dynamic Range does is pretty clever… It deliberately underexposes the image protecting the highlights, and then lifts the shadows, creating the illusion of a wider dynamic range. It’s fun to play with and creates some really great looking JPEGs, especially if you are trying to achieve a film-like look.
Something to note is that turning this setting to anything other than OFF will have an affect on your RAW Images. As you move up the strength, you might notice a little more noise in the darkest areas of your RAWs. This shouldn’t be a huge issue if you’re mainly shooting to get the best JPEGs you can! I pretty much always have my i.Dynamic Range set to at least LOW and have never had any issues.
This is probably the setting I’ve introduced the most people to. It exists in nearly all other camera brands but is called something different every time. If you’re main focus is shooting JPEGs, I massively recommend playing with this setting.
Write Them Down!
The final tip is to write down your settings.
Some of the best ‘looks’ I’ve created for LUMIX cameras have come about completely by accident and I’m so thankful that I had my little LUMIX ‘look’ notebook nearby to jot down the settings. Once you load in some LUTs, tweak the My Photo Style settings and land on a ‘look’ you’re happy with… I guarantee you’ll want to remember it forever.
You can check out all of the LUMIX ‘looks’ I’ve created by pressing the button below…

P.S. LUMIX ‘look’ notebooks coming soon to a store near you… Just kidding?
Conclusion
I hope this guide has been helpful for setting up your LUMIX camera for shooting JPEGs. If you’ve followed along and read it through from start to finish, hopefully you now have the knowledge needed for designing some LUMIX ‘looks’ of your own. If you do I’d absolutely love to see what you come up with so make sure to reach out either via email rossandhisjpegs@gmail.com or over on Instagram.
If you feel like this post has helped you in any way, or maybe you’ve downloaded some of my LUTs or used any of my ‘looks’ and you want to say thanks… the best and quickest way to do that is by making use of the Tip Jar below. Every tip big or small is massively appreciated and helps me continue to do what I do best!
Feel free to share this blog with anyone you know who might find it helpful. Thanks for reading!