

Kodak Aerocolor IV
If you think you haven’t come across Kodak Aerocolor IV before, you may know it by one of it’s many other names. Elektra 100 by Flic Film, Reflx Lab Pro 100, SantaColor 100 & Film Washi X are all Kodak Aerocolor IV in disguise…

Kodak Aerocolor IV believe it or not is a film that is used for aerial surveillance. It’s made in bulk for this purpose but then sold on to other companies like Film Washi or Flic Film to respool into 35mm cans. This film has a wide exposure latitude, fine grain and is very sharp which is part of the reason people love to shoot with it in their 35mm cameras. It was tricky but I’ve tried my best to recreate this look below…
Kodak Aerocolor IV is a film stock I have experience with shooting and one that I love the look of. After studying my own scans from lots of other photographers, I discovered that the look of this film can drastically vary. Whether that’s how it has been shot, scanned, edited or whatever, I don’t know… but basically I think there are two main looks that this film can produce... Either a flat, desaturated, low contrast look or a warm, vivid, punchy look and it is the latter of these that has inspired my latest LUMIX look below.


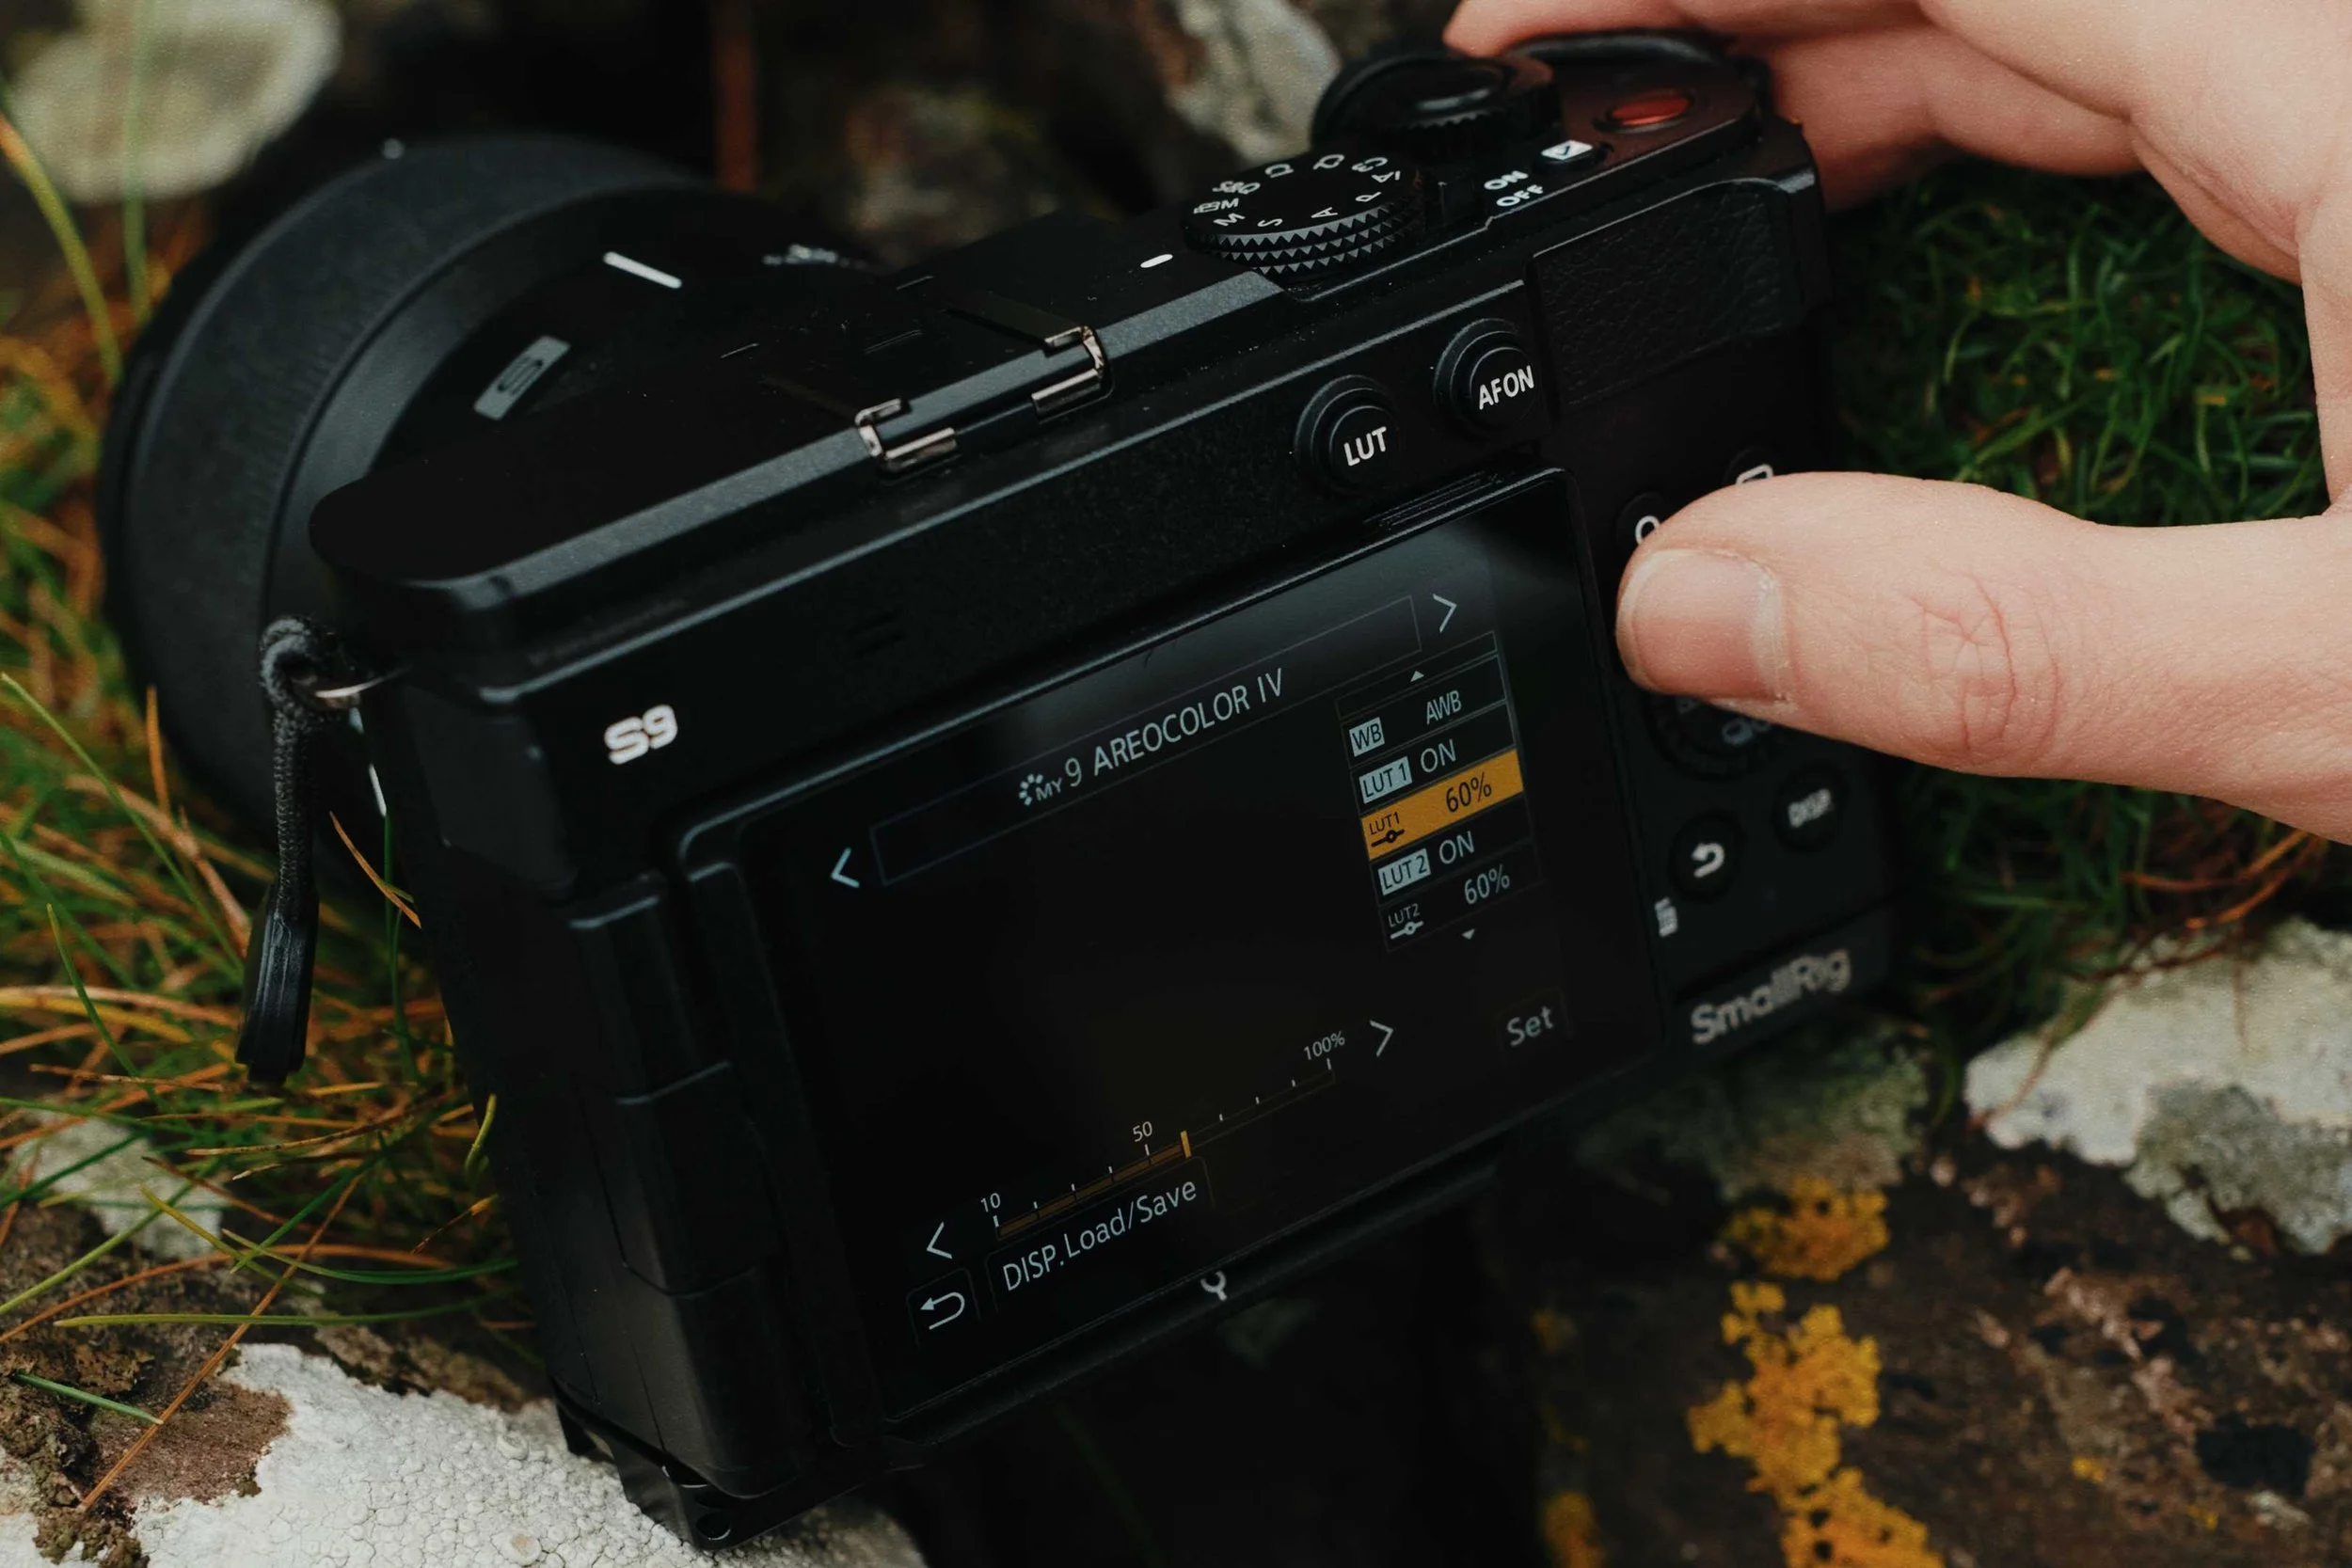
I knew when starting to design this look that there wasn’t one LUT that could capture the feeling of Kodak Aerocolor IV so I got to work combining some of my LUTs at different percentages. I found that combining two of my LUTs ‘Kitaura’ & ‘Summer’ both at 60% gave me the best starting point. It’s funny because these two LUTs couldn’t be more different from each other (‘Kitaura’ being inspired by classic Fujifilm colours and ‘Summer’ Kodak) but the combination here is really working. Find these two LUTs free to download from my website or on the LUMIX Lab App.
Kodak Aerocolor IV is Daylight balanced so if you’re a ‘film purist’ you might want to set your WB to Daylight - this is the first LUMIX look I’ve created however that I am specifically recommending you set your White Balance setting to AWB (with a warm Kodak A:8 M:2 push). That’s what I did for all of the examples shown above and I’m really was happy with the results. With AWB selected, this strong look will be all the more flexible in different lighting scenarios.
Set your Grain setting to LOW, i.Dynamic Range setting STD. and set the Sharpness for this look to -2.5 to try and match up with Kodak Aerocolor IV. The Photo Style I chose as the base is Vivid which I think gives the look the perfect punch. Vivid is obviously more ‘vivid’ and so to control the Saturation for this look turn it down to -2.5
For me what I love about this film is the combination of dark greens and toasty warm tones that it captures and that’s what I’ve mainly been inspired by for this look. Check out all the settings you’ll need below…
Aerocolor IV
[by rossandhisjpegs]
Photo Style: Vivid
Contrast: 0
Highlights: -2
Shadows: -2.5
Saturation: -1.5
Hue: 0
Grain: LOW
Color Noise: OFF
Sharpness: -2.5
NR: -5
i.Dynamic Range: STD.
White Balance: AWB (A:8 M:2)
LUT 1: Kitaura by rossandhisjpegs
LUT 1 Opacity: 60%
LUT 2: Summer by rossandhisjpegs
LUT 2 Opacity: 60%
As featured in this video…
If you enjoyed this post, why not drop something in the Tip Jar below to say thanks. It would be massively appreciated!